This tutorial shows you the basics of getting a Google Analytics 4 property created and connected to your website. Google announced in March of 2022 that all existing Google Analytics accounts using the older Universal Analytics properties need to migrate with the a new Google Analytics 4 property by July 1, 2023. Websites with existing analytics will want to migrate their account ASAP to have as much historical data in your new analytics properties as possible.
Google Analytics Account
The first thing you’ll need, obviously, is a Google Analytics account. Once you have your account created / or you’ve signed into your existing Analytics account, you’re ready to continue.

Create A Google Analytics Property
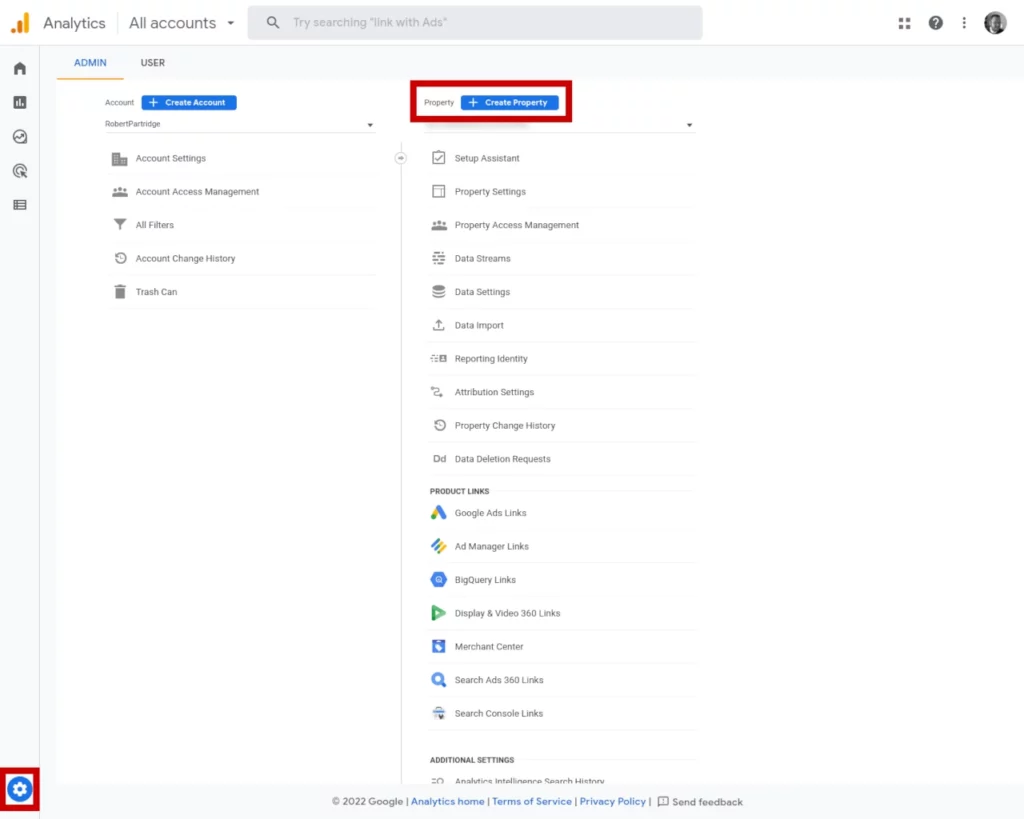
Once you’re logged into Analytics, you’ll want to go to the admin page by clicking the gear icon in the bottom left corner. Once there, click the blue create property button.
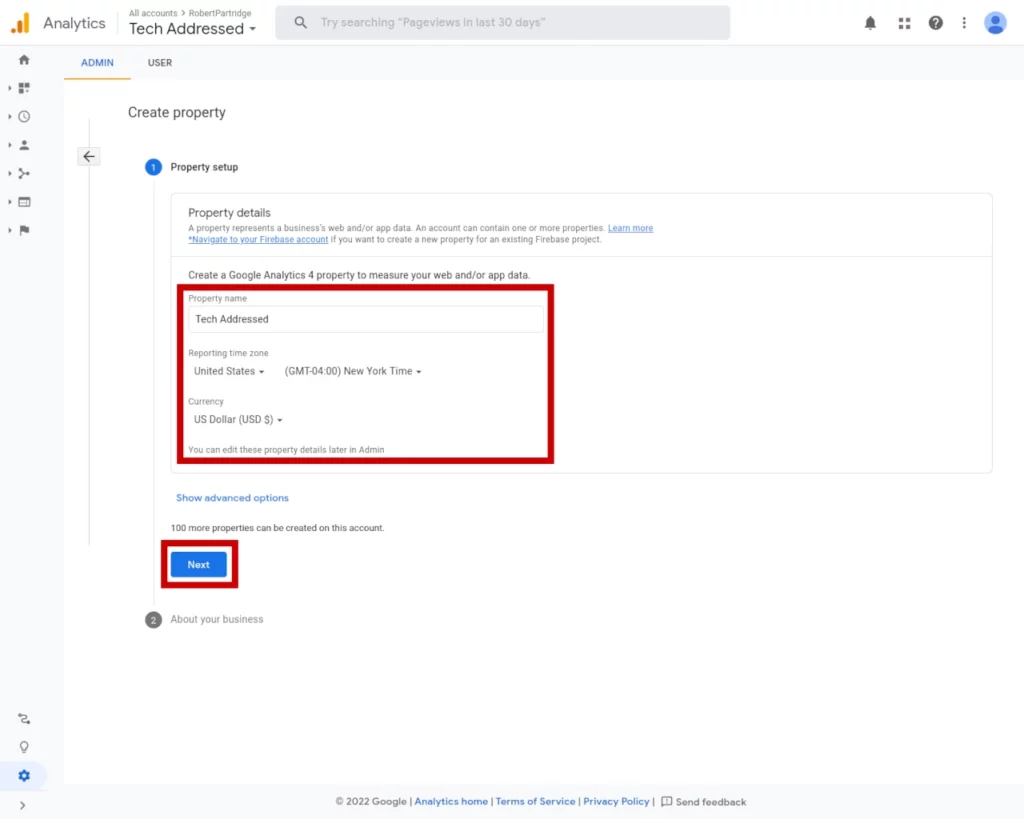
The first step of creating your property is to give it a name, specify your time zone, and indicate your local currency. Once you’ve completed these fields, click next.
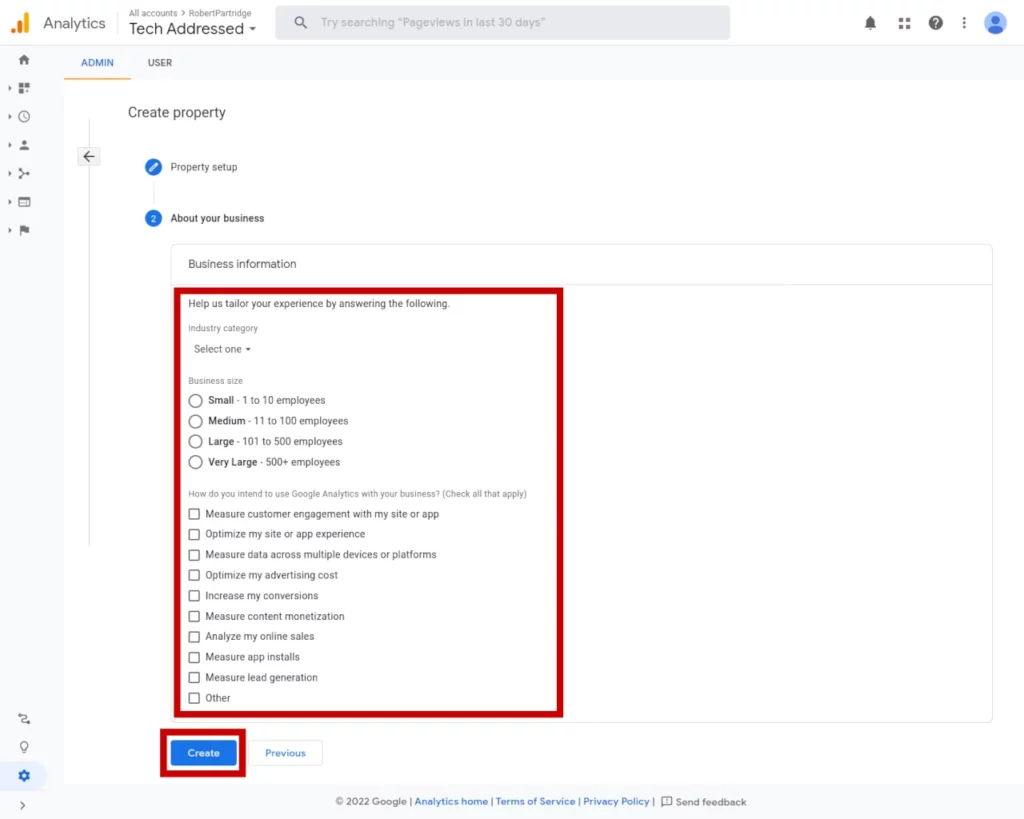
Next, Google wants to know a little about your business. Even if you’re just someone setting up a personal homepage, Google treats every website like a business.
If you need advice on which industry category to choose, I highly recommend reading this blog post from Michael over at Pixelpunk. He does a great job of explaining how to figure out which category is the best fit for your website. Selecting your appropriate business size and how you’re using Google Analytics should be straight forward.
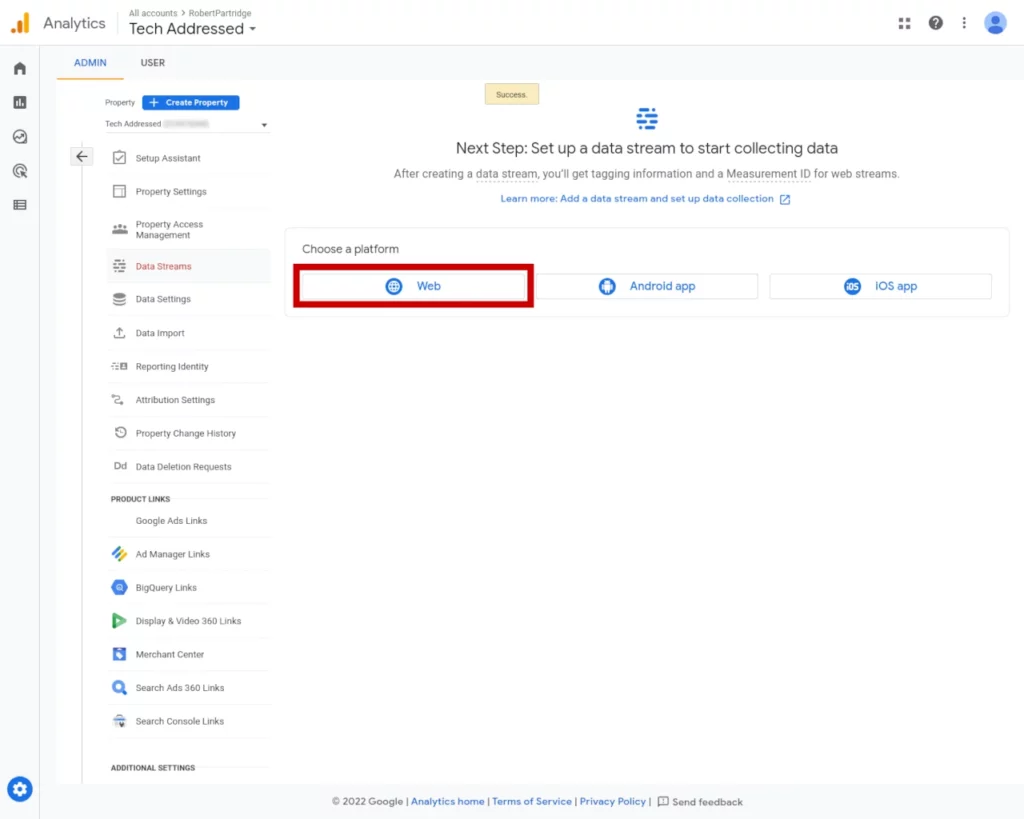
Next, Google wants you to choose what kind of data stream you’ll be sending back to your analytics property – web, Android app, or iOS app. For this tutorial, we’re setting up analytics for a website so we’ll choose web.
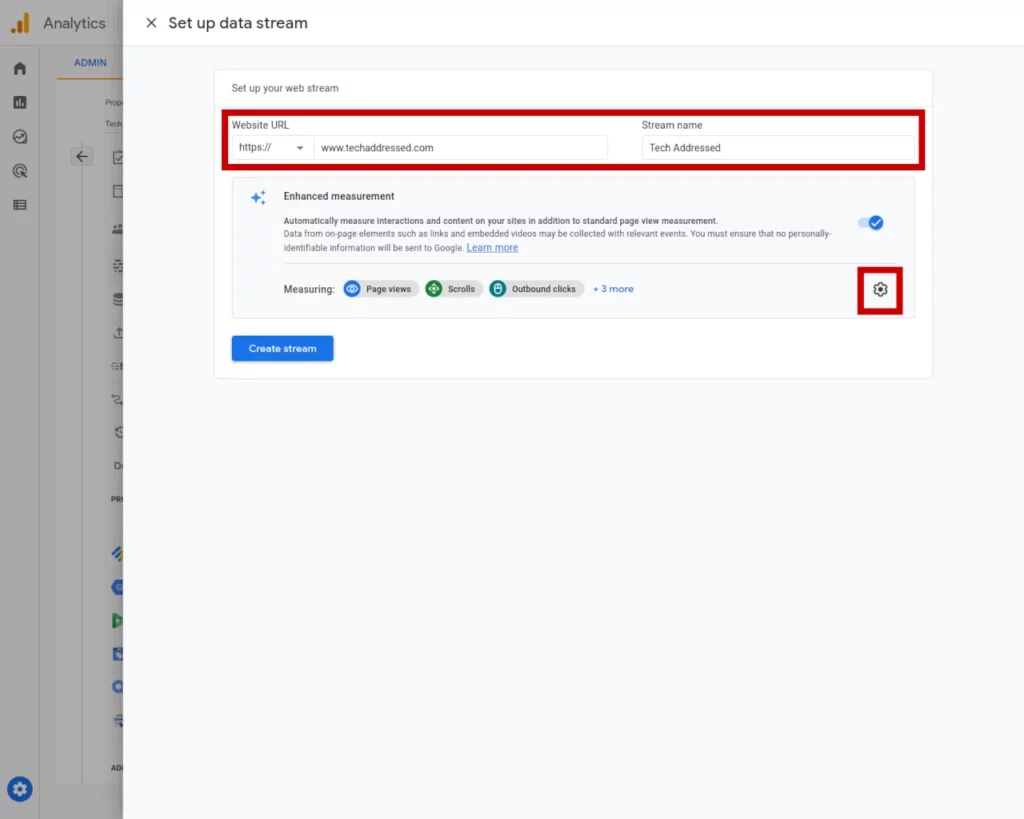
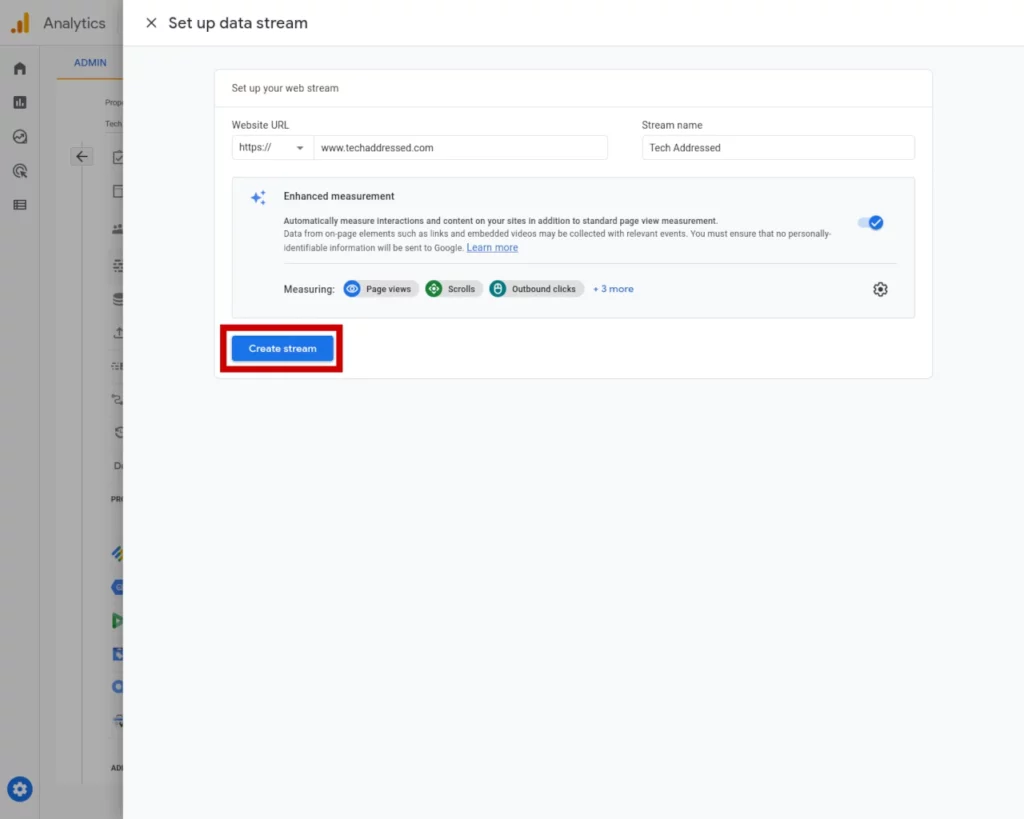
The next step in setting up your data stream is to provide your website url and a stream name. You can name the stream however you like. Before you continue, however, be aware that by default Google has preselected all of their enhanced measurement features for Analytics to be turned on. If you’d like to review those features, click the gear icon on the right.
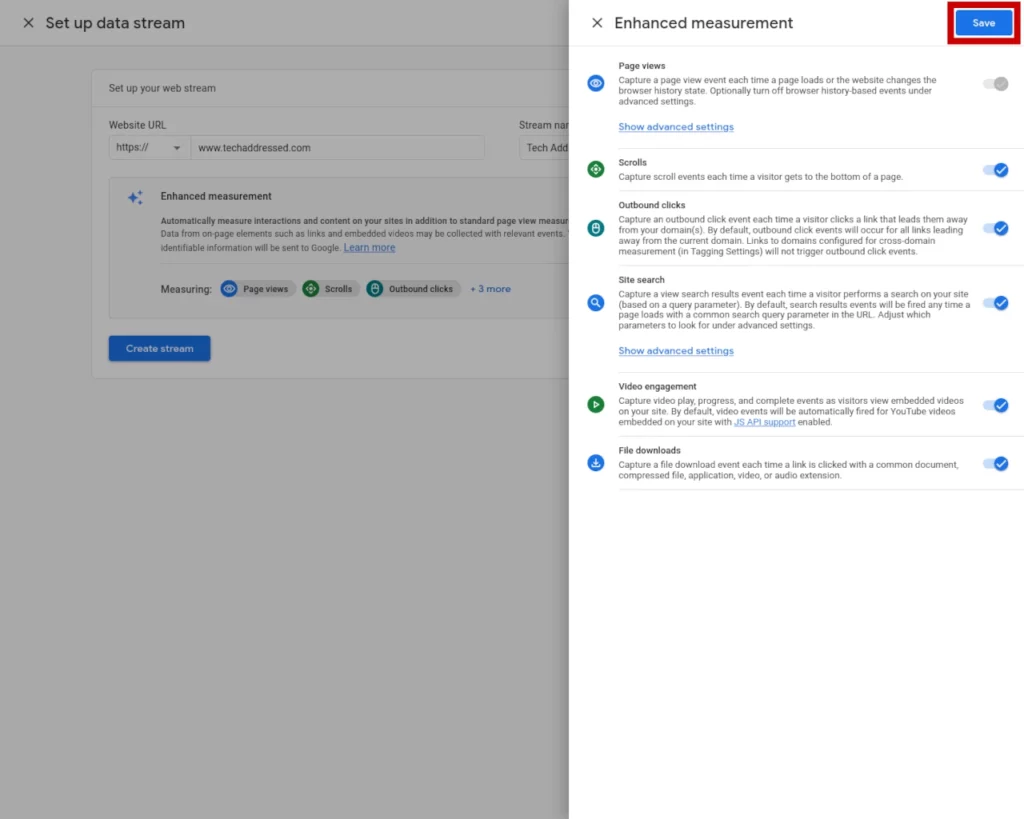
The various enhanced measurements include features like showing how far users scroll down your content, outbound link clicks, capturing site search data, and more. If you want to disable any of these features, do so then click the blue save button to go back to the previous screen.
Once you’ve provided your website URL, given your stream a name, and reviewed the enhanced options, click the blue create stream button.
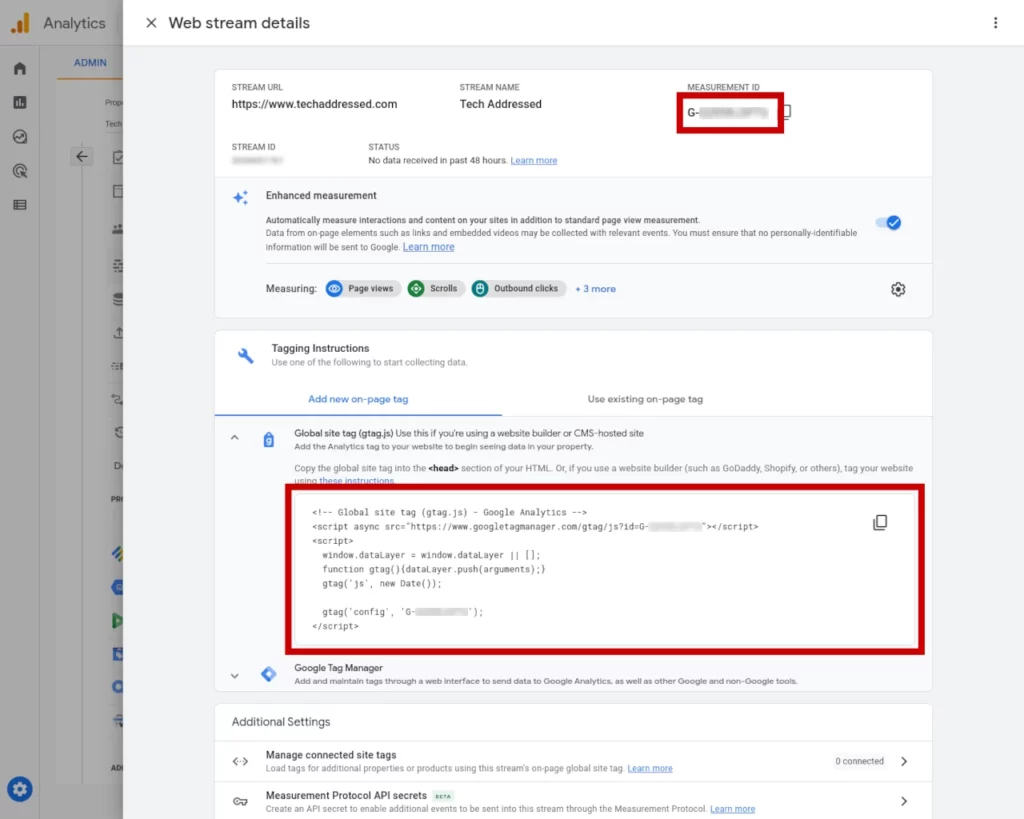
Your Google Analytics property is now created. The next step is to connect your website to your analytics. You’ll notice in your web stream details screen that Google has assigned your stream a measurement ID. Additionally, under tagging instructions, if you expand down the first option for the global site tag, Google has code available for you to copy / paste into your website. Depending on how your website was created, your approach to applying your analytics to your site will vary – which is something we’ll discuss shortly.
If You’re Already Using Universal Analytics
If you already have a website making use of the older version of Google’s Analytics known as universal analytics and you’re beginning to transition to the newer analytics, Google suggests “dual tagging” your analytics with both your existing analytics property and your new GA4 property. For those that need it, I have a tutorial on exactly how to do this.
Add Google Analytics To Your Website
As I just mentioned, depending on how your site was created will affect how you deploy Google Analytics to your website.
Non-WordPress Users
If you coded your website yourself, congrats! You probably already know how to apply the code provided by Google to the header section of your website. I don’t need to tell you how to do this.
If your site was created using a content management system other than WordPress, you’ll want to refer to Google to search for how to apply the analytics code to your website’s header via your content management system.
If your website WAS NOT coded by you and is not using a well documented content management system that you can refer to Google to find how to apply the analytics code to your site, then you will need to contact your web developer and have them assist you with applying the code.
Lastly, if you are using WordPress, I’ll show you, here, one method you can use to apply analytics to your site.
WordPress Users
There are literally dozens of plugins out there for WordPress to deploy Google Analytics – I’ve tried a number of them myself over the years, such as MonsterInsights for example. Plugins like this only require you to provide your measurement ID from Google and they do the rest of the work, so to say.
However, my personal preference is to simplify things whenever possible. To me that means using a multi-purpose tool if I can. In this case, we’re going to deploy the actual analytics code using the Insert Headers and Footers plugin. This plugin can be used for deploying any kind of Javascript you might want / need to add to your website – not just the analytics script.
A quick aside – one example of a common use of additional scripts I’ve seen over the years with my website management clients is for deploying Javascript code from Pinterest. Using the more multipurpose tool saves us from requiring multiple plugins to accomplish the same task we could with one.
Also worth noting – some WordPress themes, for example the Genesis and Divi themes, have this kind of functionality built in already. Consult your theme documentation if you need help finding how to add the scripts to your website.
If you need to install the plugin – from the WordPress dashboard, on the left you’ll see plugins then choose add new. Using the search box at the top right, type in insert headers and footers. You’ll get results like those in the image, below. When you’ve located the plugin, click install now and then when it’s finished click activate.

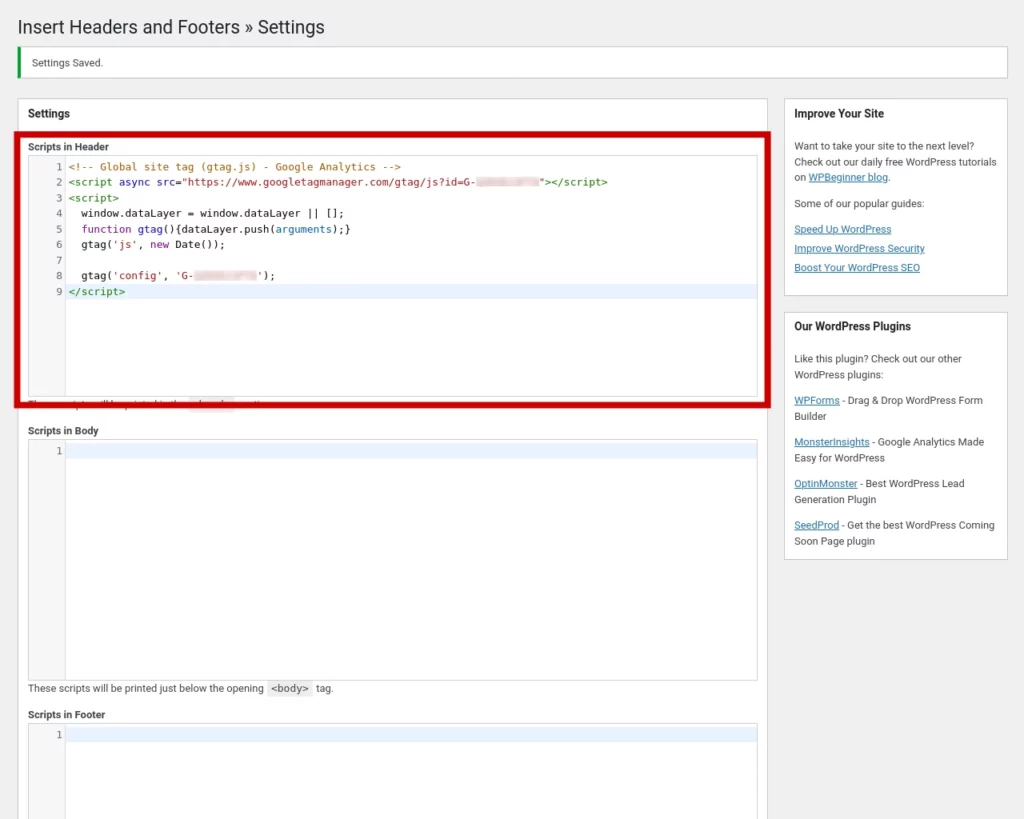
To access the plugin, from the WordPress dashboard find settings then choose insert headers and footers. The plugin is divided into three sections – one for adding code to the website’s header, one for the body, and one for the footer.
We want to paste our analytics code at the very top of the header section. Once you’ve pasted in the code, scroll down and click the blue save button.
Testing
You’ve now successfully added Google Analytics to your website! You want to make sure to go back and check that Google is receiving analytics data. You can watch the real-time overview from inside Google Analytics to get a quick answer to whether it works or not. Consider asking some friends to visit your site quick to guarantee there should be visitor data coming through.
Thanks
If you found this tutorial helpful or have any questions, I encourage you to please share it with others and/or leave a comment below. If you would like to support our efforts to create additional resources like this, please consider making a donation. Your support is greatly appreciated! Thanks for reading and I hope you visit again soon!