This tutorial details how to configure networking for a static IP in Debian. Most Debian systems configure network settings one way, however, there is one exception to the rule that I’m familiar with that I detail how to configure well. This tutorial was written for headless Debian 11 “Bullseye” installs but should work with other versions of Debian as well. When Debian 12 “Bookworm” is released, I will update this tutorial as necessary.
Before We Begin
Above, I mentioned that this tutorial is meant for headless systems. If you don’t know what headless means in this context – it’s a reference to a system/server without a graphical interface or even without a monitor attached at all. All changes to a headless system are generally done through a remote connection using a command line terminal.
The reason this tutorial is specific to headless systems is that a system with a graphical interface setup is likely using a graphical program called Network Manager to handle configuring networks for the system.
IP Address / Subnet Basics
If you’re using this tutorial, there’s a chance you might not have a strong knowledge of IP addresses and subnet masks. If you need to brush up on some basic info on IP addresses and subnets, I’ve written an additional tutorial that should give you enough understanding to complete this tutorial.
Check Your Existing IP
First things first – before we modify any settings, let’s have a look at the existing IP address on your system. By default when you install Debian your networking is configured via DHCP. Run this command in the terminal to check your existing IP address:
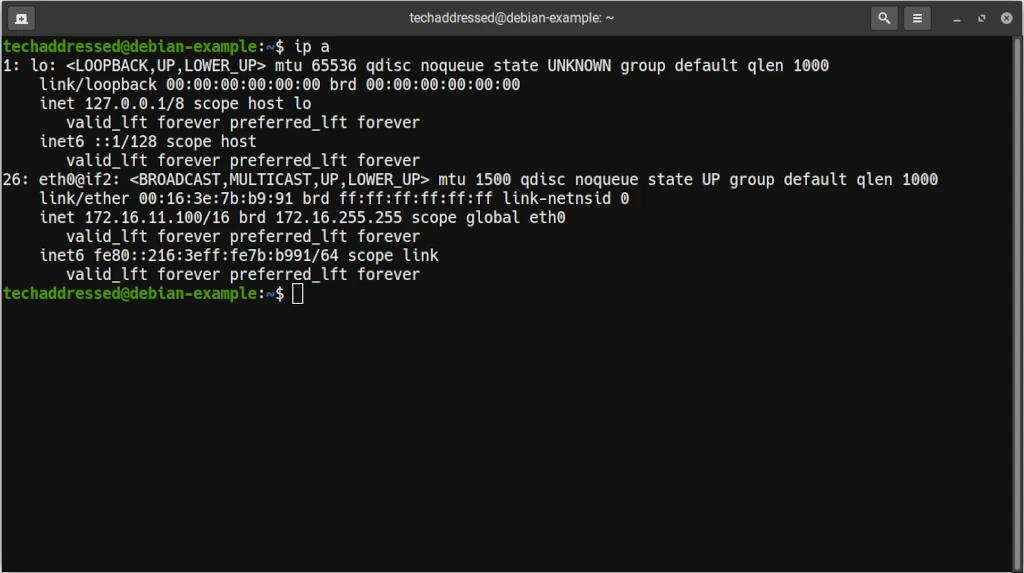
ip aThe output should look similar to this but specific to your system:
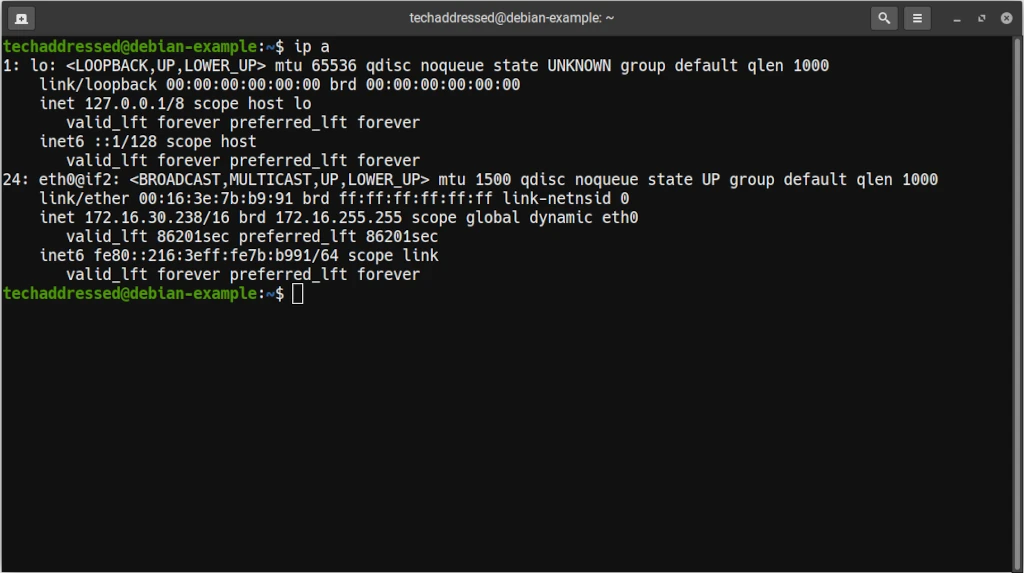
Notice for the device eth0@if2 (this is the network device for my my LXD container based demo environment) that the address is listed as dynamic meaning that the IP has been assigned via DHCP.
If your results don’t say dynamic, your system is already configured with a static IP address and no further changes are necessary unless you need to modify the server to use a different IP address.
Once you’ve determined that your system does indeed have a dynamic IP address, you can proceed with modifying your configuration for a static IP.
Modifying The Networking Interfaces File
Most Debian systems use the file /etc/network/interfaces for configuring your network settings.
To edit this file, we’ll use the nano editor as it’s fairly easy to use:
sudo nano /etc/network/interfacesYour default interfaces file should look similar to this:
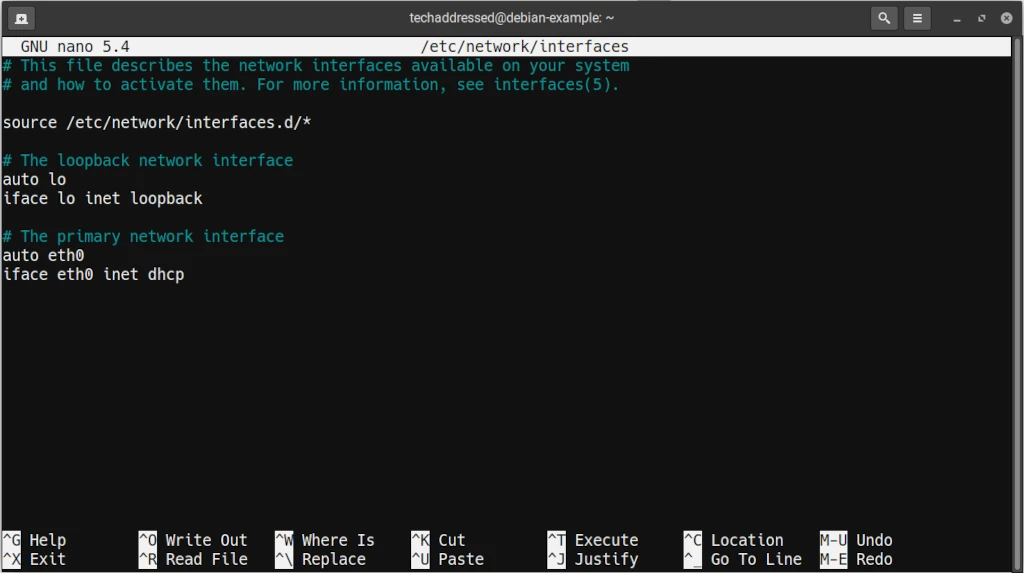
Start by modifying the line that says iface eth0 inet dhcp by changing dhcp to static. Next we need to provide a networking configuration. You’ll need to determine what IP address, netmask – netmask is another term for subnet mask, gateway, and dns nameserver settings are necessary for your own network.
If it’s helpful, these are the settings I’ve used in creating this tutorial:
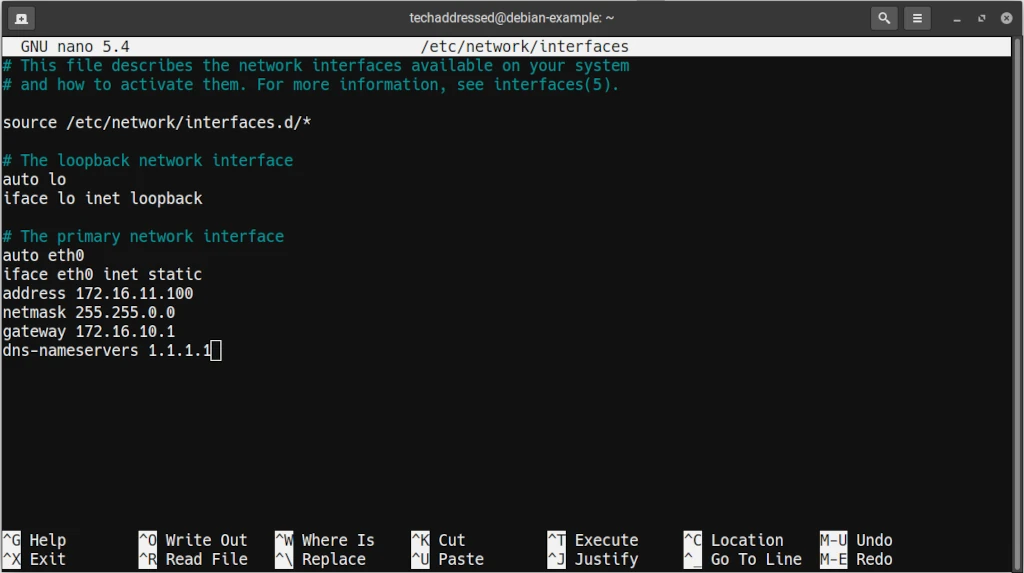
auto eth0
iface eth0 inet static
address 172.16.11.100
netmask 255.255.0.0
gateway 172.16.10.1
dns-nameservers 1.1.1.1
I’ll take a moment to mention – you can use whatever DNS nameservers you prefer on your systems. On server systems I prefer to use Cloudflare’s 1.1.1.1 public DNS for their lightning fast speed. On desktop systems, I prefer to use Quad9’s DNS servers as I prefer the additional privacy / security their system offers.
Once you’ve finished making changes, the resulting configuration should look similar to this:
To exit saving the changes you’ve made, on your keyboard press CTRL + X and when prompted to save press Y for yes.
Once the file has been saved, you’ll need to restart networking for these changes to take effect. Do this using this command:
sudo systemctl restart networkingand then check the IP address to verify that your new settings have applied:
ip aThe output should look similar to this:
If we check the eth0@if2 interface again, notice that the address is now the static IP I’ve specified and it is no longer showing as being dynamic.
Setting A Static IP In Debian LXD Containers
For whatever reason, Debian configures their networking differently than normal in LXD containers. I make use of LXD containers in my homelab all the time – running various services as well as for setting up test environments and demos.
In LXD containers, Debian makes use of the networkd feature in systemd for networking. To modify the settings, you’ll need to find the config file for the network device you wish to configure inside the /etc/systemd/network/ directory. If you didn’t change the ID of your network interface for your container config, it should be /etc/systemd/network/eth0.network.
The default DHCP configuration should look like this:
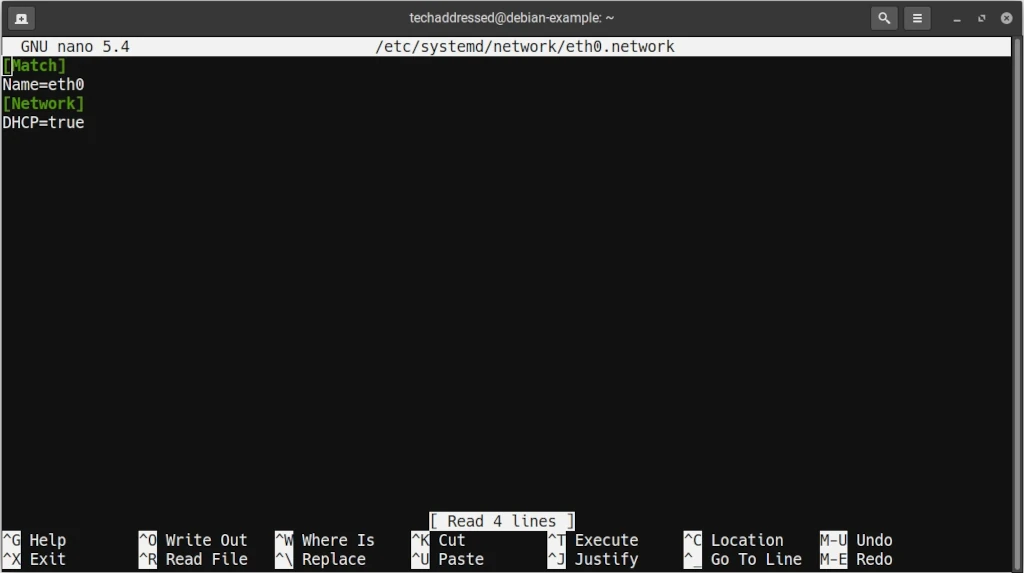
To modify this configuration, we’re going to delete the line that says DHCP=true and replace it with settings like these, however, be sure to use settings appropriate for your own network:
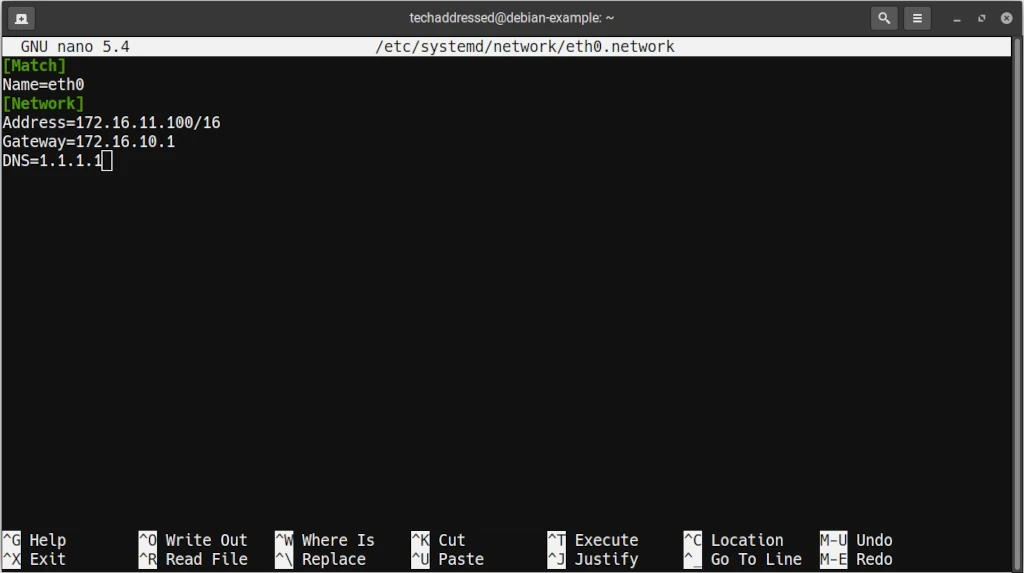
Address=172.16.11.100/16
Gateway=172.16.10.1
DNS=1.1.1.1
I’ll take a moment to mention – like I did in the previous section – you can use whatever DNS nameservers you prefer on your systems. On server systems I prefer to use Cloudflare’s 1.1.1.1 public DNS for their lightning fast speed. On desktop systems, I prefer to use Quad9’s DNS servers as I prefer the additional privacy / security their system offers.
Once you’ve finished your changes, the resulting configuration should look similar to this:
To exit saving the changes you’ve made, on your keyboard press CTRL + X and when prompted to save press Y for yes.
Unlike your typical Debian system where you can easily restart the networking service to apply the changes, when you’re using Debian in a LXD container the simplest solution to applying the network changes is to restart your container.
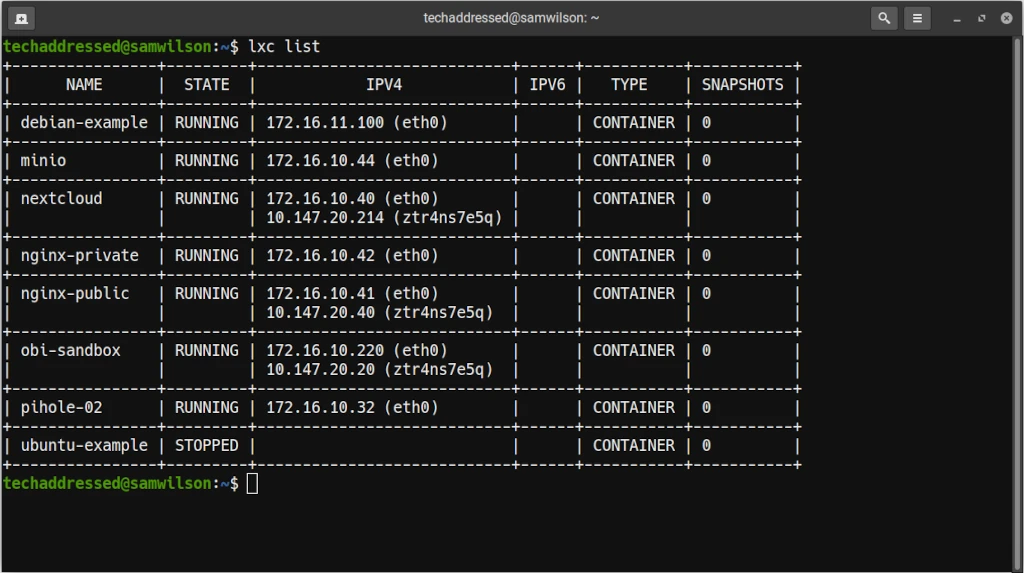
Once your container is restarted, you can check that the changes have applied from your host system by just bringing up a list of the system’s containers using this command:
lxc listThe output of this command should look similar to my system – though if you’re reading this tutorial you probably won’t have as many containers:
Additionally, you can check for the static IP in Debian as normal from the system terminal with this command:
ip aThe output should look similar to this:
If we check the eth0@if2 interface again, notice that the address is now the static IP I’ve specified and it is no longer showing as being dynamic.
Conclusion
Setting a static IP in Debian isn’t difficult once you know how to do it. If you’ve used this tutorial to prepare a system for a server application – perhaps like Pi-hole, Gitea, or Minio – you’re now ready to continue setting up your new server app.
If you found this tutorial helpful and would like to support our efforts to create additional resources like this, please consider making a donation. Your support is greatly appreciated!
If you can’t make a donation, please consider sharing this tutorial with others who may be interested. If you have questions about anything regarding this tutorial, please be sure to leave them in the comments below. Thanks for reading, and I hope you visit again soon!