The recent (as of the date of publishing this tutorial) data breach at Lastpass, resulting in the theft of users encrypted password vaults, has highlighted the importance of taking control of your password security. Vaultwarden, an open source, community driven alternative to commercial password management solutions, is a great option option for those who prefer to self host their password management solution and keep complete control over their data.
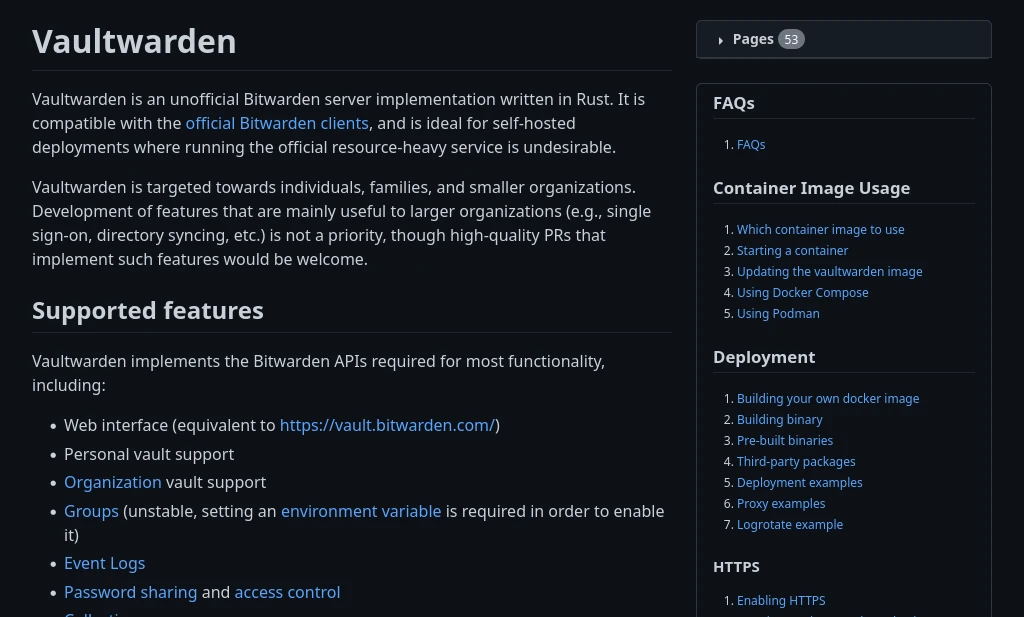
Vaultwarden is an alternative implementation of the Bitwarden password manager developed using the Rust programming language. It is designed to work seamlessly with the official Bitwarden clients, while avoiding the resource-intensive nature of the official Bitwarden server.
Besides keeping control of your password data out of the cloud, Vaultwarden offers a number of additional features, including:
- The ability to generate strong, unique passwords for each of your accounts, reducing the risk of your account being compromised due to weak or reused passwords.
- The ability to store and manage other sensitive information such as credit card details, notes, and documents.
- The ability to share your password vaults with other users securely and manage access permissions.
- A comprehensive and user-friendly web-interface and mobile application that allows you to access and manage your password vault from anywhere.
- An easy-to-use password auto-fill feature that automatically fills your login credentials when you need to sign in to a website.
- A feature to check the relative strength of your passwords and notify you if they are weak or reused.
Vaultwarden is designed to be deployed and managed using Docker, making it simple to deploy, update, manage and migrate the software between different environments. In this tutorial, we’ll compare Vaultwarden to Bitwarden and why you would consider using it instead of Bitwarden as well as everything you need to know to get Vaultwarden deployed to your homelab environment using Docker Compose.
To make this tutorial more accessible, a table of contents has been included, below, so you can quickly jump to specific sections of this tutorial as needed.
Table of Contents
Vaultwarden vs Bitwarden
You might be thinking to yourself, “why should I use a recreation of Bitwarden instead of just using Bitwarden itself?”. Let’s examine that question.
Cost / Features
Simply put, Vaultwarden enables more of the Bitwarden features at no-cost where Bitwarden (even self hosted) would require a paid license to enable these features. Examples include:
- Hardware Two Factor Authentication Options (FIDO2, YubiKey, etc)
- Bitwarden Authenticator
- Emergency Access
- Additional User Accounts
Rust
If you’re unfamiliar with the Rust programming language, it started off as the personal project of a Mozilla employee that eventually grew into a community developed language managed by its own foundation. Rust has grown exponentially in popularity in part due to it’s focus on security.
Rust is memory-safe, null-safe, type-safe, and thread-safe. The compiler will not allow code compilation to complete if there are issues in any of these areas. While developers can override some of these checks, they have to do so in a way that makes the exceptions easy to spot in the event that there is a problem in the future.
It’s this focus on producing secure code that made it the perfect choice for developing Vaultwarden. The last thing you want in your password management system is a memory leak or other security concern.
Simplicity
Another of the major advantages of Vaultwarden is its simplicity. A self hosted Bitwarden deployment requires 11 docker containers as opposed to a single container for Vaultwarden, and it has a higher minimum hardware requirement than Vaultwarden. Let’s compare the two side-by-side.
| Bitwarden | Vaultwarden | |
| CPU Cores | 1 | 0.2 |
| Memory | 2GB | 128MB |
| Storage | 12GB | 200MB |
While Bitwarden itself is open source, it is deployed using Microsoft’s SQL server. People who care about open source might not want to deploy a non-open database.
At the time of writing this tutorial, Bitwarden has a more lightweight version of their system, called Unified Deployment, in beta testing to address some of these issues like deployment as a single container and with additional database options.
With all of that said, if you’re convinced that Vaultwarden is for you, let’s get into actually deploying the software.
Before We Begin
There are a number of things you’ll need to have in place before you can setup your self hosted Vaultwarden instance.
Host Computer / Virtual Machine
First, you’ll need a computer or virtual machine to host the software. While it’s possible to host Vaultwarden in the cloud via a provider like DigitalOcean (affiliate) or Linode (affiliate), for security reasons I would not recommend it unless you’re more technically advanced and know how to properly secure and access the system remotely.
If you don’t already have a computer at home for this purpose, I would recommend picking up an inexpensive mini PC on Ebay or the even more affordable Inovato Quadra.
Docker & Docker Compose
We’ll be setting up Vaultwarden using Docker & Docker Compose. Your host system will need these packages installed before you can proceed. If you haven’t already, install them to a Debian / Ubuntu based system:
sudo apt install docker.io docker-compose -yOnce the packages are installed, you’ll want to add your user account to the docker user group so you can execute docker commands without the use of sudo. If you would prefer to use sudo to execute docker commands, skip this step.
sudo usermod -aG docker usernameMake sure to replace username with your actual username.
Domain / Subdomain
While it’s technically possible to setup Vaultwarden without a domain name and instead access it via an IP address, it’s a better experience and easier to setup with a SSL certificate if you use one. The domain does not need to be an internet domain – a domain local to your LAN will work so long as it resolves via your own local DNS.
If you already own a domain, you do not need to purchase another. A subdomain on your existing domain will work perfectly fine.
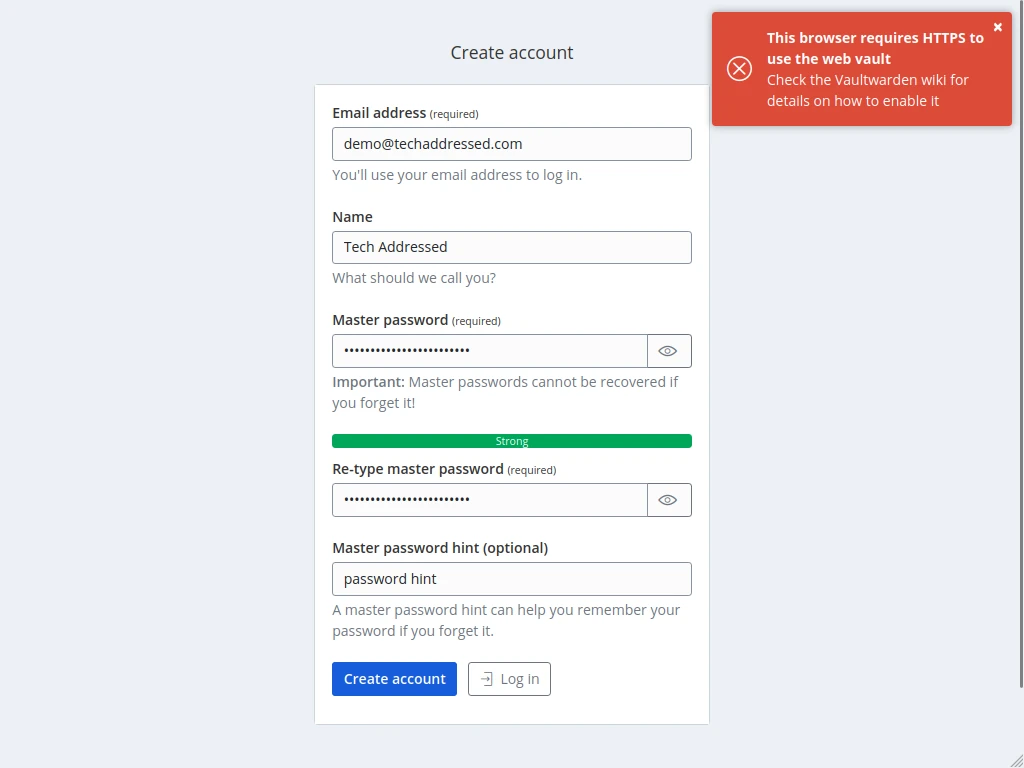
HTTPS / SSL Certificate
To access Vaultwarden, you must use HTTPS. The best way to accomplish this is by putting it behind a reverse proxy. If you don’t have a reverse proxy on your network already, I have a tutorial on configuring Nginx as a reverse proxy that also explains how to obtain a SSL certificate via Let’s Encrypt.
If you’re using a local domain, you can use a self signed SSL certificate
If you attempt to access the web vault without HTTPS, you’ll receive a message like the screenshot, below.
SMTP Email Account
For Vaultwarden to be able to send email messages – for example to send emails after account creation – you’ll need to configure it with SMTP email account credentials. Vaultwarden does not make use of mail systems like sendmail. If possible, I would create an email account specific for this purpose.
Make sure that you have all of the required information for your email provider. If you aren’t certain what information you’ll need, this information can be found when we discuss the environment variables section of this tutorial.
Firewall (Not Required But Highly Recommended)
While not strictly required for Vaultwarden to function, it is HIGHLY RECOMMENDED for the security of your server that you configure a firewall. If you’re running Debian / Ubuntu, you can setup the UFW firewall in a few quick steps. First, install the UFW package.
sudo apt install ufw -yNext, tell UFW what ports you want to open. By default all ports are closed after install. At the minimum, you’ll want to be sure to open any ports you’re using to remotely access the server, such as via SSH. By default SSH uses port 22. To specify access to port 22 enter:
sudo ufw allow 22/tcpLastly, enable UFW.
sudo ufw enableYou can check the status of UFW via:
sudo ufw statusVaultwarden Deployment
The process of deploying your Vaultwarden using Docker Compose is fairly straightforward.
Folder / Directory Creation
Before we can deploy Vaultwarden, we need somewhere on your host system to store its files. On my systems, I prefer to keep a docker directory inside my home directory and then create subdirectories specific to each application I’ve deployed.
We can create all of the directories needed for this tutorial with a single command from your home folder.
mkdir -p ~/docker/vaultwarden/dataAfter the directories are created, change into the vaultwarden directory where we’ll create the necessary docker-compose.yml file.
cd ~/docker/vaultwardenCreate docker-compose.yml
We’re ready now to create the docker-compose.yml file that will hold your Vaultwarden docker configuration. In this tutorial I’m making use of the nano text editor and will give instructions specific to it. If you have a preference for a different editor, however, you’re free to use it instead.
To begin, let’s enter nano:
nano docker-compose.ymlIf by some chance your system doesn’t already have nano available already, you can install it on Debian / Ubuntu based systems with this command:
sudo apt install nano -yWhen you’ve entered nano, you should start with a blank file. Your editor should look like the screenshot, below.
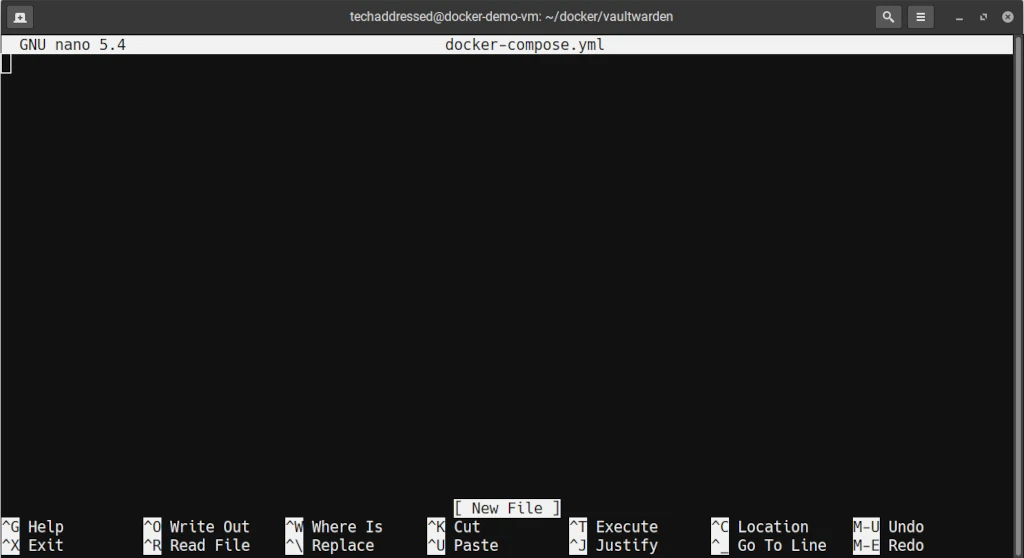
Instead of typing in the entire configuration, I recommend copying the entire configuration – found under the Putting It All Together heading – and pasting it into nano and then making the necessary changes. When you’ve finished making modifications, press CTRL + O then ENTER on your keyboard to save the file then press CTRL + X to exit nano.
The Basics
The contents of the docker-compose.yml file can be a bit much to take in at once. To make it easier to understand, I’ve divided it into smaller sections.
Let’s start with the bare minimum configuration required to get Vaultwarden running – though I would NOT deploy a system using only these basic settings.
version: '3'

services:
  vaultwarden:
    container_name: vaultwarden
    image: vaultwarden/server:latest
    restart: unless-stopped
    volumes:
      - ./data/:/data/
    ports:
      - XXXX:80
Let’s examine what these settings do.
- container_name
This is the name that your container will be identified as in Docker. This can be anything you wish it to be, however, I’d recommend just keeping it as vaultwarden to make it easy to identify.
- image
The image setting informs docker which container image to use and which version. Here we’ve specified vaultwarden/server and then specified to always use the latest version.
- restart
This tells Docker when to restart this container if it’s not running. While there are other values you could specify, I’d recommend leaving it as I’ve specified. Using unless-stopped will always restart your container when it’s not running unless you’ve stopped it yourself.
- volumes
This is where we tell Docker how to map the data directory we created to be used inside the container. If you created a directory other than the one I specified earlier in this tutorial, you’ll want to be sure to modify the value on the. If you followed my directions, you can leave this as-is.
- ports
This is where we map a port on the host system to the necessary port used inside the container. Inside the Vaultwarden container the software uses port 80. Specify which port you’re using on the host on the left where I’ve specified XXXX. Any valid port should work fine. IMPORTANT – you’ll need to note which port you’ve chosen to open it in your firewall and specify it in your reverse proxy’s settings.
Environment Variables
Now let’s add the environment variables we’ll be adding into the file to help customize our Vaultwarden configuration. Note, these are not the only possible variables Vaultwarden has available for us to use. These are simply the ones I find the most necessary. You can consult the Vaultwarden environment variable documentation, if you wish, for additional options.
System Settings
This collection of settings deal with the configuration of Valutwarden itself.
      - DOMAIN=https://subdomain.yourdomain.com
      - LOGIN_RATELIMIT_MAX_BURST=10
      - LOGIN_RATELIMIT_SECONDS=60
      - ADMIN_RATELIMIT_MAX_BURST=10
      - ADMIN_RATELIMIT_SECONDS=60
      - ADMIN_TOKEN=YourReallyStrongAdminTokenHere
      - SENDS_ALLOWED=true
      - EMERGENCY_ACCESS_ALLOWED=true
      - WEB_VAULT_ENABLED=true
Again, let’s look at what each individual settings does.
- DOMAIN
This is the domain you wish to associate with your Vaultwarden instance.
- LOGIN_RATELIMIT_MAX_BURST
This is the maximum number of requests allowed in a burst of login / two-factor attempts while maintaining the average specified in LOGIN_RATELIMIT_SECONDS.
- LOGIN_RATELIMIT_SECONDS
This is the average number of seconds between login requests from the same IP before Vaultwarden rate limits logins.
- ADMIN_RATELIMIT_MAX_BURST
This is the same as LOGIN_RATELIMIT_MAX_BURST, only for the admin panel.
- ADMIN_RATELIMIT_SECONDS
This is the same as LOGIN_RATELIMIT_SECONDS, only for the admin panel.
- ADMIN_TOKEN
This value is the token (a type of password) for the Vaultwarden admin panel. For security, this should be a long random string of characters. The admin panel is disabled if this value is not set.
- SENDS_ALLOWED
This setting determines whether users are allowed to create Bitwarden Sends – a form of credential sharing.
- EMERGENCY_ACCESS_ALLOWED
This setting controls whether users can enable emergency access to their accounts. This is useful, for example, so a spouse can access a password vault in the event of death so they can gain access to account credentials. Possible values: true / false.
- WEB_VAULT_ENABLED
This setting determines whether or not the web vault is accessible. Stopping your container then switching this value to false and restarting Vaultwarden could be useful once you’ve configured your accounts and clients to prevent unauthorized access. Possible values: true/false.
Signup Settings
Finally, we’ll look at settings used to control account signups in Vaultwarden. I think it’s safe to assume that you don’t want just anyone to be able to create an account on your server and that you’d like to add some sensible settings to improve security.
      - SIGNUPS_ALLOWED=false
      - SIGNUPS_VERIFY=true
      - SIGNUPS_VERIFY_RESEND_TIME=3600
      - SIGNUPS_VERIFY_RESEND_LIMIT=5
      - SIGNUPS_DOMAINS_WHITELIST=yourdomainhere.com,anotherdomain.com
Let’s look at the individual settings.
- SIGNUPS_ALLOWED
This setting controls whether or not new users can register for accounts without an invitation. Possible values: true / false.
- SIGNUPS_VERIFY
This setting determines whether or not new accounts must verify their email address before being able to login to Vaultwarden. Possible values: true / false.
- SIGNUPS_VERIFY_RESEND_TIME
If SIGNUPS_VERIFY is set to true, this value specifies how many seconds a user must wait before another verification email can be sent.
- SIGNUPS_VERIFY_RESEND_LIMIT
If SIGNUPS_VERIFY is set to true, this value specifies the maximum number of times an email verification may be re-sent.
- SIGNUPS_DOMAINS_WHITELIST
This setting is a comma separated list of domains that can register for Vaultwarden accounts, even if SIGNUPS_ALLOWED is set to false. This is useful for when your Vaultwarden accounts are to be used specifically by email addresses whose domains you control.
SMTP Settings
I previously mentioned you’ll need a SMTP email account for your Vaultwarden service to be able to send emails. This is how we’ll configure those account settings. A reminder – these settings will depend on how your email provider has their systems configured.
      - SMTP_HOST=smtp.youremaildomain.com
      - SMTP_FROM=[email protected]
      - SMTP_FROM_NAME=Vaultwarden
      - SMTP_SECURITY=SECURITYMETHOD
      - SMTP_PORT=XXXX
      - SMTP_USERNAME=[email protected]
      - SMTP_PASSWORD=YourReallyStrongPasswordHere
      - SMTP_AUTH_MECHANISM="Mechanism"
Finally, our last group of settings.
- SMTP_HOST
This is your SMTP mailserver.
- SMTP_FROM
This is the email address messages will be sent from.
- SMTP_FROM_NAME
The name you wish to appear as the email account name on sent messages
- SMTP_SECURITY
The security method used by your SMTP server. Possible values: “starttls” / “force_tls” / “off”.
- SMTP_PORT
This is the SMTP port used by your mail server. Possible values: 587 / 465.
- SMTP_USERNAME
This is the login for your SMTP mail server.
- SMTP_PASSWORD
This is the password for your SMTP credentials.
- SMTP_AUTH_MECHANISM
This is the SMTP authentication mechanism of your mail server. Possible values: “Plain” / “Login” / “Xoauth2”.
Putting It All Together
Putting all the pieces together gives us this complete docker-compose.yml file. As I’ve previously mentioned, copy and paste this into your editor and make the appropriate changes for your deployment.
version: '3'

services:
  vaultwarden:
    container_name: vaultwarden
    image: vaultwarden/server:latest
    restart: unless-stopped
    volumes:
      - ./data/:/data/
    ports:
      - XXXX:80
    environment:
      - DOMAIN=https://subdomain.yourdomain.com
      - LOGIN_RATELIMIT_MAX_BURST=10
      - LOGIN_RATELIMIT_SECONDS=60
      - ADMIN_RATELIMIT_MAX_BURST=10
      - ADMIN_RATELIMIT_SECONDS=60
      - ADMIN_TOKEN=YourReallyStrongAdminTokenHere
      - SENDS_ALLOWED=true
      - EMERGENCY_ACCESS_ALLOWED=true
      - WEB_VAULT_ENABLED=true
      - SIGNUPS_ALLOWED=false
      - SIGNUPS_VERIFY=true
      - SIGNUPS_VERIFY_RESEND_TIME=3600
      - SIGNUPS_VERIFY_RESEND_LIMIT=5
      - SIGNUPS_DOMAINS_WHITELIST=yourdomainhere.com,anotherdomain.com
      - SMTP_HOST=smtp.youremaildomain.com
      - [email protected]
      - SMTP_FROM_NAME=Vaultwarden
      - SMTP_SECURITY=SECURITYMETHOD
      - SMTP_PORT=XXXX
      - [email protected]
      - SMTP_PASSWORD=YourReallyStrongPasswordHere
      - SMTP_AUTH_MECHANISM="Mechanism"
Starting The Container
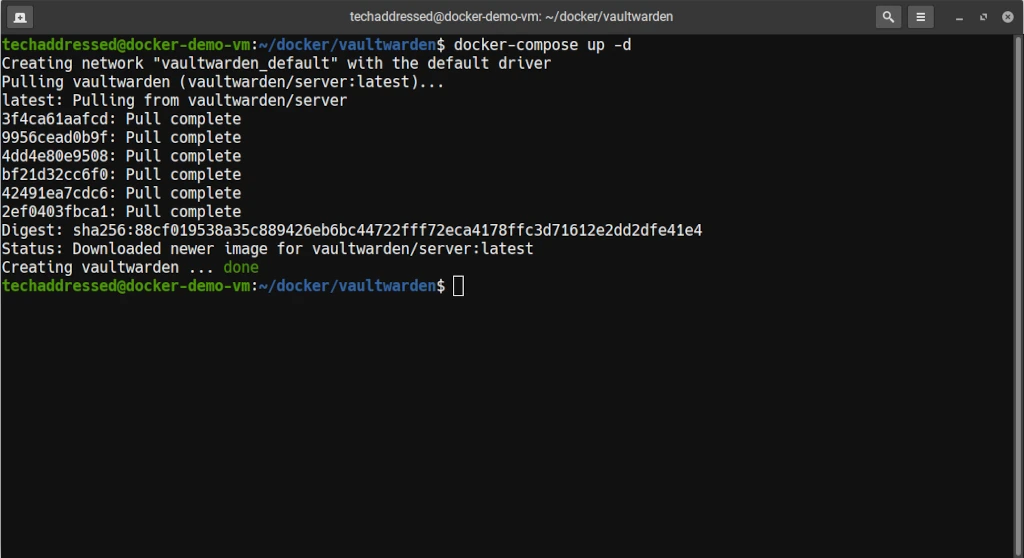
Once you’ve finished editing the docker-compose.yml file, run this command from the vaultwarden directory to both create and start the container.
docker-compose up -dThe -d flag tells docker to run the container “detached” in the background instead of running in the foreground of your terminal. Without this flag, your container would stop running as soon as you close the terminal it was launched from.
The example screenshot, below, illustrates what you can expect to see once your container is created.
Stopping The Container
If you ever have a need to stop your Vaultwarden container, simply run this command from your vaultwarden directory:
docker-compose downUpdating The Container
The same command you used to launch and start your container can also be used to update your container. First change into the vaultwarden directory:
cd ~/docker/vaultwardenThen run:
docker-compose up -dTIP: To simplify the process of updating my containers, I create a bash script that navigates to each docker subdirectory on my system and runs the necessary docker-compose command.
Containers do not have to be stopped in advance in order to perform updates.
Firewall Settings
Earlier, I specified to make note of what public port we’re exposing for your container on the host system. We need to ensure that port is open in your host’s firewall. If you’re using the UFW firewall package that I previously mentioned under Prerequisites, you can open the port you’ve used with this command.
sudo ufw allow XXXX/tcpBe sure you specify the port you’ve selected in place of XXXX.
Accessing The Web Vault
Once your container is up and running and you’ve confirmed that your reverse proxy is configured properly and your firewall port is open, accessing the web vault for the first time to create your Vaultwarden account should be as simple as entering your chosen domain into a browser. So, for example, if your domain is vault.mydomain.com, you’d use this as the URL:
https://vault.mydomain.com/If accessing Vaultwarden this way returns an error, attempt to access the system instead using your host system’s IP and the port number you chose for Vaultwarden to confirm that it isn’t the source of your problem. For example, if your host’s IP is 192.168.1.100 and you’ve chosen port 8000 the URL would be:
http://192.168.1.100:8000If Vaultwarden loads in this way, the problem likely resides with your reverse proxy.
Closing
In this tutorial, we’ve gone over all the steps necessary to set up Vaultwarden in your home lab environment using Docker Compose, in addition to discussing the differences between Vaultwarden and Bitwarden and why you might choose it.
If you found this tutorial helpful and would like to support our efforts to create additional resources like this, please consider making a donation. Your support is greatly appreciated!
If you can’t make a donation, please consider sharing this tutorial with others who may benefit from it. If you have questions about anything regarding this tutorial, please be sure to leave them in the comments below. Thanks for reading, and I hope you visit again soon!