This tutorial covers the basics of configuring a newly installed Pi-hole instance. If newer options become available in the future, this document will be updated to reflect the changes / additions. After completion of this tutorial, you should have a solid grasp of the essential Pi-hole settings – including DNS, Privacy, custom lists, and Group Management. Refer back to this tutorial as needed if you need a refresher on any of these basic settings / features.
This article is part of my Pi-hole series. Be sure to check out the other articles in this series for additional information.
Pi-hole Series Index
- What Is Pi-hole & Why Would You Want To Use It?
- Installing Pi-hole On Debian / Ubuntu Servers
- Installing Pi-hole Using Docker
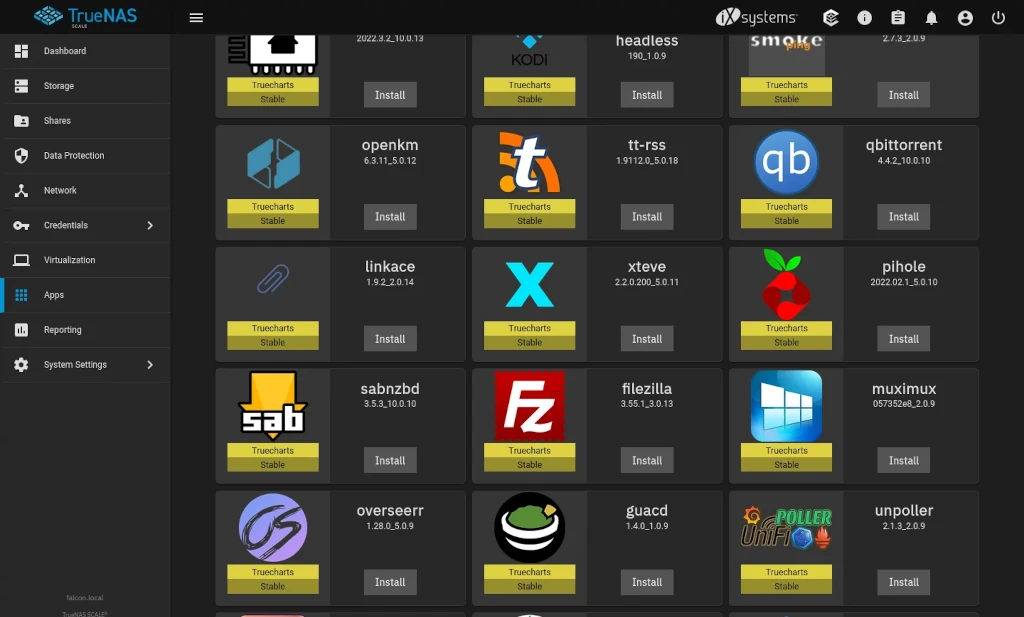
- Installing Pi-hole On TrueNAS Scale
- Basic Pi-hole Configuration — You Are Here
- Using Gravity Sync To Sync Multiple Pi-hole Instances
- Advanced Pi-hole Config: Recursive DNS With Unbound
- Using Pi-hole Local DNS And Why It’s Important In Your Homelab
Before We Begin
A few things we need to address before we begin.
Assumptions
This tutorial assumes that you’ve already got a working Pi-hole installation. If you need instructions on installing Pi-hole, please refer to the series index at the top of the page.
Router / Local DNS Settings
Because there are a number of ways to configure how DNS servers are assigned to your devices – not to mention the variation in ways to configure DNS settings between devices – I cannot provide instructions on how to configure DNS for your network / specific devices.
In general, however, if you want to use your Pi-hole installation for DNS across your entire network you need to configure whatever device acts as your DHCP server (most likely your router) to use your Pi-hole IP address as your DNS server address.
If you’re configuring DNS on a per-device basis, you should refer to documentation for your device / operating system on how to modify its network settings.
A Note About Modern Browsers & DNS
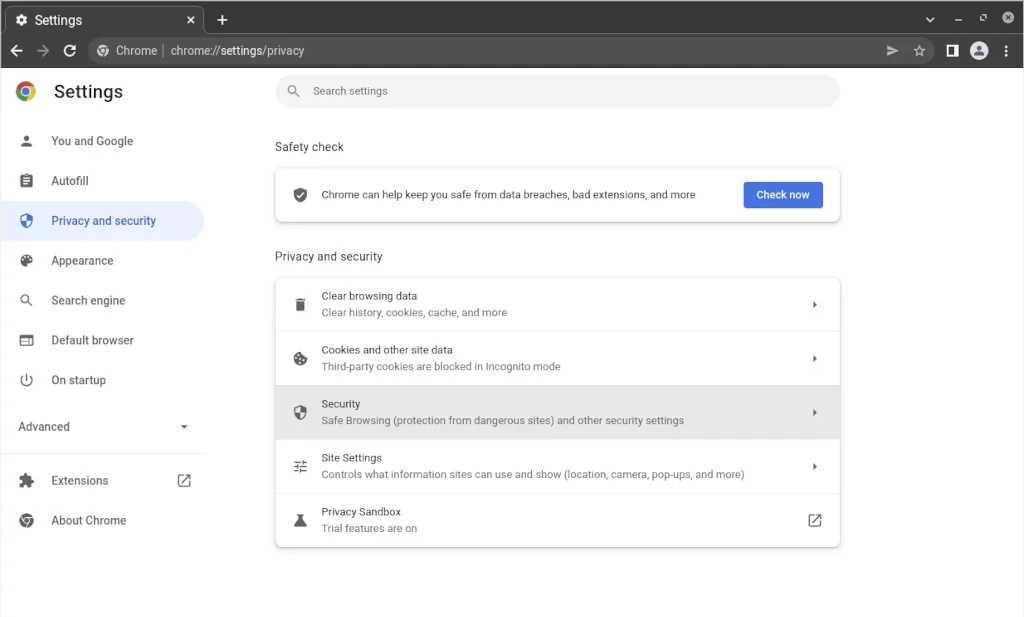
Most modern browsers have the ability to use what’s called DNS Over HTTPS. While, generally speaking, this is a great feature, depending on how it’s configured it might skip your device’s configured DNS settings. This means, if you’re using a Pi-hole for your DNS, your browser might not be making use of it – negating it’s usefulness. I’ve written a post about Browsers and DNS Over HTTPS to help you sort out these settings.
Dashboard
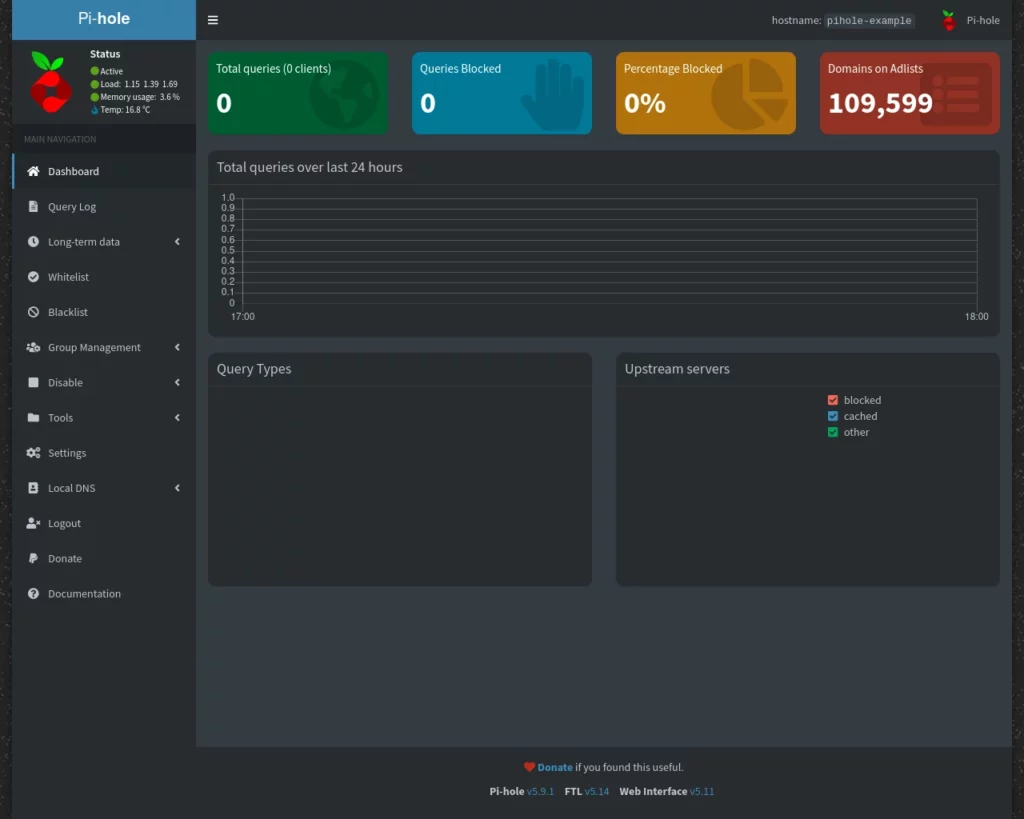
Let’s begin by having a look at the Pi-hole dashboard. When your install is brand new you’ll find your dashboard a little barren … like the one I’ve shown, here, below.
Once you start using Pi-hole, however, it will quickly begin to fill with data, like this screenshot from the Pi-hole instance I use for managing my kid’s internet access. Looking across the top you get a quick glimpse of the total queries made to Pi-hole and how many of those queries have been blocked. As you go down the page you get a quick glimpse of when there has been activity. In this example, you’ll see my kid decided he wanted to use his PC to watch PBS Kids videos at 9:30PM … that is until I made him go to bed 30 minutes later.
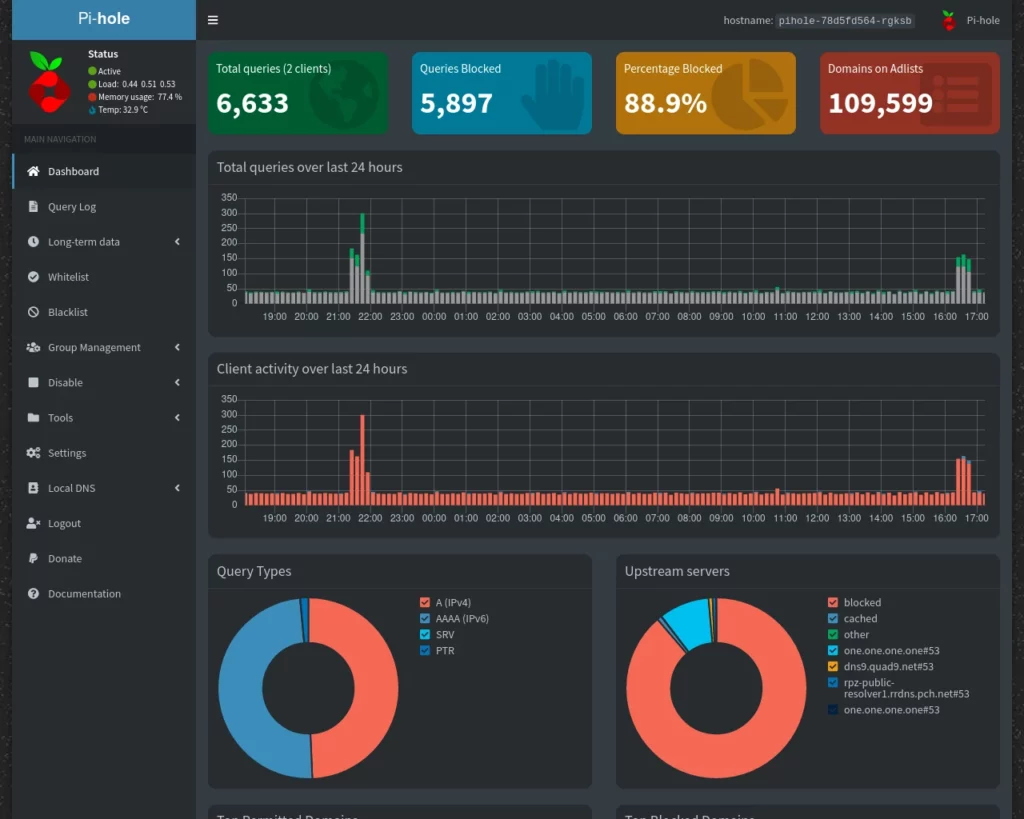
I’ve not captured the entire dashboard in the above screenshot, but as yours fills with data and you scroll further you’ll get additional information on what the most frequently permitted and blocked domains are. If you could see on my Pi-hole instance, you’d see my son visits pbskids.org frequently (it’s one of the few websites he’s allowed to visit right now without supervision) and is routinely prohibited from visiting YouTube. In addition to these, however, you’ll also see a lot of domains that don’t even look remotely familiar in your blocked list. These are going to be domains that run trackers and advertisements that your Pi-hole’s default list has blocked.
We’ll get into whitelisting and blacklisting domains like I do for controlling where my son is allowed to go online further on in this tutorial.
In addition to which domains are permitted / denied most frequently, you also get to see which devices on your network are making the most requests and which have the most requests blocked.
Settings
Let’s move on now into the settings page via the link in the menu on the left of the interface. The first screen that should show up is the system tab – tabs are located across the top.
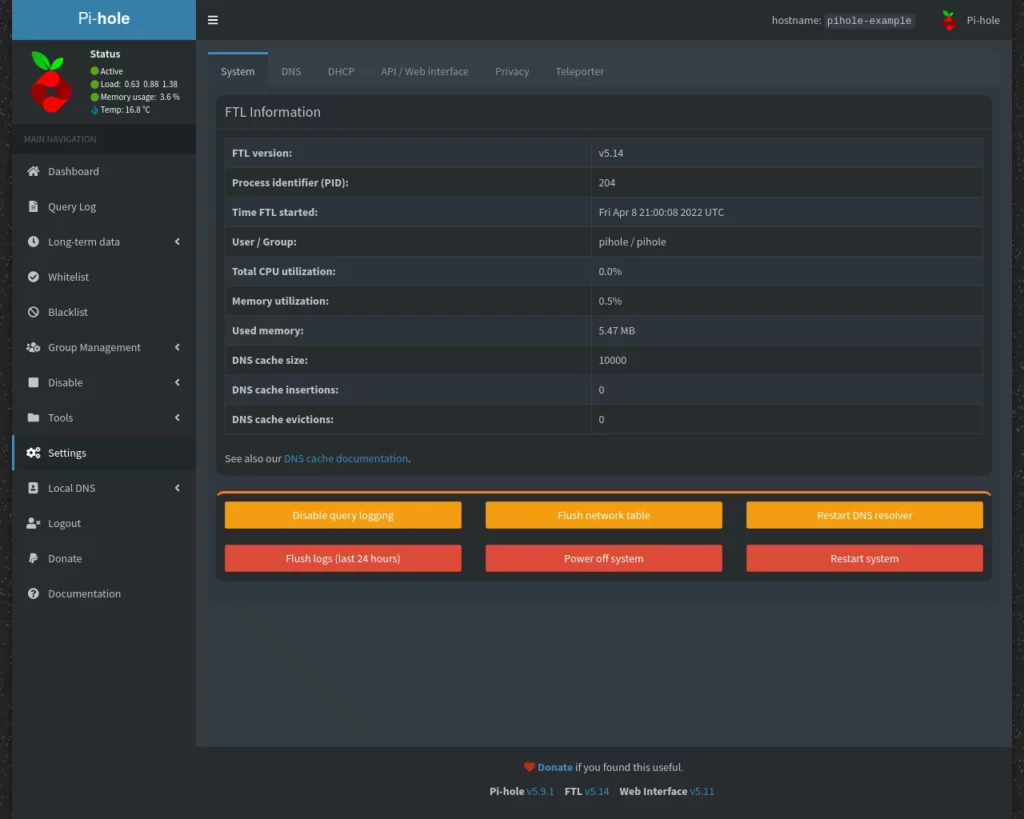
System
The first information we get on the system tab is headed FTL Information – FTL is the engine that runs Pi-hole. Here you can get a quick glimpse of things like the version of FTL that’s running, how much CPU and memory are being used, and the DNS cache size.
Beneath this information we have a set of six buttons. Let’s go over what each of those buttons does.
- Disable Query Logging – Use this button if you want to stop logging DNS queries in your Pi-hole.
- Flush Network Table – This button is used to clear out the list of devices on your network that Pi-hole is aware of.
- Restart DNS Resolver – Used for troubleshooting, try this if for some reason your Pi-hole stops performing DNS queries.
- Flush Logs (Last 24 Hours) – Clears our the last 24 hours of query logs.
- Power Off System – Powers off your Pi-hole device / virtual environment.
- Restart System – Restarts / reboots your Pi-hole device / virtual environment.
DNS
Let’s move now to the DNS tab. I’ll start by saying that we’re ignoring the ADVANCED DNS SETTINGS on this page in this tutorial.
If you installed Pi-hole manually, as opposed to via Docker or inside TrueNAS Scale, you’ll see the 3rd party DNS provider you chose during install under Upstream DNS Servers. If you installed via any other method, you can change the setting here on this page.
If you have NO CLUE what settings to pick here and are privacy conscious, I highly recommend using Quad9 (filtered, DNSSEC) as shown here in the screenshot. If privacy isn’t so much of a concern, you could go with any of the choices here. I would suggest, perhaps, Cloudflare as their DNS servers respond extremely quickly.
If you wanted to use DNS servers other than one of the predefined options given to you, you can do so in the custom fields on the right side of the screen.
On the right side you’ll also notice a section headed Interface Settings.
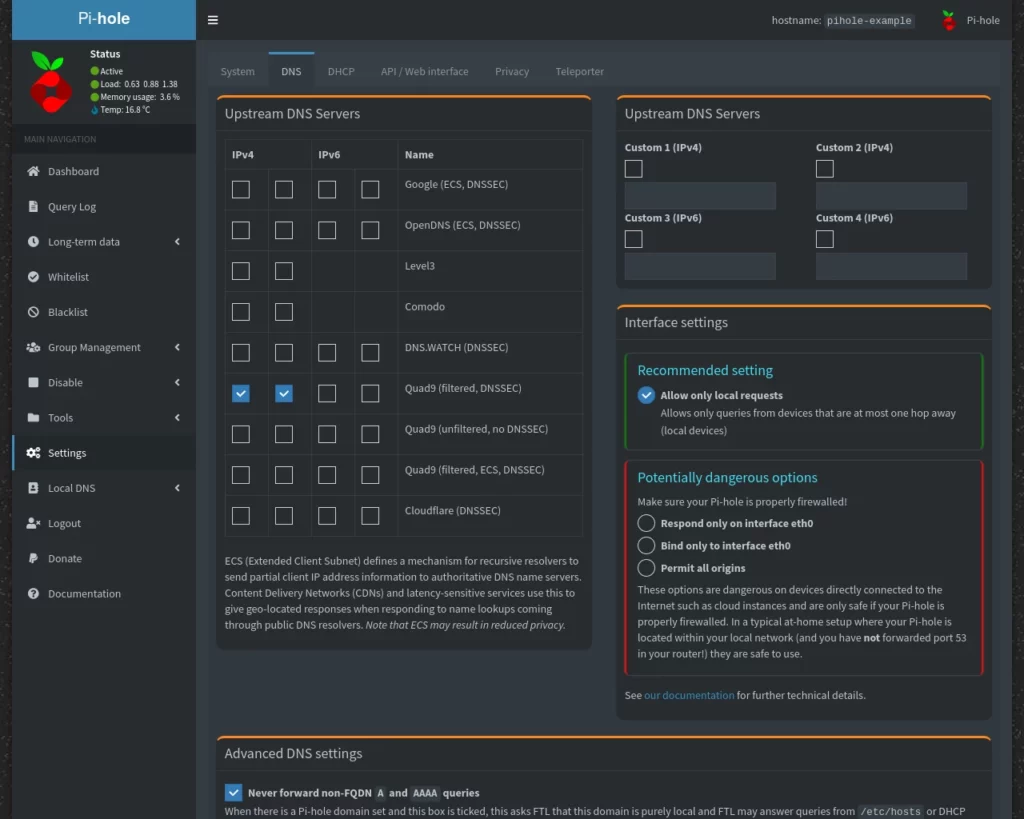
If your home network is simple – by simple I mean you have a single router and no additional network devices (such as switches or additional access points) – then the recommended setting of Allow Only Local Requests should work fine for you.
If you’re like me and have a network that’s more complex, you’ll want to choose one of the other options that Pi-hole indicates as potentially dangerous. I have mine set to Respond Only On Interface eth0. This should be safe to use so long as you do not have port 53 accessible through your network’s firewall.
DHCP
For the purposes of this tutorial, we’re skipping the DHCP tab.
API / Web Interface
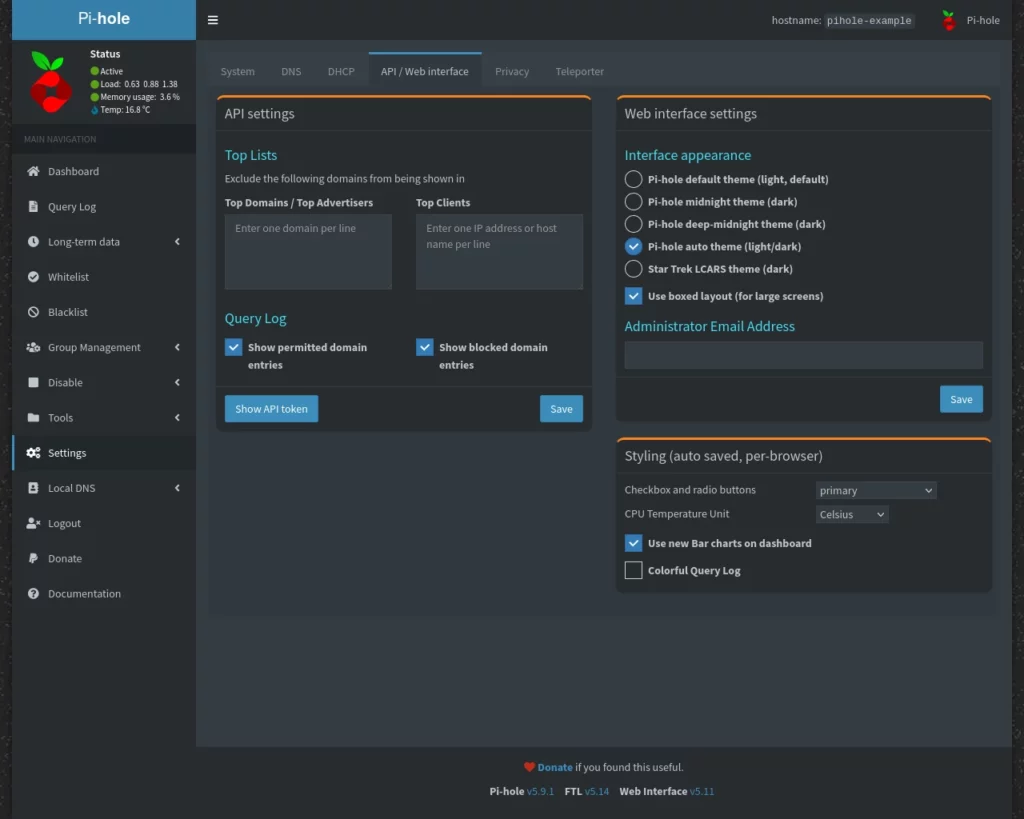
Moving on now to the API / Web Interface tab, let’s start with the API Settings section. Here you can specify if there are domains or network clients that you do not wish to appear in the Top Lists on the Pi-hole dashboard. Additionally, if you’d prefer to hide either the allowed or blocked domains from appearing on the dashboard entirely you can uncheck the appropriate box for either.
After you’ve made any adjustments to any of these settings, be sure to click the Save button to apply the changes.
For the purposes of this tutorial, we’re skipping over discussing the Show API Token button.
Let’s next look at Web Interface Settings and Styling in the right side of this tab. Simply put, these settings allow you to made additional adjustments to how your Pi-hole interface appears. Additionally, you can specify an email address for the administrator for the Pi-hole software if you wish.
I won’t be detailing what all of the various interface / styling options do here – you can experiment them until you find settings that you prefer. Be sure to click SAVE to apply any changes.
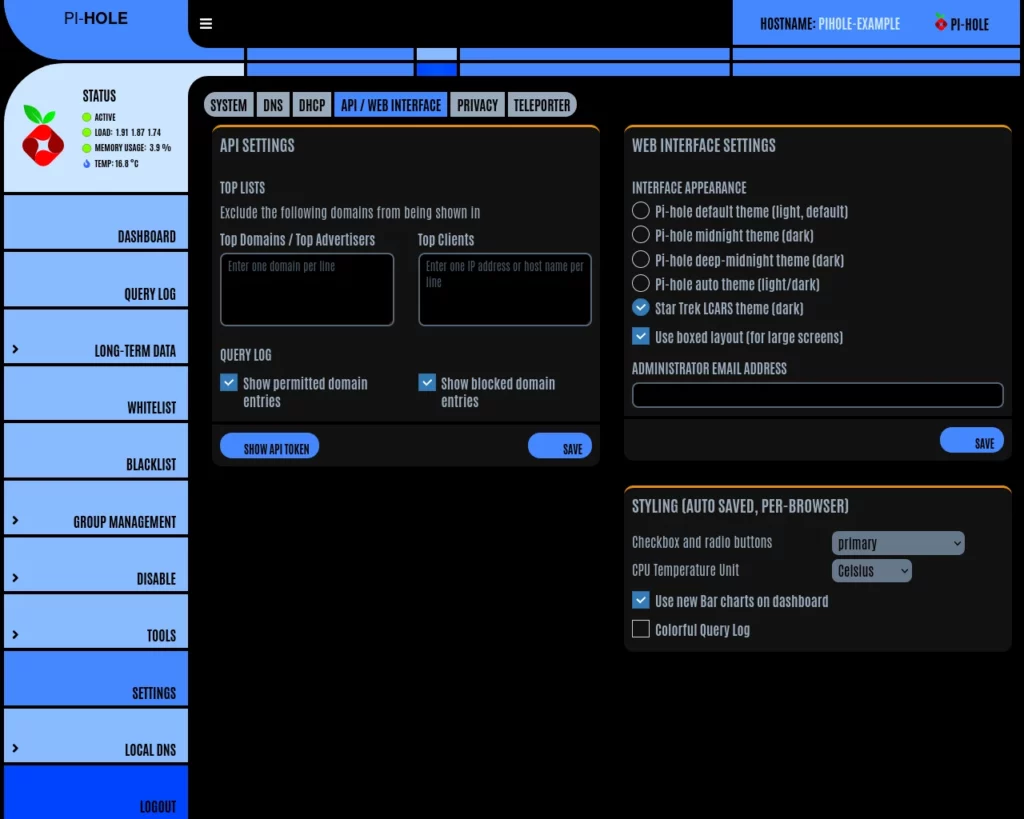
I will however point out that my inner sci-fi nerd wishes more software came with a Star Trek LCARS interface option – seen below.
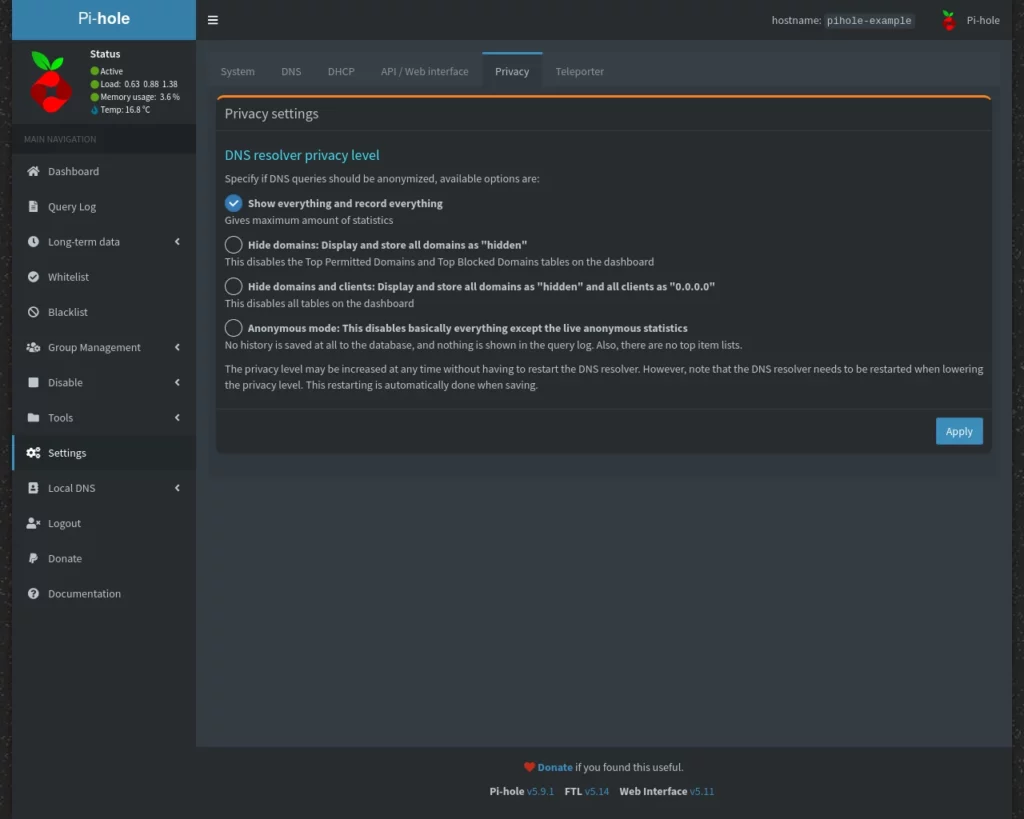
Privacy
Moving next to the Privacy tab. If you performed a manual install of Pi-hole (as opposed to deploying on Docker or TrueNAS for example) you were asked to choose privacy level you wanted – which is shown here. If you installed via other means, you can now make that choice here. Each setting records a different amount of information regarding the DNS queries that are submitted to Pi-hole. The choices are:
- Show everything and record everything
- Hide domains: Display and store all domains as “hidden”
- Hide domains and clients: Display and store all domains as “hidden” and all clients as “0.0.0.0”
- Anonymous mode: This disables basically everything except the live anonymous statistics
Choose the setting that you prefer and click Apply.
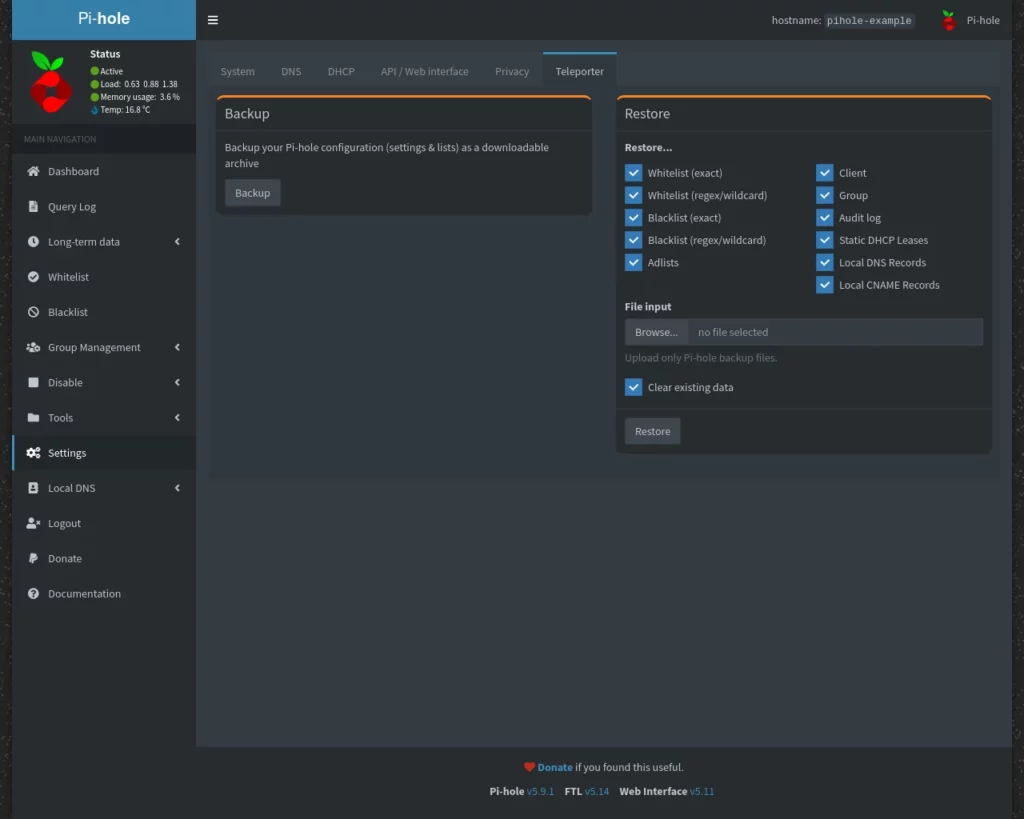
Teleporter
Moving next to the Teleporter tab. Sadly, Pi-hole doesn’t allow us to beam things / people from one place to another ala Star Trek – regardless of whether you’ve enabled the LCARS style interface or not. That said, however, I can’t overstate how useful this tool is for your Pi-hole installation.

What the teleporter tool does is backup / restore your Pi-hole configuration.
Once you’ve got everything configured as you need, come to this tab and click the BACKUP button to export a .zip file containing a backup of your entire configuration. Should you ever need to recreate your Pi-hole installation, you can save yourself a bunch of time and effort by simply restoring the settings from that backup.
To restore, click on the Browse button on the right under File Input and then click Restore.
If you only wish to selectively restore settings you can selected / deselect which options you want using the check boxes provided.
Whitelist & Blacklist
Now that we’ve gone through everything under the Settings page, we’ll move on to discussing the Whitelist and Blacklist options found in the left-side navigation. I’ve combined the two together as the interfaces are identical. The only difference between them is that one creates a list of allowed domains and the other creates a list of disallowed domains. Aside from this everything should work the same.


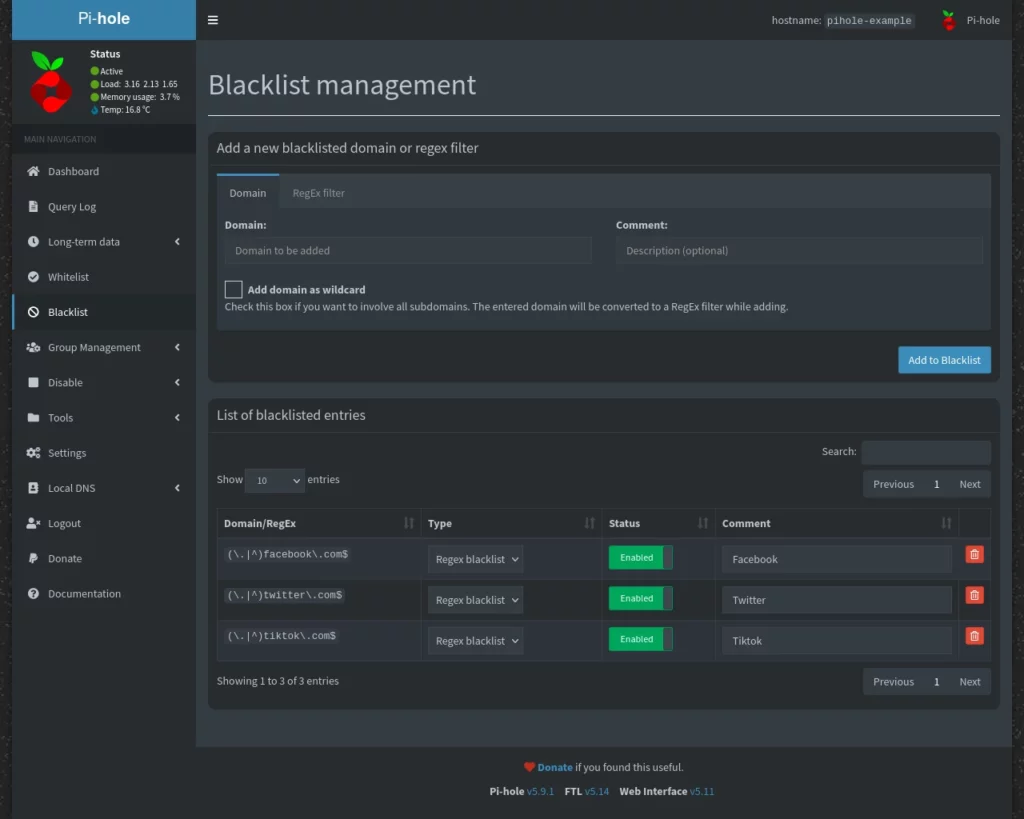
Pi-hole makes it easy to add domains to your lists – simply enter them in the field specified – check the wildcard box if you’d like to block all subdomains of this domain as well – and click the Add to Whitelist / Blacklist button. It’s not a bad idea to add a comment with your domain additions in case you ever might come back and wonder what a domain is or why it’s on the list.
Advanced geeks with an understanding of regular expressions have the option instead to use the REGEX Filter tab to setup more targeted rules. The complexity of creating regular expressions is far beyond the scope of this tutorial. There are RegEx generators that exist as well as guides online to learning RegEx if this is something you absolutely need to use.

I’ll give you a freebie RegEx filter, however, as it’s the only one I’ve personally had use for aside from creating wildcard entries the easy way. If you want to be able to blacklist EVERYTHING on the entire internet you can do so with this expression:
.*This comes in handy when I manage my son’s devices – I blacklist everything by default and then whitelist the domains I allow him to visit.
All domains that have been added to a list show up in the list on the bottom of the page interface. I’ve created an example blacklist with wildcard entries for facebook.com, twitter.com, and tiktok.com. You can enable or disable entries in the list under the Status column. Additionally, you can delete entries from the list using the Trash Can button at the end of each entry line.
We’ll discuss how you can control where and when to use these lists as we discuss Groups, Domains, and Clients in the next section.
Group Management
There are four separate pages under the umbrella of Group Management – Groups, Clients, Domains, and Adlists. We’re going to address these slightly out of order as it makes better sense for how they’re used together.
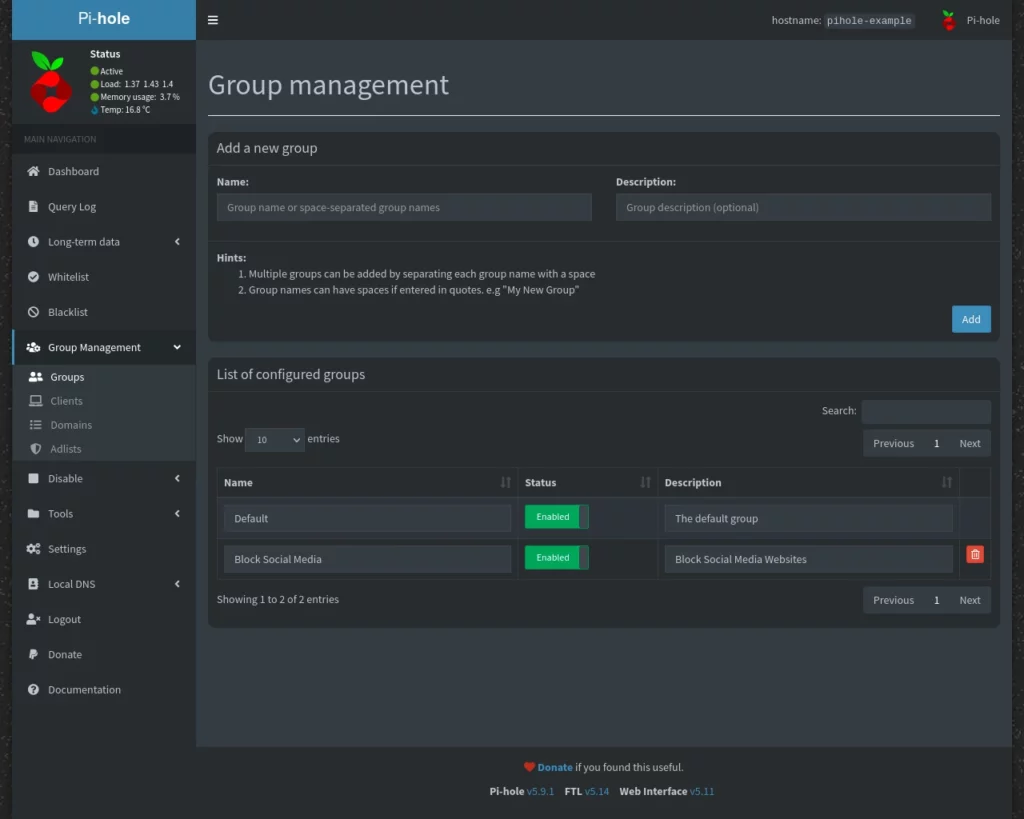
Groups
Pi-hole allows us to create named groups for bundling rules together to make it more convenient for assigning allowed / blocked domains to client devices. In my example, I’ve created a rule called Block Social Media.
To create a group, enter the name into the Name field under Add A New Group. Note that if you want spaces in your group name that you need to enclose your name inside quotes. For my example group, I entered “Block Social Media”. Add an optional description if you want more information noted about the group. Click Add. You’ll see your group added to the List Of Configured Groups.
Now that we’ve configured a group, let’s assign our example blocked domains to it.
Domains
The Pi-hole Domain Management page is nearly identical with the Whitelist and Blacklist pages but with one important difference. While you can do everything on this page that you can on the others, you can additionally assign the specified domains to a group using the drop-down in the Group Assignment column. After you’ve selected all of the groups a domain should be a part of, click the Apply button. Domains can be added to multiple groups if you require. HINT HINT … using multiple groups is really useful.
You’ll notice in my example, below, I’ve added my example domains to the group I created earlier called Block Social Media.
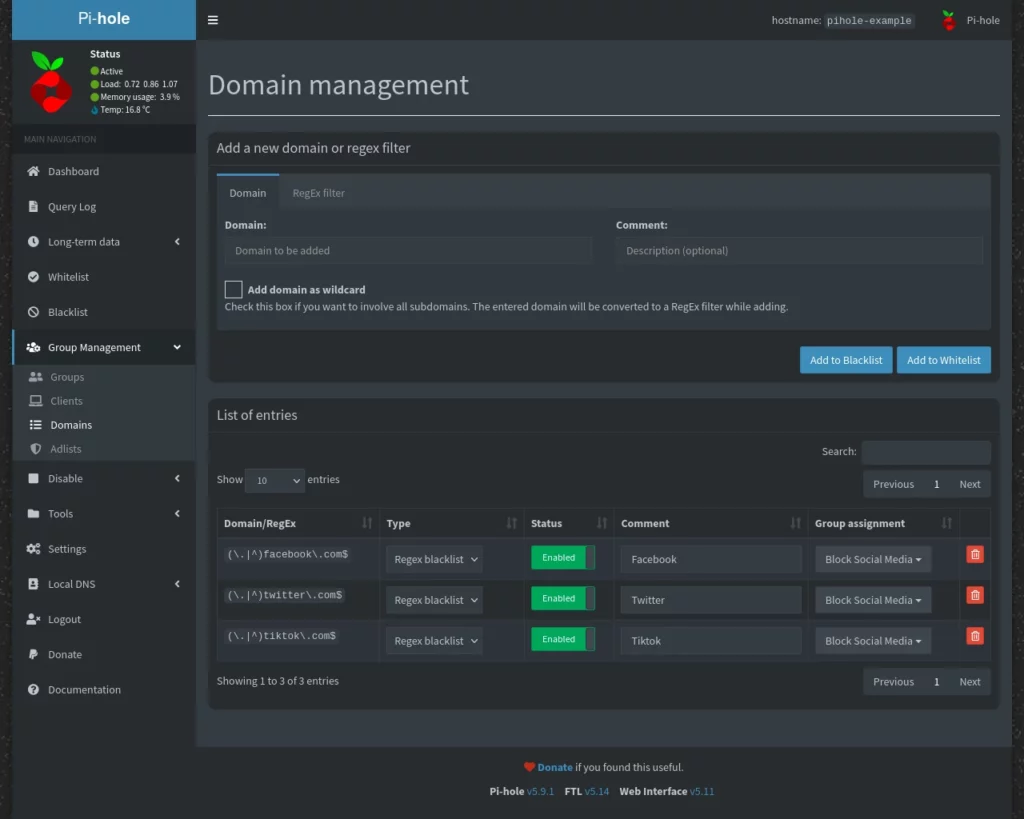
Now that we have domain rules added to our example Block Social Media group, we can assign that group to a client.
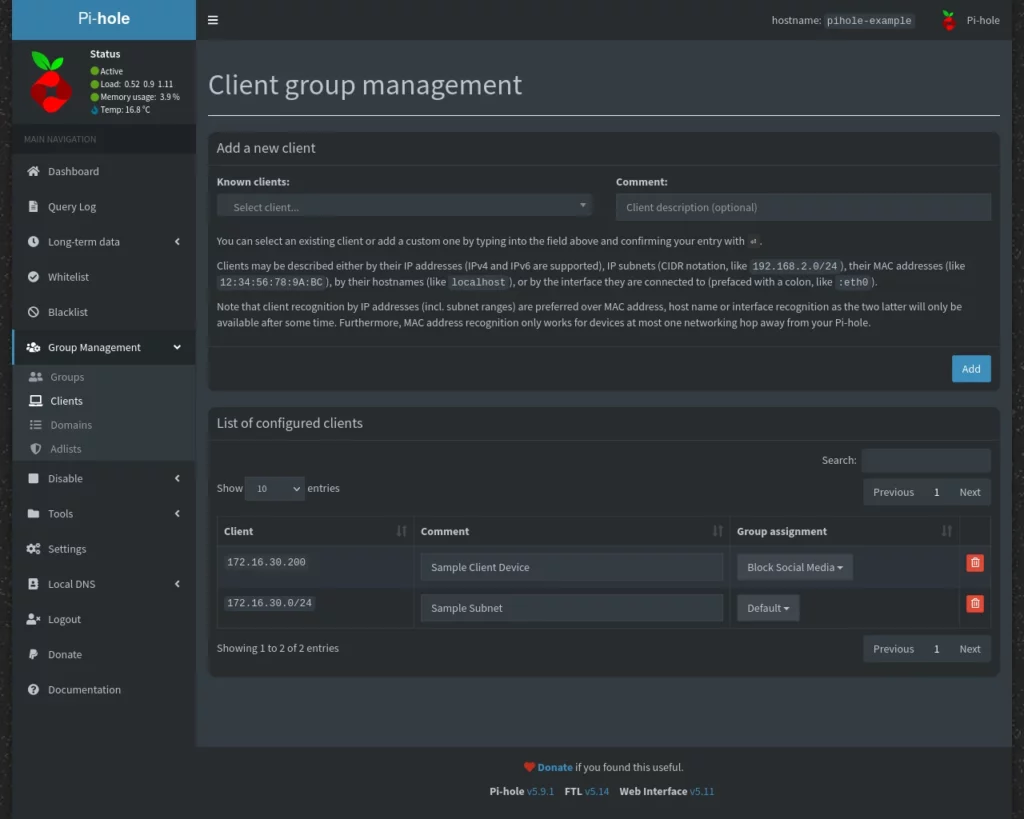
Clients
At this point, the interface should be fairly familiar as they’re all similar. To add a client under Client Group Management, it is recommended to do so using either the client’s IP address or through use of entire IP subnets. While Pi-hole can work with hostnames or MAC addresses, you’ll tend to have fewer issues using one of the other methods of identifying devices.
In my example, I’ve added a sample client device by it’s IP of 172.16.30.200 as well as the entire 172.16.30.0/24 subnet. If you don’t understand IP subnetting, don’t worry too much about it. Just know that in my example, the groups will apply to all devices using the Pi-hole instance for DNS that have IP addresses that begin with 172.16.30
You can also see in the example that I’ve used the Apply button when finished.
To demonstrate that Pi-hole is indeed working, on my sample client, I opened a terminal and did a ping of www.twitter.com before I applied the group to the client and then again after I applied the group. Notice that before it resolved Twitter’s actual IP address of 104.244.42.65 and after instead it returned back the loopback IP address 127.0.0.1. Any domain that is blocked by Pi-hole will return back this value.

Adlists
Let’s take this now a step further and manage Pi-hole’s Adlists. Pi-hole allows add / remove the lists it uses for blocking ads and trackers. To add a new list to Pi-hole simply paste in the URL of the list into the Address field, provide an optional description and then click Add.
If you want to examine additional lists, check out this article from avoidthehack.com on the subject.
In addition to adding and removing lists, we can also assign lists to groups just like we can add our own domain rules. Just like we’ve done previously, specify what groups you want your lists to apply to in the Group Assignment column and then click the Apply button. By default, the default list that is included with Pi-hole is assigned to the default group, however you can change this if you wish.

So for example, you might want the default group behavior to not block ads so you remove the list from the default group. You could create a group specifically called Block Ads then specifically for clients who should have ads blocked.
Hopefully you are beginning to see how you can use all of these tools to customize how each device interacts with your Pi-hole setup. My best advice is to make use of multiple groups with names that make their purpose easy to identify and then assign them to clients as needed.
Disable
Finishing up our look at the basic Pi-hole configuration options, we have the DISABLE menu which has options for INDEFINITELY, 10 SECONDS, 30 SECONDS, 5 MINUTES, and CUSTOM TIME. If for any reason you want to stop all of the Pi-hole functionality and simply return back actual DNS responses without any kind of blocking, you can use one of these options to do so for whatever period of time you choose.
Closing
Congrats! You’re ready now to use your Pi-hole instance!
If you found this tutorial helpful or have any questions, I encourage you to please share it with others and/or leave a comment below. If you would like to support our efforts to create additional resources like this, please consider making a donation. Your support is greatly appreciated! Thanks for reading and I hope you visit again soon!