You’ve installed TrueNAS Scale but until you’ve setup at least one storage pool for your system to use, you won’t be doing much with it. Follow along, here, while I step you through the process to setup your first ZFS pool. Once you’re done, be sure to check out some of my other TrueNAS content where I show you how to setup various applications as well as upcoming content on topics including Intro to Configuring TrueNAS Scale or Getting Started with ZFS.
Before We Begin
A quick note before we begin … on the screenshots in this tutorial, I’ve outlined the important parts on the images with red rectangles to make them easier for you to locate.
TrueNAS Scale Dashboard
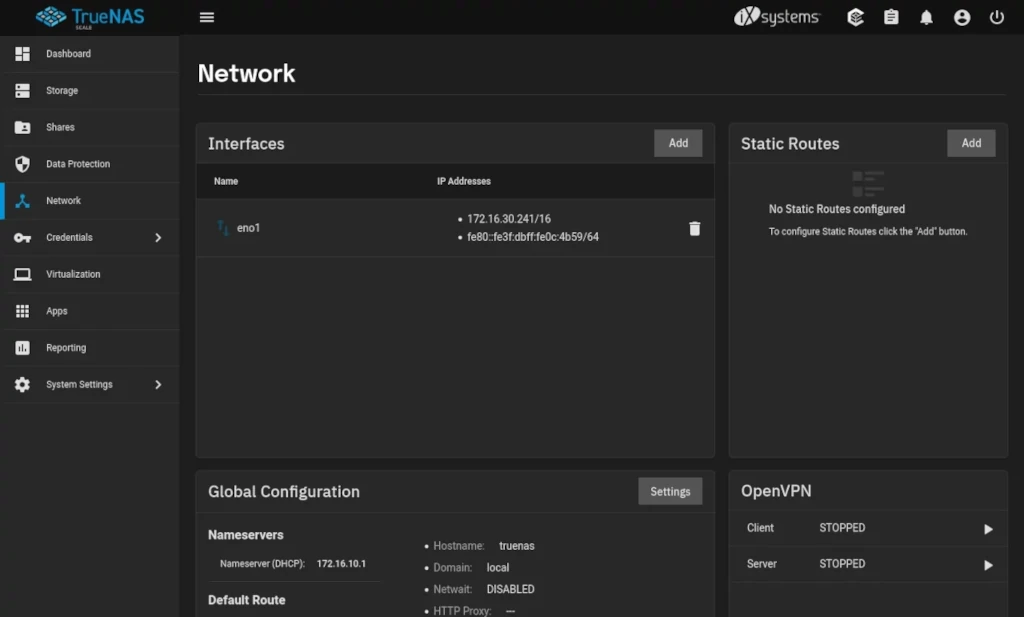
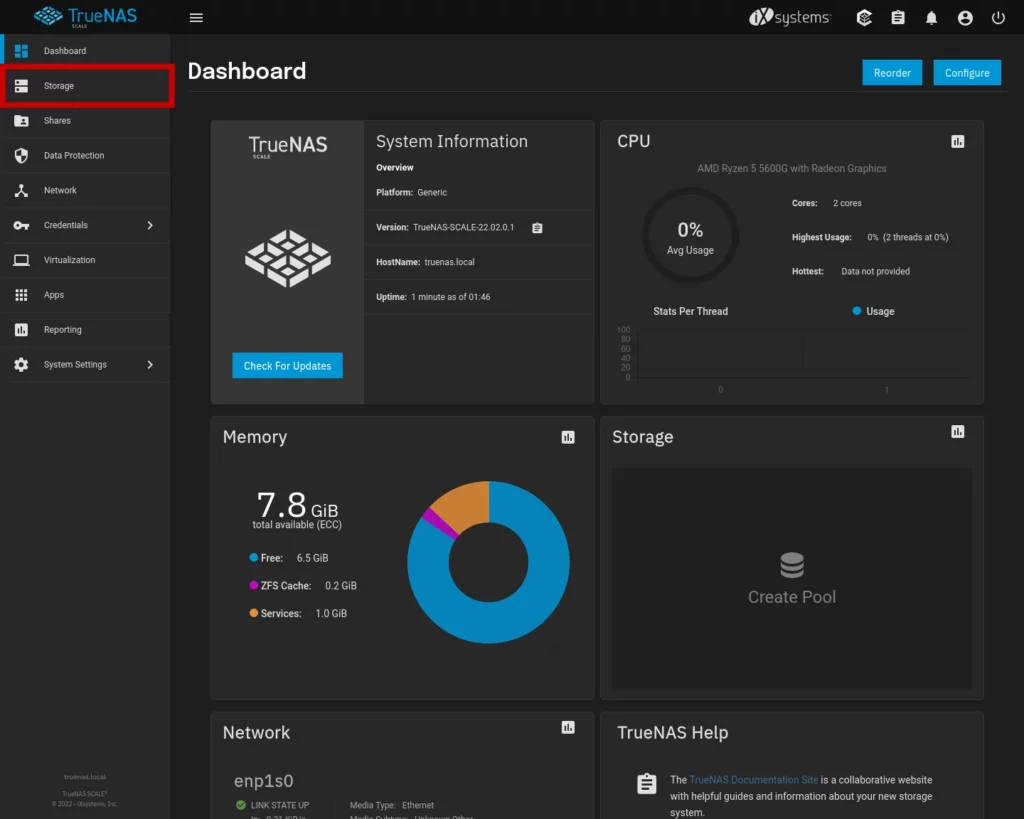
Let’s begin at the beginning with the TrueNAS Scale Main Dashboard and click Storage in the left menu.
Storage Dashboard
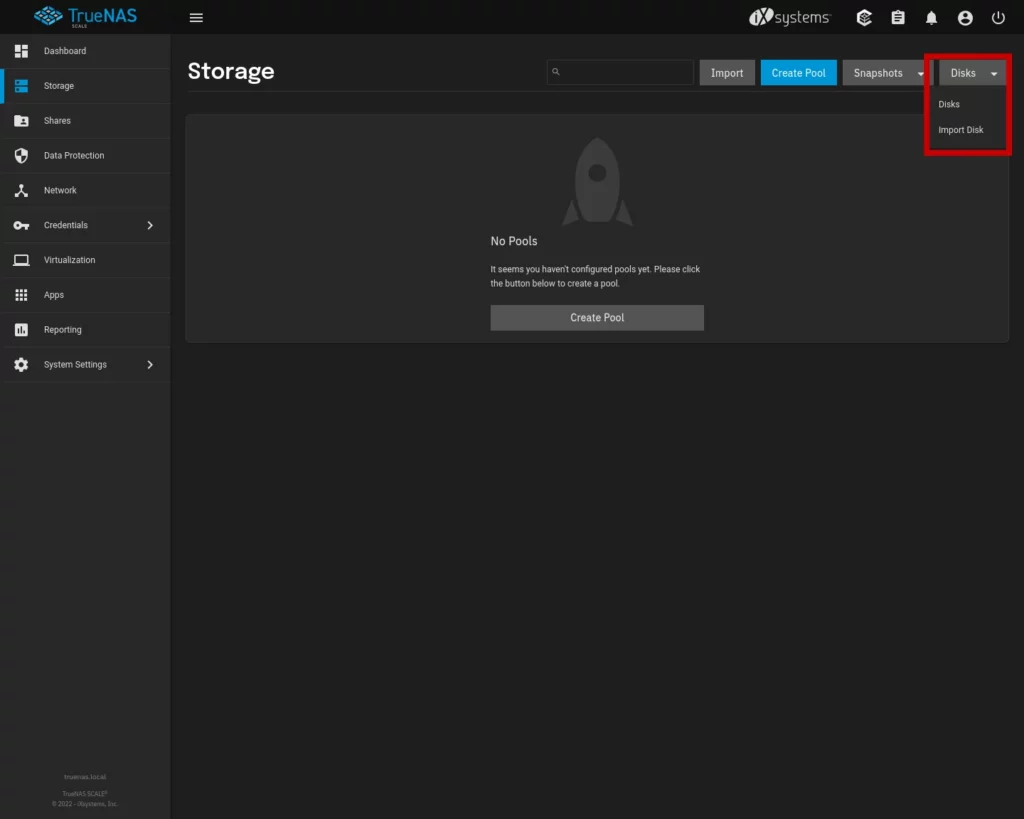
We’re now in the STORAGE DASHBOARD. Before we create our storage pool, we first want to know that TrueNAS is detecting the disks we wish to create the storage pool on. In the top right corner, click on the Disks drop-down and select Disks.
Disks
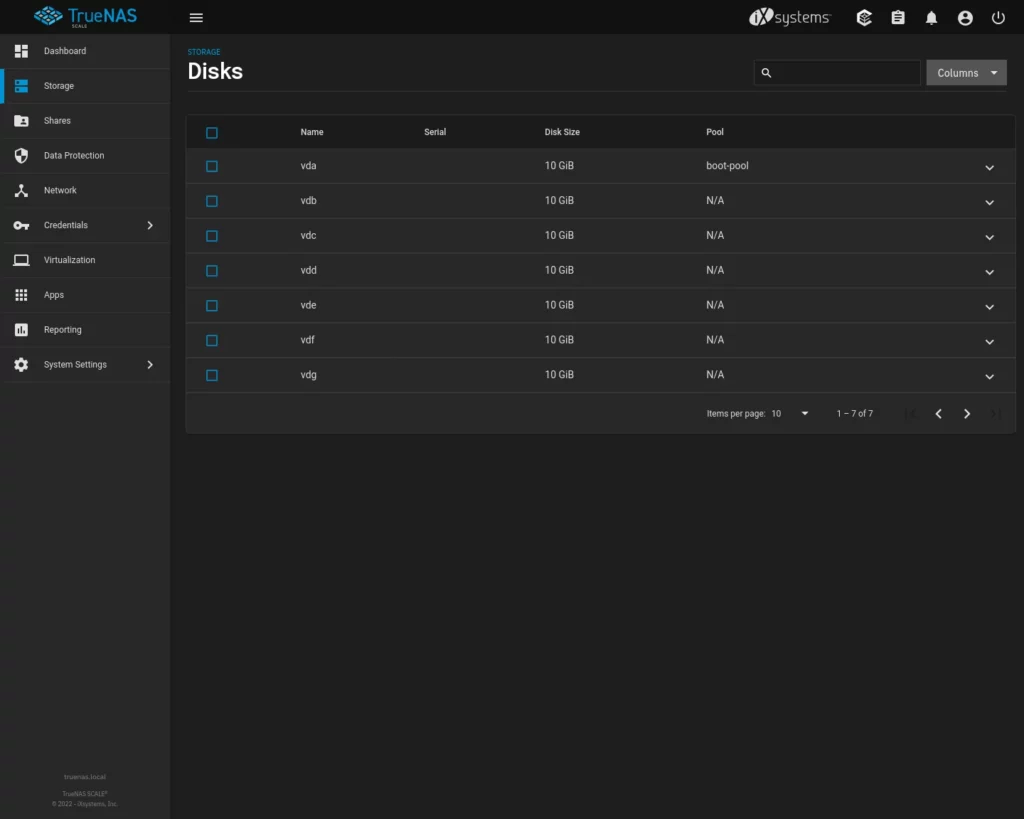
For my example, I’ve created a Virtual Machine for TrueNAS with a total of 7 virtual disks – the first of which is running the actual TrueNAS Scale operating system. I cannot stress enough that what I’m about to demonstrate should not be done using virtual hardware except for demonstration purposes. Do not create multiple virtual disks for an application like this.
You’ll see here that all of our disks are present. If your system is missing any disks, start by shutting down and checking that all of your disks are fully connected to the computer. If necessary, check for possible bad cables. Once you’ve ensured that all of your hardware has been detected properly, go back to the Storage Dashboard.
Creating A Storage Pool
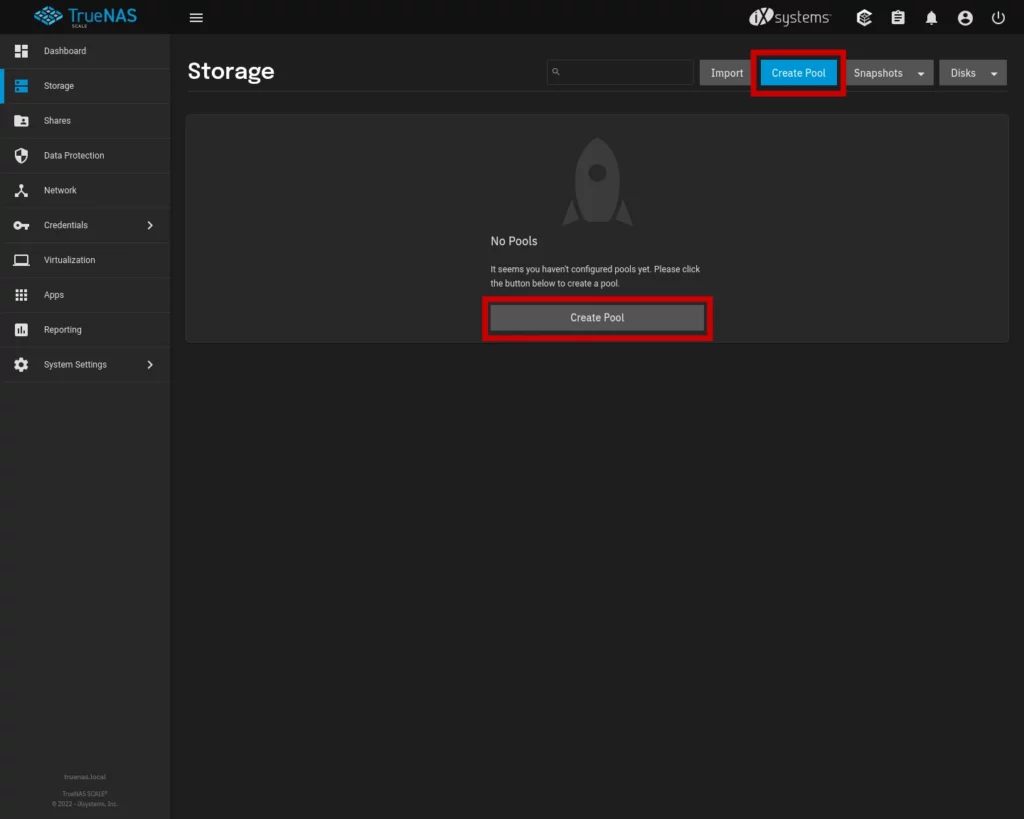
Back in the Storage Dashboard, we have a couple buttons to choose from that both say Create Pool. Click one of them.
Give Your Pool A Name
The first thing we need to do to create our storage pool is to give the new pool a name. You can name it whatever you like, however, I would advice you to consider using a meaningful name if you can – especially if you intend to create multiple pools on your server.
Examples of names might be, Backups for holding file backups or Media-Files if the pool will be dedicated to storing media like movies and music. These are merely suggestions. My personal server has only a single pool of 6 disks that I’ve named HDD-Pool-01 simply because it’s comprised of hard disk drives for the primary storage as opposed to SSDs (solid state drives).
Once you’ve chosen your name, enter it into the name field.

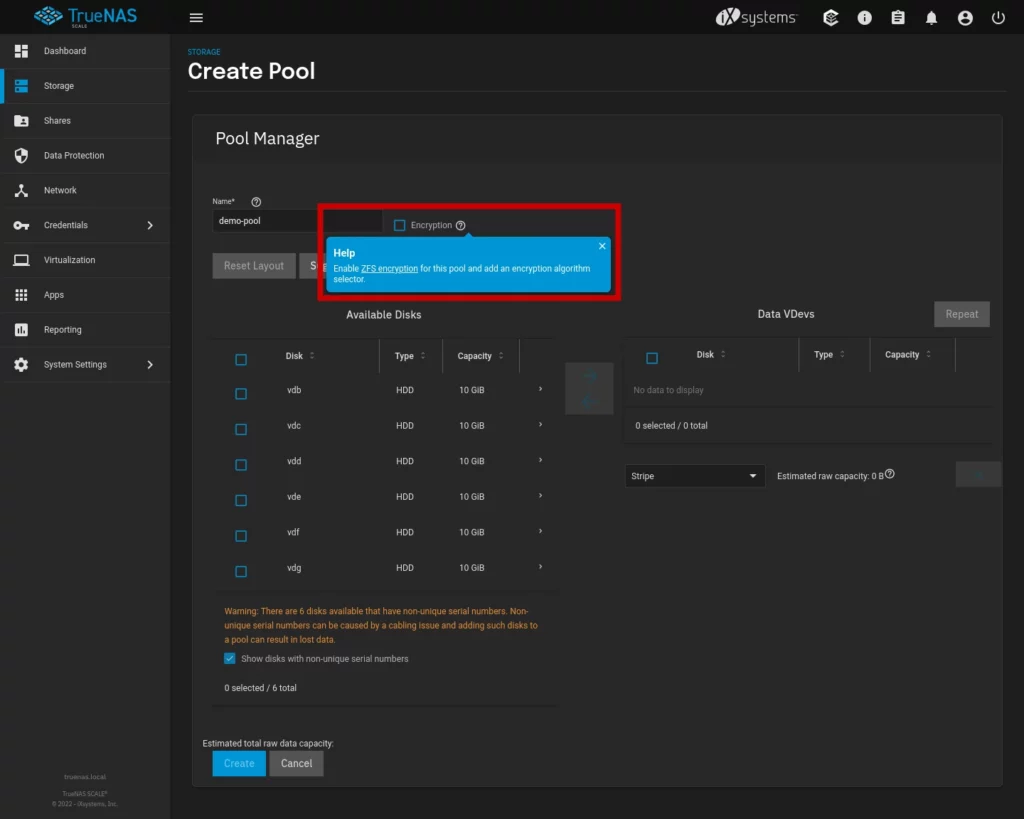
Disk Encryption
I’ll point out here that TrueNAS does offer you the ability to have your files encrypted on the drives (what is often referred to as encrypted at rest). I’ll not be going over disk encryption in this tutorial, however, at least be aware that it’s available. At some point in the future I’ll create additional content to cover this feature.
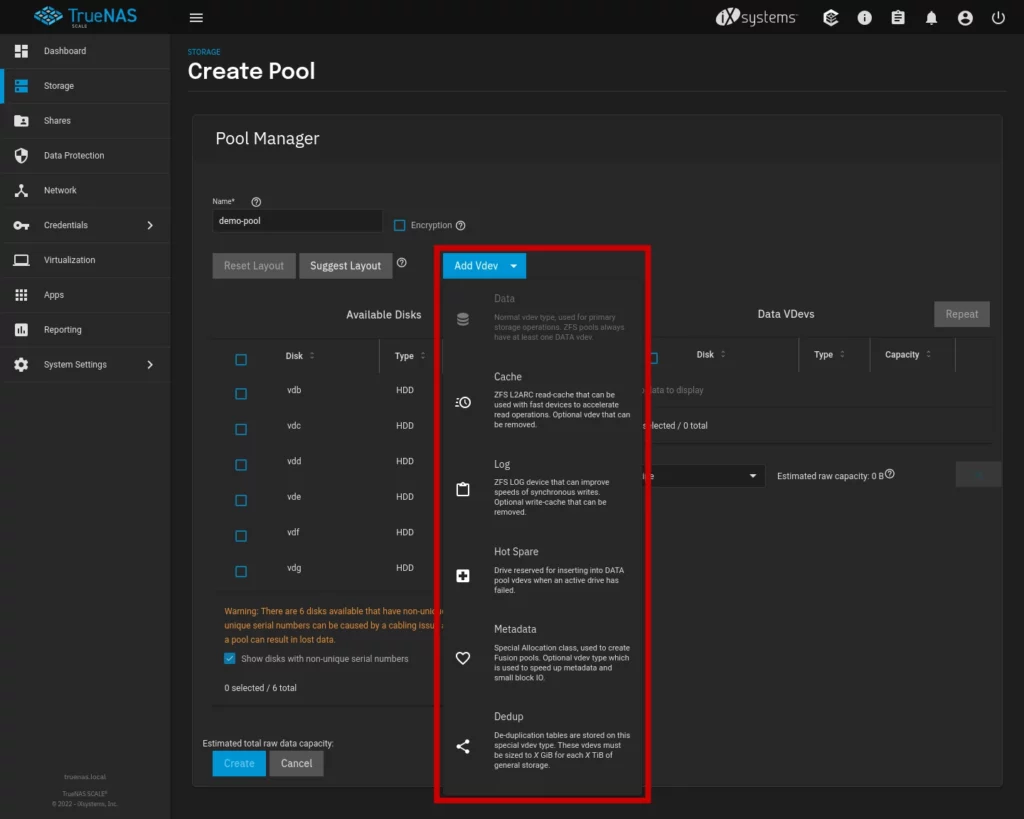
Optional Vdevs
Next up, let’s have a quick look at the various types of vdev available from the blue Add vdev drop down – vdev is short for virtual device. These additional vdev types can enhance your ZFS storage pool’s capabilities. Log vdevs, for example, can be used to improve disk write speeds if you use appropriately fast ssds for the task. Hot Spare devs would be disks held in reserve that the system can automatically use in place of another disk that fails. I won’t be going in depth here into what all of these necessarily are, as that would be an entire discussion about the ZFS filesystem – which I already have planned to write as a separate piece in the future.
However, if you need to make use of additional vdevs in your pool you can select them from this drop down.
When you do, you’ll see an area appear to the right where you’ll be able to assign specific drives to those vdevs. As an example, here you see that I’ve specified that I would like to add disks as a Log vdev.
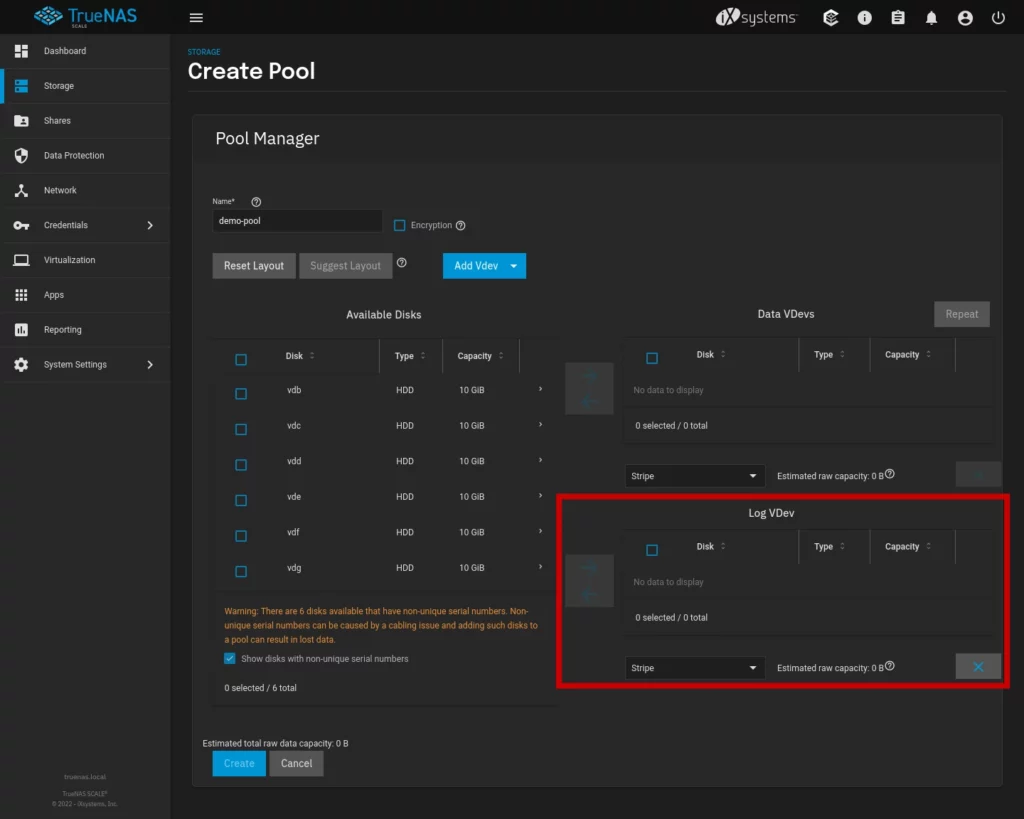
Going forward with this example, we’ll only be working with the minimum required Data vdev section.
Add Disks To Vdevs
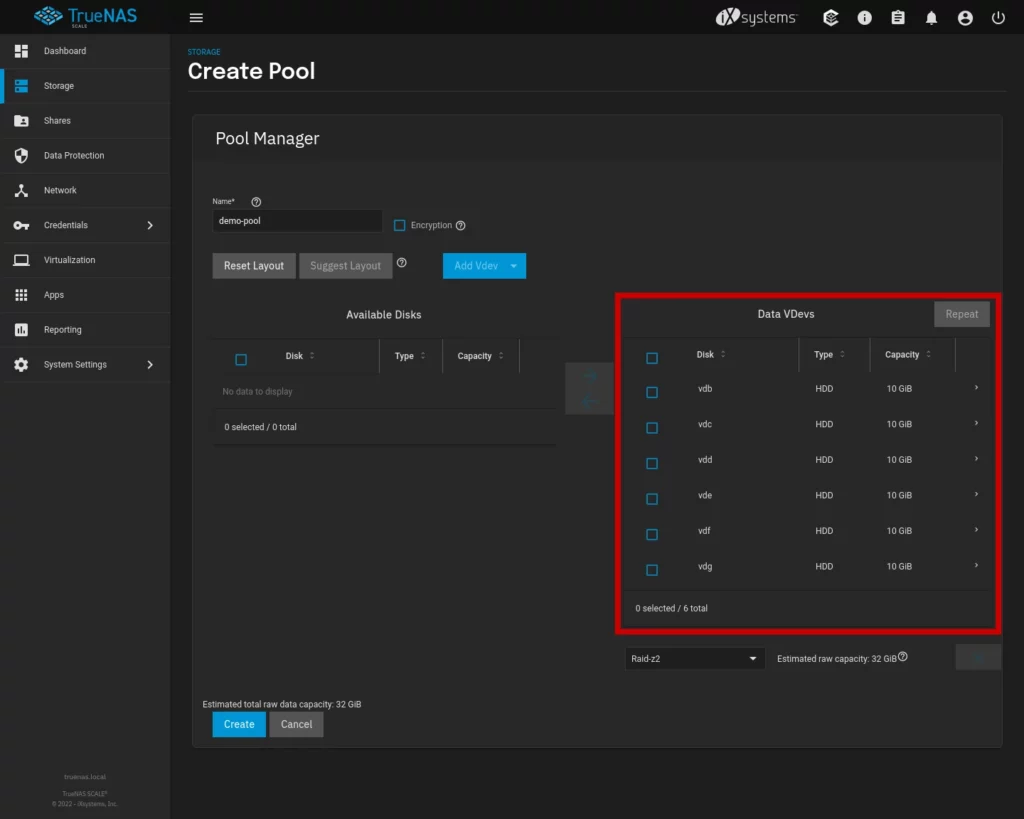
To add a disk to a vdev, you’ll see Checkboxes to the left of each disk under the Available Disks section. When you check one more more of these you’ll notice the Right Pointing Arrow button in the middle will be enabled. Clicking this button will add the checked disks to the corresponding vdev section.
You’ll notice in my screenshot here that TrueNAS is warning me about my disks having non-unique serial numbers. As I’ve mentioned already, this is due to my demo server being created as a virtual machine. If your server is using actual physical disks you should not see this warning.
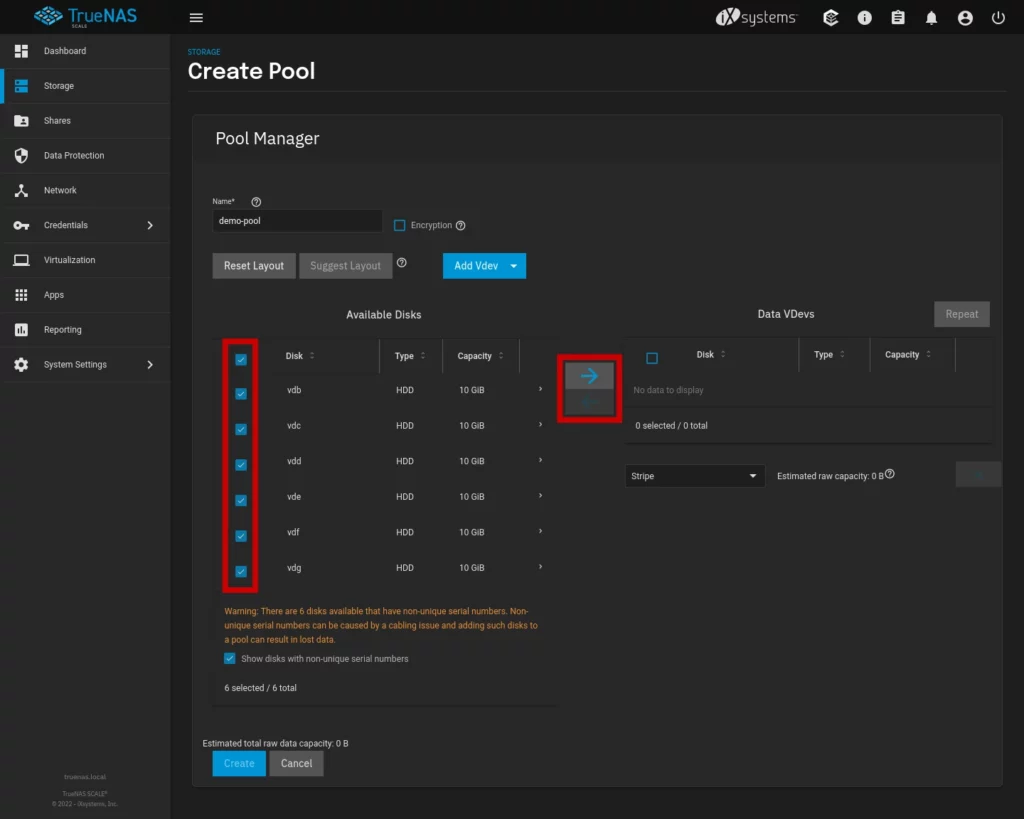
You’ll see now that I’ve added all six of the disks in my example to the Data vdev section.
Choose Your Storage Layout
The last thing we need to decide before we create our storage pool is what kind of layout we wish to use. Under each option, I’ll provide a brief description of what each means. If you’re at all familiar with traditional disk RAID options, these should be familiar. Options include:
STRIPE
A stripe layout has zero disk redundancy. The data is stored in stripes across all of the disks of the volume. This is the fastest performing option and you don’t lose any disk capacity, however, if a single drive dies you will experience data loss.
MIRROR
A mirror layout stores all data on every disk in the pool. This option has the absolute maximum redundancy available but at the cost of disk capacity. With a mirror, your usable disk space is whatever the size of a single disk in the pool can hold.
RAID-Z
RAID-Z functions similarly to a traditional RAID 5 setup. In this layout, your pool has a single parity disk. This means if one of your disks should fail, your storage pool will continue to function without data loss – allowing you to replace the bad disk. You lose one disk worth of storage space but gain minimal protection from data loss due to disk failure.
RAID-Z2
RAID-Z2 works much like RAID-Z except your pool uses two disks for parity data. You can have up to two disks fail without losing data, however, this comes at the cost of two disks worth of capacity.
RAID-Z3
RAID-Z3, predictably, works like the last two layouts except that it uses three disks for parity data. You can have up to three disks fail without losing data but at the cost of three disks worth of capacity.
TrueNAS Scale will make it’s own recommendation of what layout to use after you’ve added your disks to the vdev. Ultimately, which layout you choose will depend upon a number of factors such as how many disks you’re using and what kind of tolerance you have for disk of data loss vs lost disk capacity.
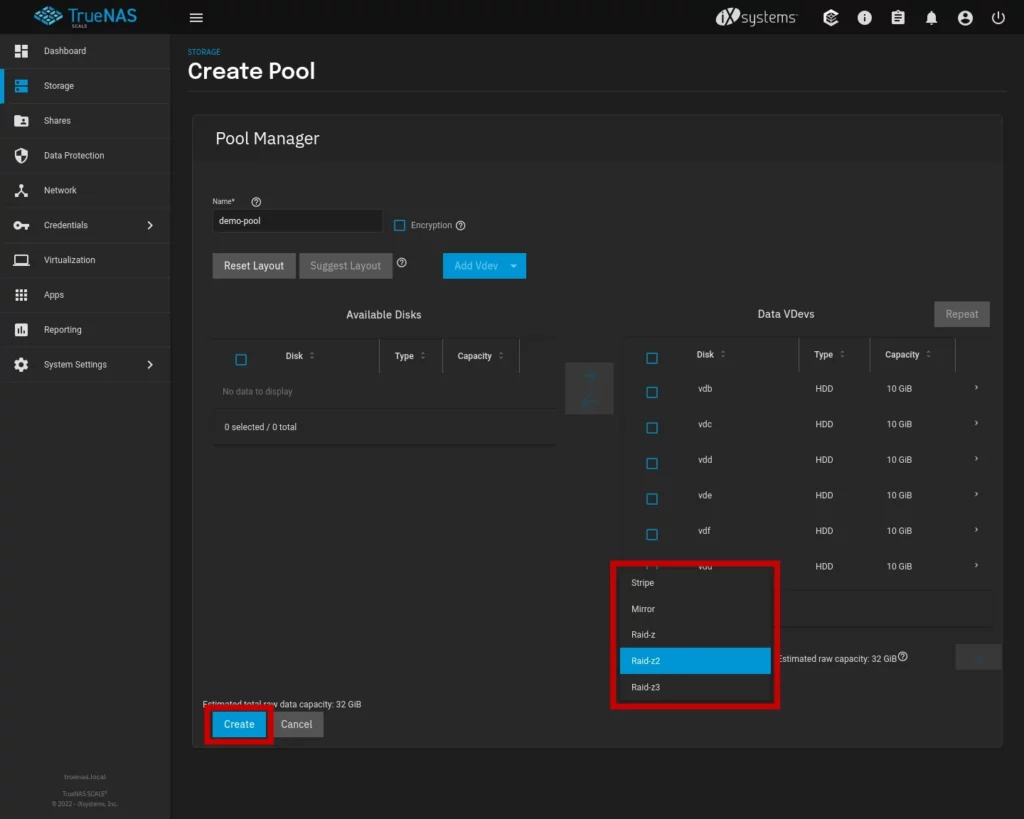
Once you’ve chosen your storage layout, click the blue Create button.
Pool Setup Complete
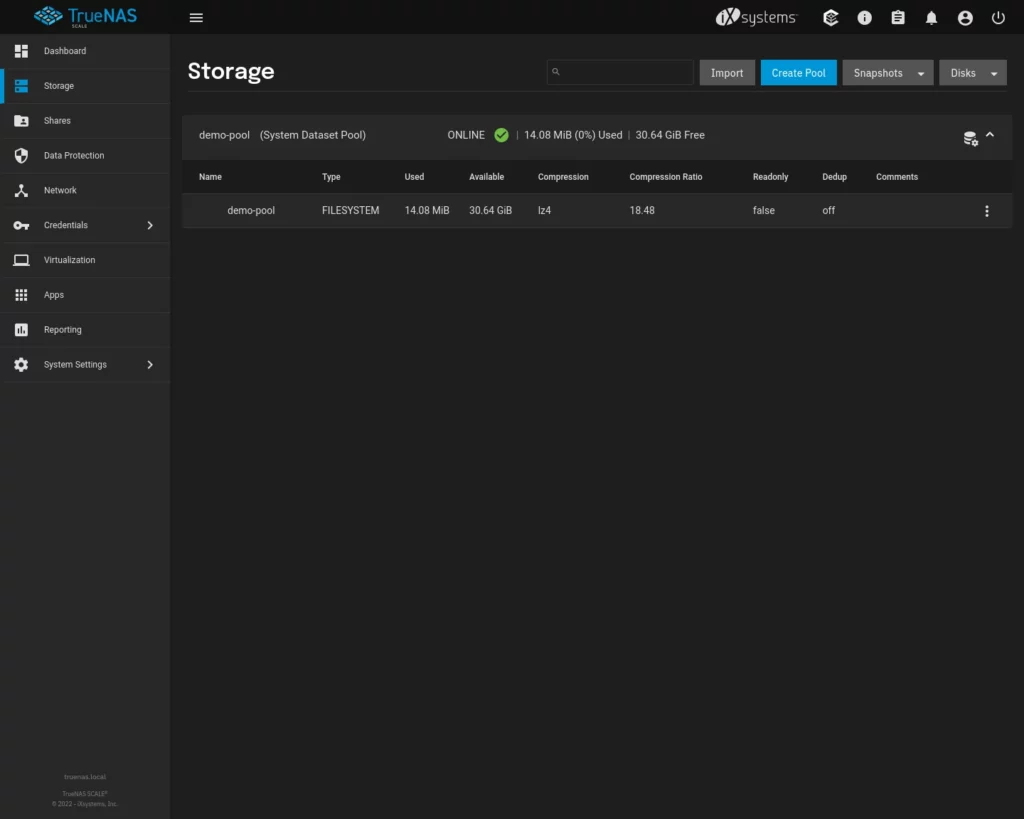
After a few moments, in the Storage Dashboard you’ll see your storage pool appear along with some statistics such as how much space has been used and how much is currently available.
Pool Quick Stats
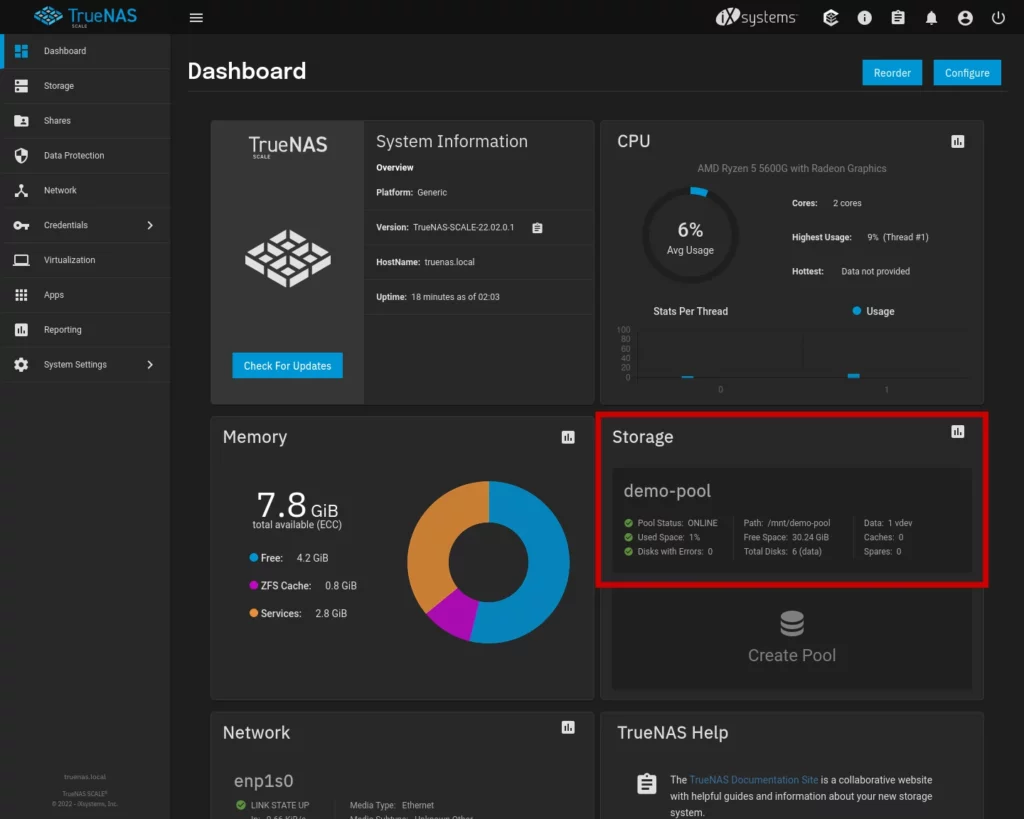
Lastly, you can get a quick glimpse at the heath and usage stats of your storage pool at any time from the Main Dashboard.
Thanks
If you found this tutorial helpful and would like to support our efforts to create additional resources like this, please consider making a donation. Your support is greatly appreciated!
If you can’t make a donation, please consider sharing this tutorial with others who may be interested. If you have questions about anything regarding this tutorial, please be sure to leave them in the comments below. Thanks for reading, and I hope you visit again soon!