This tutorial details how to configure a static IP in Ubuntu. This tutorial was written for headless Ubuntu Server 22.04 installs but should work with other versions – such as 20.04 – of Ubuntu Server as well. When updated versions of Ubuntu Server are released, I will update this tutorial as necessary.
Before We Begin
Above, I mentioned that this tutorial is meant for headless systems. If you don’t know what headless means in this context – it’s a reference to a system/server without a graphical interface or even without a monitor attached at all. All changes to a headless system are generally done through a remote connection using a command line terminal.
The reason this tutorial is specific to headless systems is that a system with a graphical interface setup is likely using a graphical program called Network Manager to handle configuring networks for the system.
IP Address / Subnet Basics
If you’re using this tutorial, there’s a chance you might not have a strong knowledge of IP addresses and subnet masks. If you need to brush up on some basic info on IP addresses and subnets, I’ve written an additional tutorial that should give you enough understanding to complete this tutorial.
Check Your Existing IP
The Ubuntu installer gives you the option to configure a static IP address as part of the installation procedure. Because of this, before we modify any settings, let’s have a look at the existing IP address on your system to check if this is the case. Run this command in the terminal to view your existing IP address information:
ip aThe output should look similar to this but specific to your system:
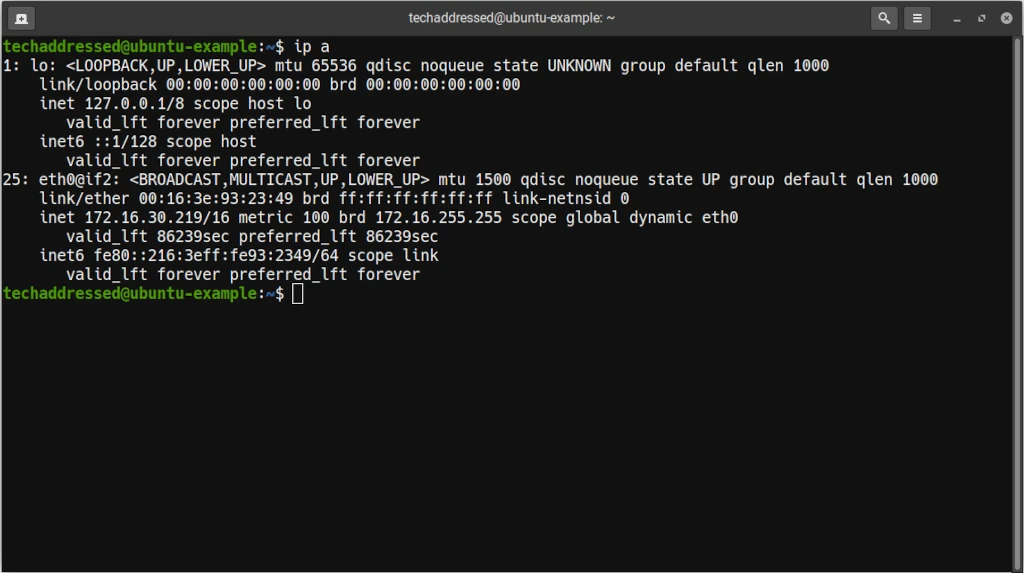
Notice for the device eth0@if2 (this is the network device for my my LXD container based demo environment) that the address is listed as dynamic meaning that the IP has been assigned via DHCP.
If your results don’t say dynamic, your system is already configured with a static IP address and no further changes are necessary unless you need to modify the server to use a different IP address.
Once you’ve determined that your system does indeed have a dynamic IP address, you can proceed with modifying your configuration for a static IP.
Configuring Your Static IP In Ubuntu
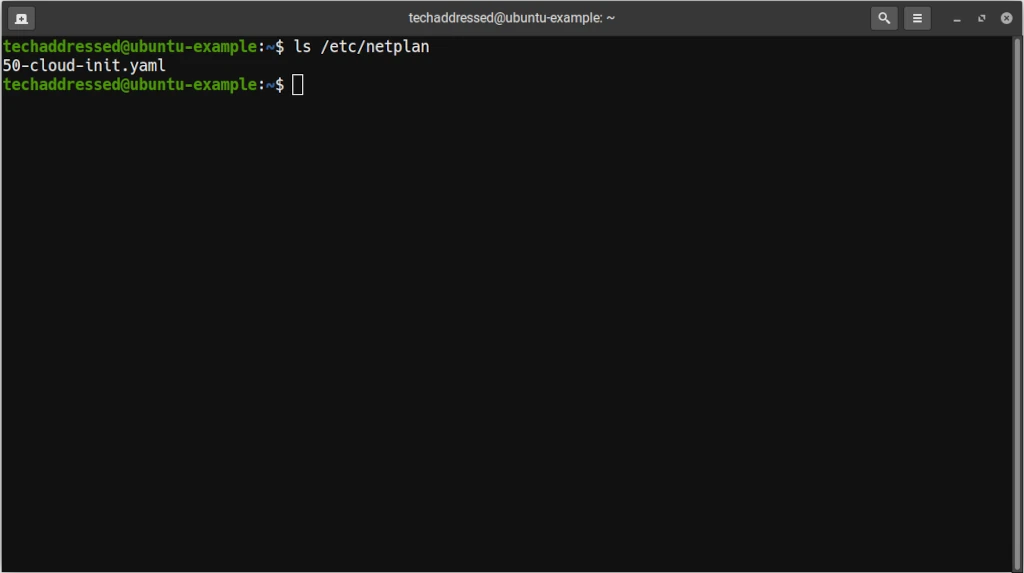
Older versions of Ubuntu used to use the same network configuration system as Debian, however, newer versions of Ubuntu use software called Netplan for controlling networking. The configuration file you need to modify can be found in /etc/netplan/ folder. This file doesn’t necessarily have a consistent name – depending on how your system was installed. To view the files in that folder, run this command:
ls /etc/netplanThe results will be something like this. Two likely file names you might see are either 00-installer-config.yaml or 50-cloud-init.yaml.
Whatever your specific config file is – to edit it, we’ll use the nano editor as it’s fairly easy to use:
sudo nano /etc/netplan/50-cloud-init.yamlor
sudo nano /etc/netplan/00-installer-config.yamlYour default configuration should look similar to this:
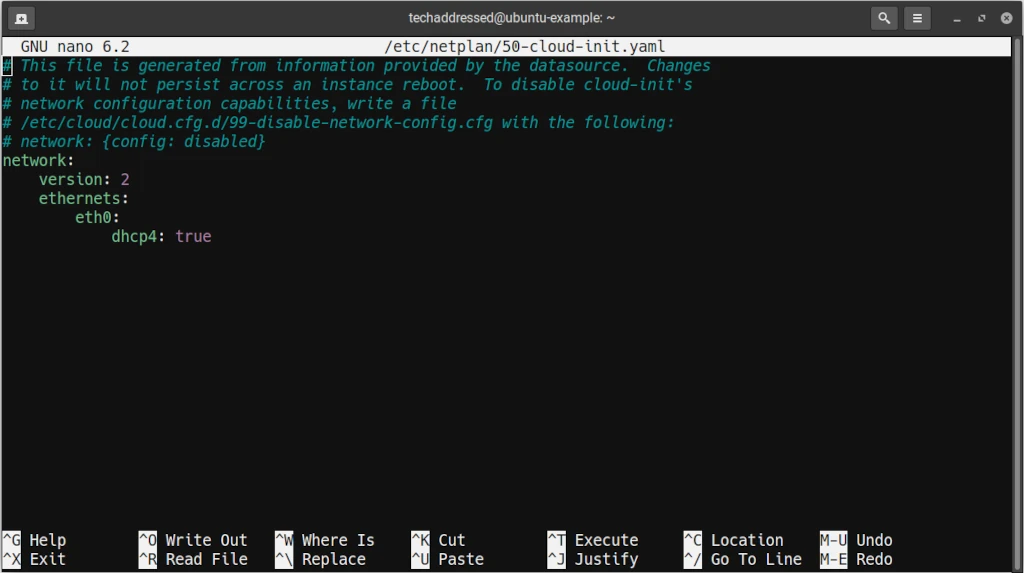
We want to delete all of the settings here and replace it with settings like the one’s I’ve provided below. Be sure to modify the values to be appropriate for your own network.
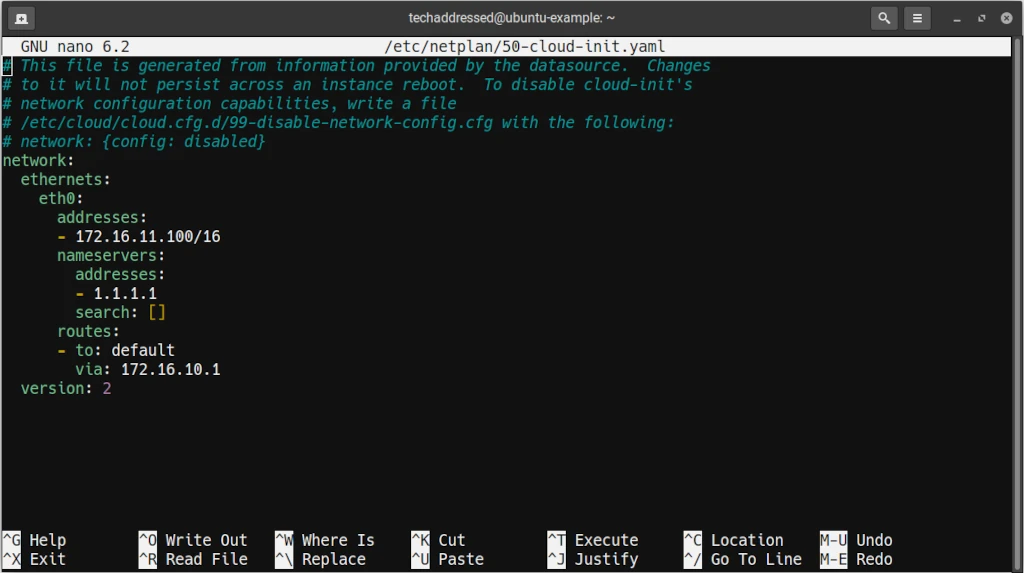
network:
  ethernets:
    eth0:
      addresses:
      - 172.16.11.100/16
      nameservers:
        addresses:
        - 1.1.1.1
        search: []
      routes:
      - to: default
        via: 172.16.10.1
  version: 2
I’ll take a moment to mention – you can use whatever DNS nameservers you prefer on your systems. On server systems I prefer to use Cloudflare’s 1.1.1.1 public DNS for their lightning fast speed. On desktop systems, I prefer to use Quad9’s DNS servers as I prefer the additional privacy / security their system offers.
Once you’ve finished making changes, the resulting configuration should look similar to this:
To exit saving the changes you’ve made, on your keyboard press CTRL + X and when prompted to save press Y for yes.
Once the file has been saved, we need to apply these new settings. To do this, type in:
sudo netplan applyand then check the IP address to verify that your new settings have applied:
ip aThe output should look similar to this:
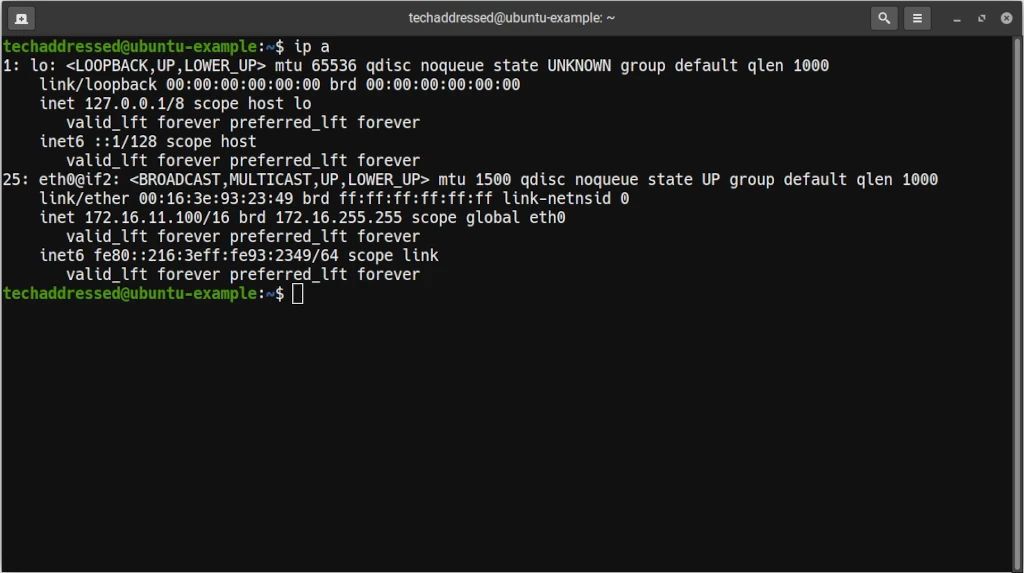
If we check the eth0@if2 interface again, notice that the address is now the static IP I’ve specified and it is no longer showing as being dynamic.
Conclusion
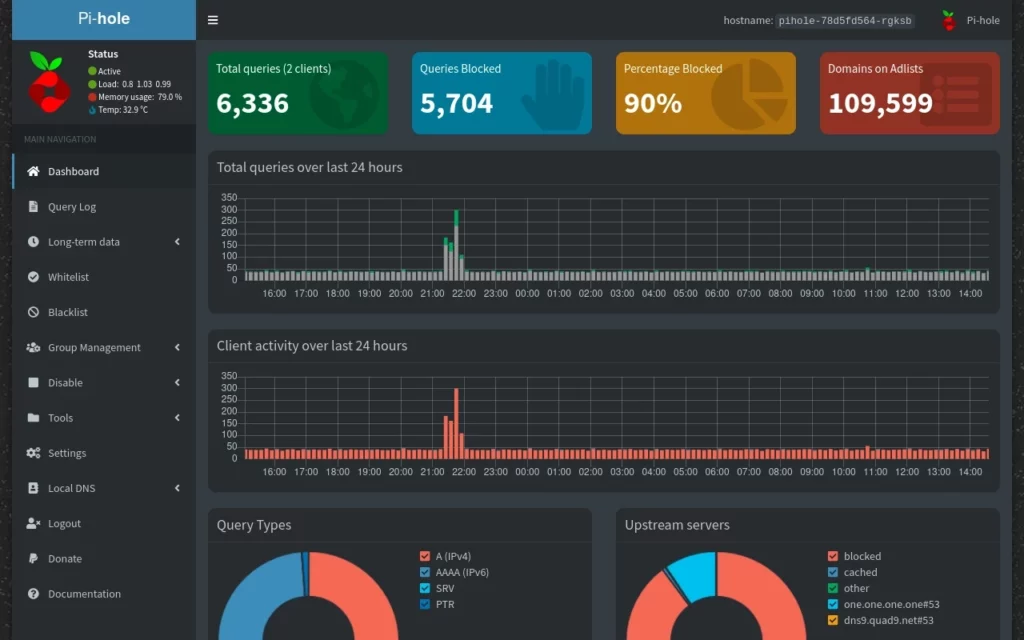
Setting a static IP in Ubuntu isn’t difficult once you know how to do it. If you’ve used this tutorial to prepare a system for a server application – perhaps like Pi-hole, Gitea, or Minio – you’re now ready to continue setting up your new server app.
If you found this tutorial helpful and would like to support our efforts to create additional resources like this, please consider making a donation. Your support is greatly appreciated!
If you can’t make a donation, please consider sharing this tutorial with others who may be interested. If you have questions about anything regarding this tutorial, please be sure to leave them in the comments below. Thanks for reading, and I hope you visit again soon!