In the world of self hosted webmail clients, SnappyMail has distinct advantages over the alternatives. It’s not only easy to deploy and manage, but also offers superior support for handling multiple email accounts. Whether you’re a seasoned sysadmin or a Docker novice, this comprehensive tutorial will guide you through the process of deploying Snappymail using Docker Compose – whether in the cloud or in your own homelab.
SnappyMail was born as a fork of Rainloop, a once-popular webmail client that was eventually neglected by it’s developers. A dedicated community of developers decided to revive the project under the new SnappyMail name – providing a number of bug fixes and security patches, making it an excellent choice for anyone seeking a reliable webmail interface.
Snappymail’s existence is a testament to the power of open-source collaboration, with passionate contributors working together to revive this user-friendly webmail client. Whether you’re focused on improving data privacy by self-hosting your webmail client or simply exploring alternatives to your current webmail client, Snappymail offers an accessible, modern, and customizable solution.
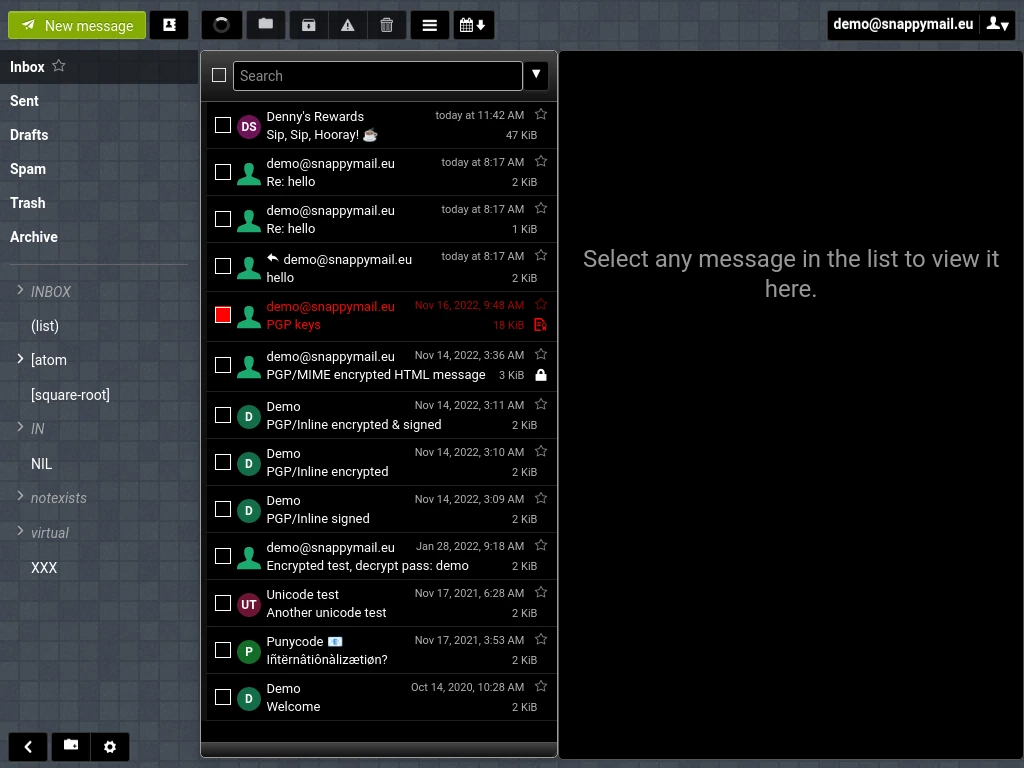
Table of Contents
Before We Begin
Before we dive into deploying Snappymail, we should first discuss what SnappyMail does and does not do, and then we’ll need to ensure that everything you’ll need for this tutorial is ready to go.
What SnappyMail Does / Does Not Do
I want to be clear up-front about what exactly SnappyMail does and does not do before you get it setup and discover it’s not what you expected. SnappyMail is a web based IMAP/SMTP email client. It is DOES NOT setup a server for you to host your own mail.
In order to use SnappyMail you’ll need to have an email account hosted somewhere already – whether that somewhere is your own email servers that you manage yourself or servers run by a hosting company. In theory, you could use it to check a Gmail account, however, ultimately this is meant more for accessing email accounts for a domain you own.
For example, the email accounts associated with the techaddressed.com domain are hosted by a company called DreamHost (affiliate). If I wanted to use SnappyMail to access these email accounts, I would need to configure it to access the servers at DreamHost – this tutorial does cover how to do this type of configuration.
Somewhere To Deploy SnappyMail To
With that out of the way, before you can begin to deploy SnappyMail you’ll need to determine where you want to run it from. This could be virtual machine in your homelab, a tiny device like a Raspberry Pi (affiliate), or a cloud server from a company like DigitalOcean (affiliate) or Akamai (affiliate). SnappyMail doesn’t use up very much in the way of system resources. As long as the system is running Linux, wherever you decide you want to run your app from should work fine.
IMPORTANT: All terminal commands given in this tutorial are for Debian / Ubuntu based Linux distros. If you’re installing to something different – such as RedHat, for example – you’ll need to adjust accordingly.
Email Server Information
As I mentioned previously, SnappyMail allows you to check email accounts so we’ll need to be able to configure it with the settings for your email server(s). There are more providers that I can give you information for so you’ll need to be sure to find out the IMAP and SMTP settings for your provider – server hostnames, encryption types, and ports – and have those handy.
Determine Your Serinstalling to, make a note of this. You’ll need to know this later when setting up your docker-compose.yml file.
System Configuration
Before you can deploy SnappyMail using Docker Compose, you’ll need to be certain that your server is configured to run Docker containers. First, let’s ensure that your OS & software are completely updated. Run the following commands from a terminal.
sudo apt update && sudo apt dist-upgrade -yOnce updates have completed, installing the necessary Docker packages is simple.
sudo apt install docker.io docker-compose -yIf you want to be able to issue Docker commands on your system without having to use the sudo command to elevate your user permissions, add your account to the docker group using the following command.
sudo usermod -aG docker usernameAt this point, in order for the new group membership to take effect, you’ll need to log out of the system and then login again. Once done, you’ll be able to issue docker commands without the need for sudo.
Recommended: Uncomplicated Firewall (UFW)
While not strictly required, it is HIGHLY RECOMMENDED for the security of your system that you configure a firewall. Unless you’re an advanced user who knows how to setup and configure iptables or ipchains firewall rules, you’ll want to make use of the Uncomplicated Firewall, or UFW, for this. We’ll start with installing the ufw package.
sudo apt install ufw -yNext, we need to tell UFW what ports you want open. By default, all ports are closed. At the minimum, you’ll want to be sure to open any ports you’re using to remotely access the server, such as via SSH. By default, SSH uses port 22 over TCP. To open this port, enter the following command.
sudo ufw allow 22/tcpLastly, you need to enable UFW for the new rule to take effect.
sudo ufw enableYou can check the status of UFW with this command.
sudo ufw statusWhen finished, your UFW status should look similar to this.
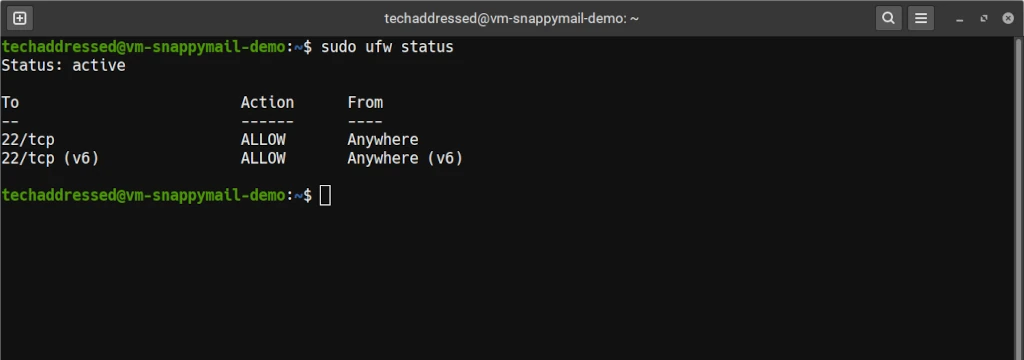
We’ll open additional ports as needed further along in this tutorial.
Recommended: Configure A Reverse Proxy
If you’re intending on your SnappyMail deployment to be available on the public internet, regardless of whether you’ve deployed it in your homelab or in the cloud, I highly recommend putting it behind a reverse proxy. I have three reasons for this recommendation:
- Remove the need to specify a port number in the URL
Because we’re deploying the software using Docker, we’ll be specifying a port number for the container that is unique to it. In the end though, do you want to have to have users specify a port number in the URL? This is likely to cause issues / confusion. Putting SnappyMail behind the reverse proxy simply makes things easier for your users and ultimately for you as well.
- More easily enable HTTPS / SSL encryption
Simply put, configuring SSL termination at the reverse proxy is a lot easier than having to implement it at the container level.
- Provide an additional layer of security
Much like with SSL, it’s easier to implement a firewall and other security measures – such as software like CrowdSec – at the reverse proxy instead of having to implement it at the container level.
If you don’t know how to configure a reverse proxy, I have a tutorial on how to setup & configure reverse proxies in Nginx that can help you with this.
SnappyMail Deployment
Now that all of the system preparation is done, we’re ready to deploy SnappyMail.
Folder / Directory Creation
First we’ll need somewhere to put your containers on the server. My personal preference is to just create a docker directory under my home to hold subdirectories for each container. To create the folders we’ll need using this convention, run the following command.
mkdir -p ~/docker/snappymailWith the directory created, we’re ready to move on to creating a docker-compose.yml file.
Create Your docker-compose.yml
First, change your current directory to the snappymail directory we previously created.
cd ~/docker/snappymailNext we’ll open up the nano editor to create our docker-compose.yml file that will contain the Docker configuration for our container.
nano docker-compose.ymlCopy the one following configuration and then paste it into nano.
version: '3'
services:
  snappymail:
    container_name: snappymail
    image: djmaze/snappymail:latest
    restart: unless-stopped
    volumes:
      - ./data/:/snappymail/data/
    ports:
      - 8888:8888
      - 9000:9000
    restart: unless-stopped
Once done, your editor should look similar to this. Please note: the container repository has changed since these screenshots were made.
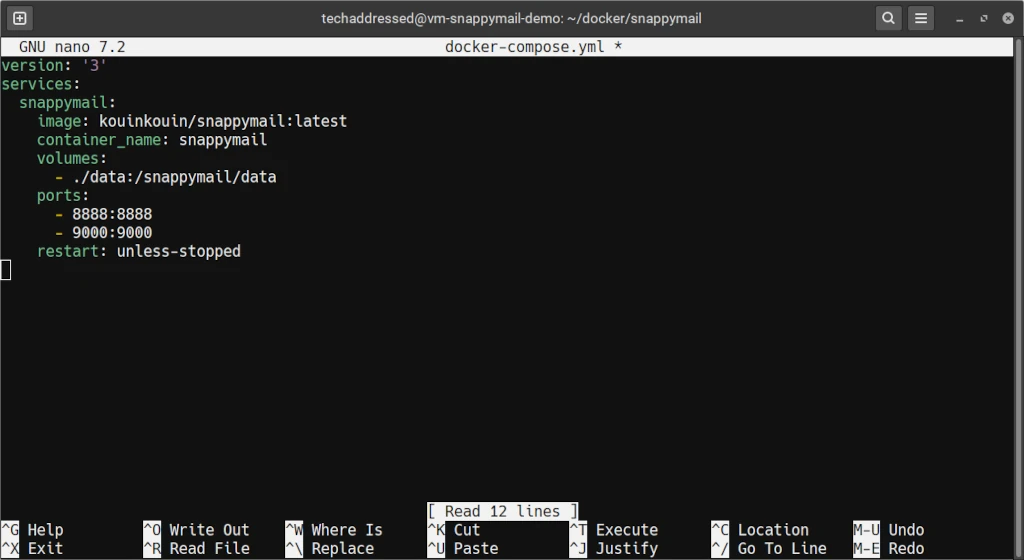
At this point, you’re ready to save and exit. Press CTRL + O and then ENTER to save then CTRL + X to exit nano.
Let’s take a minute to go over the most important parts of this configuration.
image
The image value is the only one that differs between the two examples. This indicates to Docker which container image to use when creating your container. If you notice we’ve specified something called a tag at the end of the image – it’s the part following the colon that says latest. Here we’re specifying to use the latest version of the image available. Doing this will make it easier on you to keep your container updated.
container_name
The container_name can be anything you want to name your container. It’s best to make sure the name identifies the software inside it in some way. This is especially useful if you’re deploying more than one container with the same software. Say, for instance, you wanted containers for two different domains – you could name them snappymail-domain1 and snappymail-domain2 – making it easy to know which container belongs to who.
volumes
The volume we list here tells Docker to use a location on the system running the container as a storage location inside the container. In this configuration, we’re using a directory named data that’s inside our snappymail directory to store data for the container and we’re telling Docker to map it to /snappymail/data inside the container. Configuring storage local to the system running your containers like this allows that data to persist during reboots and other interruptions.
ports
Here we can configure which ports your container will be able to be accessed through. The ports on the left of the colon are the ones that your system will listen to while the ports on the right of the colon are the ones that the container is listening for. Docker will automatically map the external ports to the associated internal ports.
Do not change the values on the right side of the colon. You can, however, alter the external ports on the left. For example, if you’re already running a container on port 8888, you will need to specify another port for SnappyMail.
For the purposes of this tutorial, we’ll be leaving the ports as-is.
restart
Lastly, we have the restart value. I always prefer to specify unless-stopped so that my containers to reboot unless I’ve manually stopped them myself. This is helpful for keeping your container running in the event that the container stops running for any reason – including a reboot – unless I’ve otherwise told the container to stop running.
Starting The Container
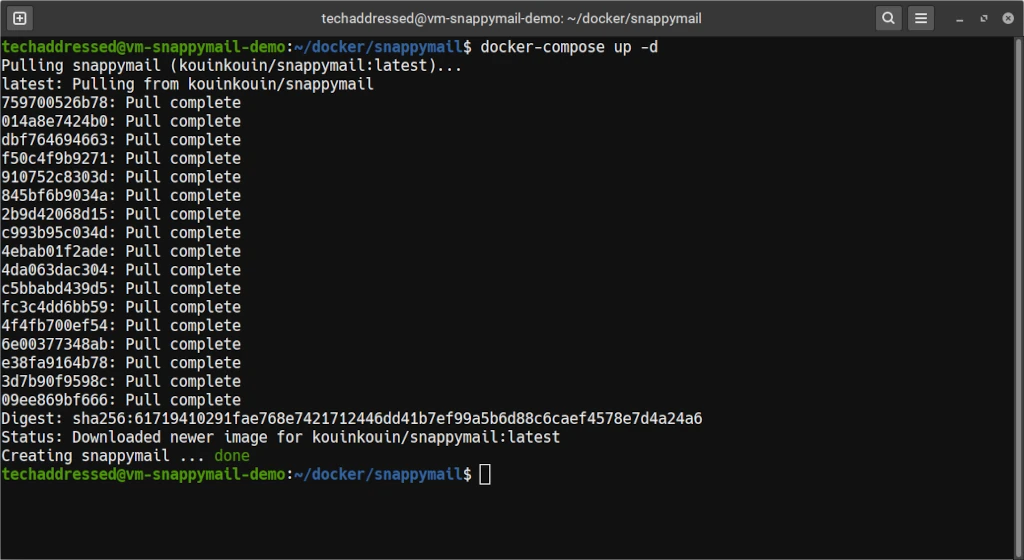
Starting a Docker container with docker-compose is simple. Once your docker-compose.yml file is ready, run the following command from inside your container’s directory.
docker-compose up -dWhen you run this command for the first time, the output will look similar to the following screenshot. If your output doesn’t look like this, it’s possible that you didn’t give your user account Docker permissions properly earlier in this tutorial. Go back and double check that this isn’t the case.
Now that your SnappyMail container is running, I’ll take a few moments for those who are new to Docker how to also stop and update your container before we get to discussing how to access and configure SnappyMail.
Stopping The Container
Stopping your running container is simple. If you’re not already in the snappymail directory, navigate into the directory.
cd ~/docker/snappymailNow, to stop the container, simply run the following command.
docker-compose downBecause we specified for Docker not to restart the container “unless-stopped”, Docker will shut down the running container and won’t start it again – even after a reboot – until you restart it yourself.
Updating The Container
Updating your container is just as simple as starting and stopping it. From the snappymail directory that holds the container, run the same command used to start the container – even if the container is running.
docker-compose up -dBecause we specified the latest flag in our container configuration, this will cause Docker to check for an updated version of the container. If one exists, it will then download the update and restart your container with the new version.
Accessing SnappyMail
For the purposes of this tutorial, examples showing how to access SnappyMail will use IP addresses only instead of domain names to somewhat simplify things for anyone who is new to self hosting applications. Sufficed to say, though, if you intend on accessing SnappyMail from the public internet you will will want to use a domain name. For this, as I mentioned previously, I highly recommend using a reverse proxy.
To access SnappyMail, we’ll need to know the IP address of the system it’s deployed on. I’m going to assume if you’ve made it this far into the tutorial that you already know what the IP address is that I don’t need to explain how to find it.
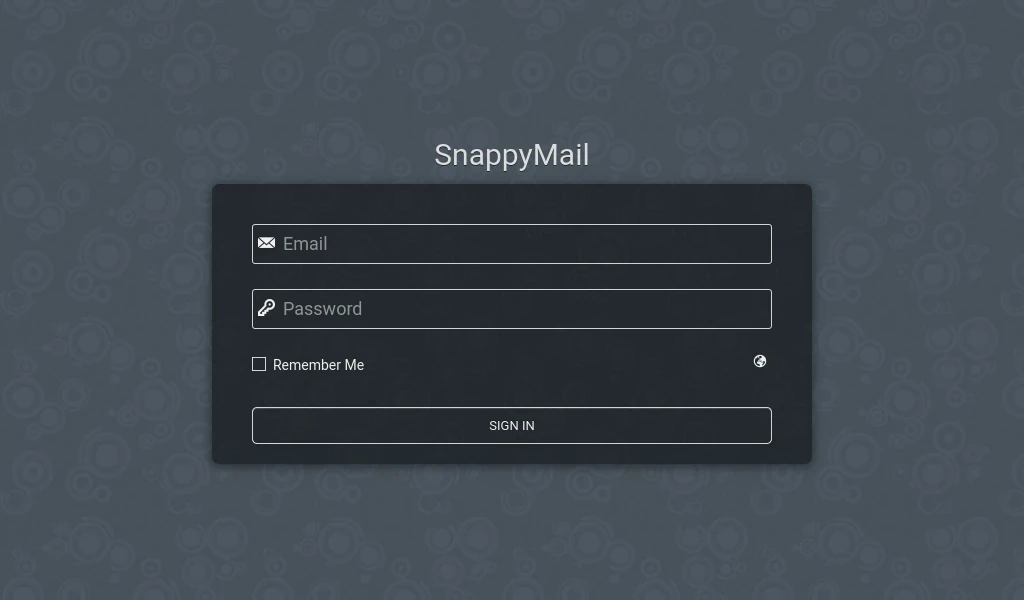
The IP of the virtual machine I’m using in this tutorial, for example, is 172.16.30.76. To access the login screen for SnappyMail, I’ll enter the following into a browser.
http://172.16.30.76:8888/If you remember, 8888 is one of the two ports we specified that SnappyMail uses in our config file. Do the same in your browser but be sure to substitute in your own appropriate IP address. If everything is working properly, you should see a login screen like the one below.
Even though we’ve got a login screen and in theory we could login to our email at this point, unless you want to allow anyone in the world to be able to use your self hosted SnappyMail deployment you’ll need to adjust some settings. The next thing to do is to access the SnappyMail admin interface and configure the domains that SnappyMail will allow you to login to.
Admin Panel
To access the admin panel, we need to append ?admin to the end of the URL in the browser. For my example, this URL looks like this.
http://172.16.30.76:8888/?adminWhen the page loads now, the interface should look like this.
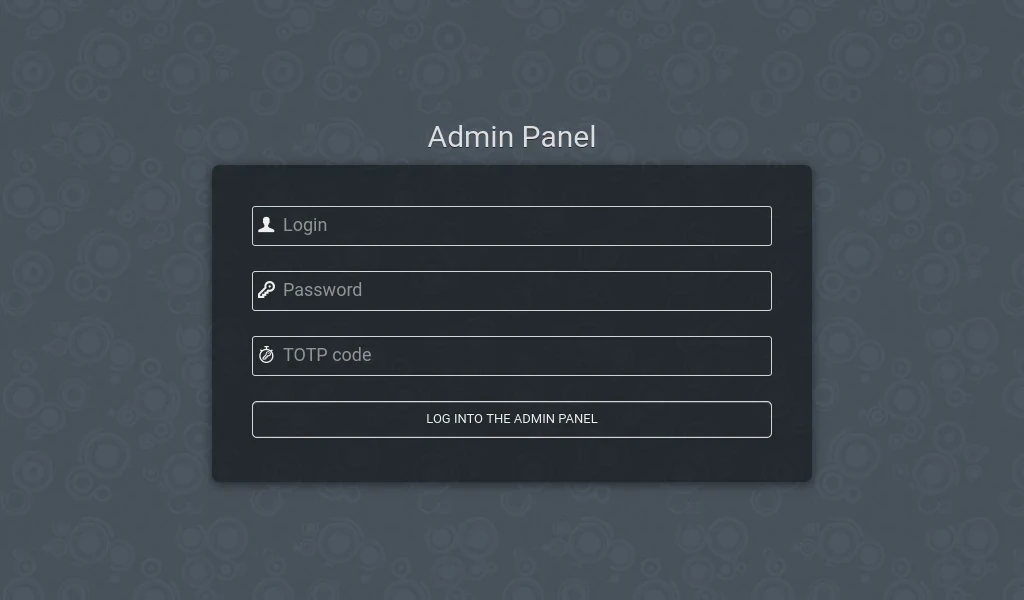
The default admin username is admin. We don’t yet know the admin password, so I’ll show you how to find it.
Remember in our container configuration that we mapped the /docker/snappymail/data folder to /snappymail/data inside the container? All of the important configuration files for SnappyMail will be accessible from outside of the container through that directory. Knowing, we can locate the file that holds the random admin_password. I’ve saved you the work of having to do this. Instead, you can run this command to display the contents of the file.
sudo cat ~/docker/snappymail/data/_data_/_default_/admin_password.txtThe output should look something like this.
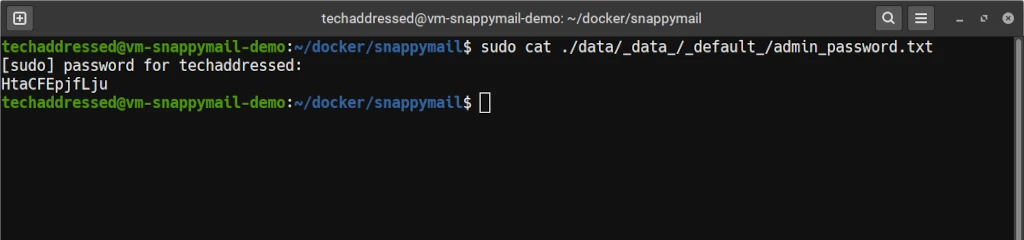
Using the default credentials, you should now be able to get logged into the admin panel. If you’re successful you’ll be greeted with a screen like the screenshot below.
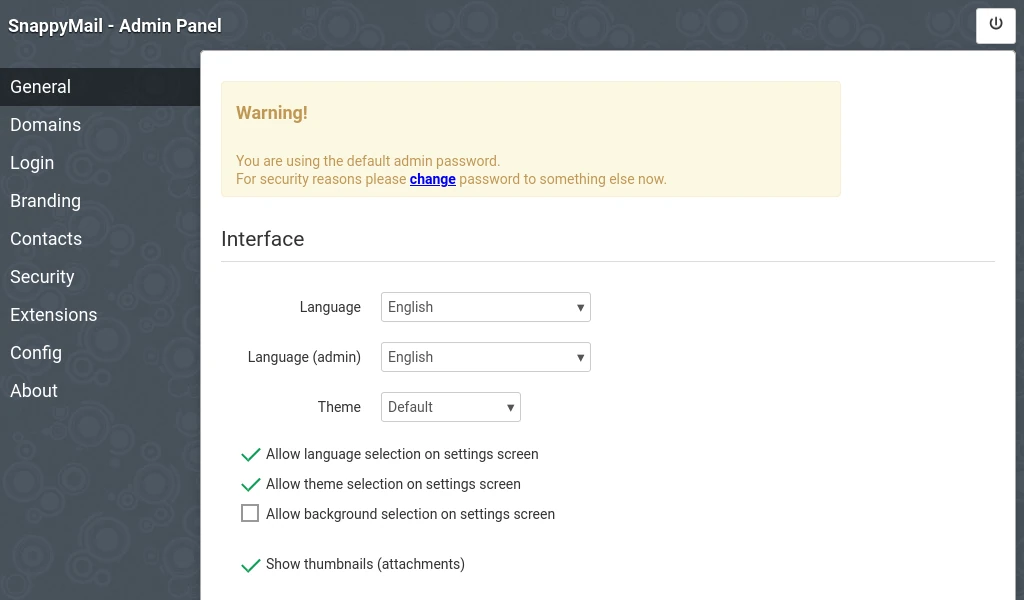
Notice the warning message that you’re using the default admin password. Before you do anything else, click where it says Security on the left.
Change Admin Username & Password
After clicking on the Security menu item, you’ll see an interface like the screenshot below. From here, we can modify a few important settings. At a minimum we want to change the administrative username to something other than admin as well as pick a new password for the account.

While it’s not absolutely required for you to change the admin account’s username, it’s a good practice to do so in order make it more difficult for someone to try to hack into the software because they already know the default username. Set the username and password to whatever you’d like – and be sure to use a strong password – but be sure that you’ll remember what you made them – or – a better idea is to store the credentials in a password manager. If you don’t have a password manager already, I have a tutorial on how to setup Vaultwarden using Docker Compose and highly recommend it.
Once you’ve changed the username / password, if you click on General on the left to go back to the main page of the admin panel, you’ll notice the warning message is gone.
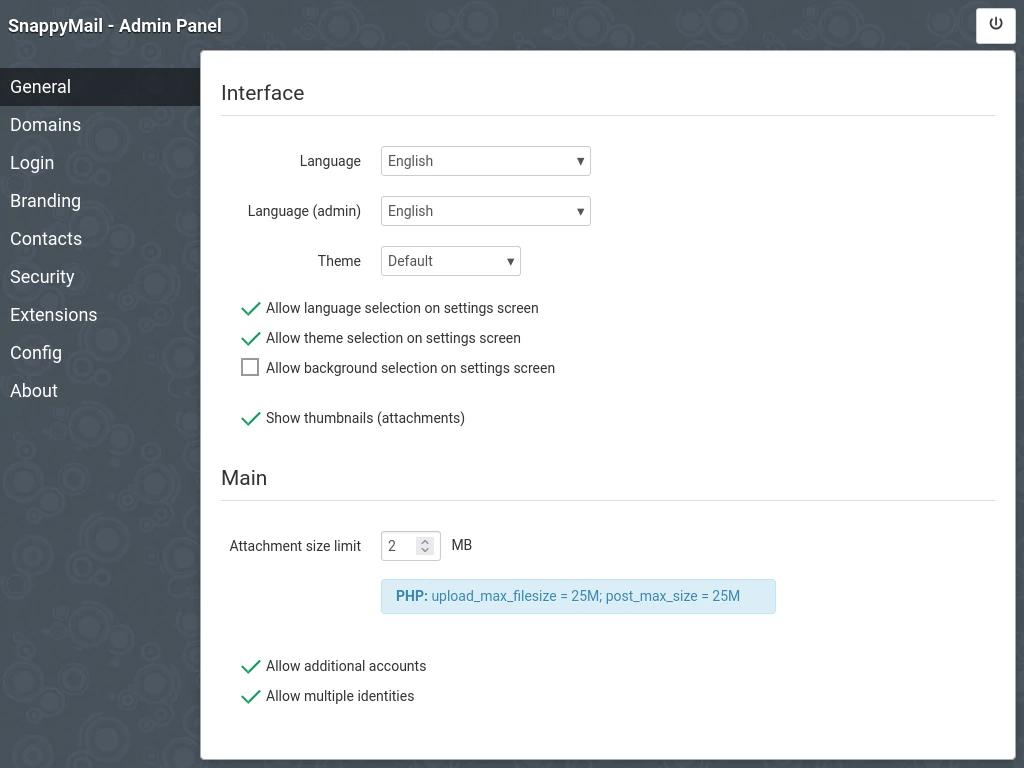
While we’re here, notice that SnappyMail makes it easy to adjust the maximum size limit of file attachments. The default size limit is 2MB. You can adjust this how you like up to a maximum of 25MB. Keep in mind, however, that regardless of what you set your file size limit to, not every recipient can necessarily receive larger file attachments.
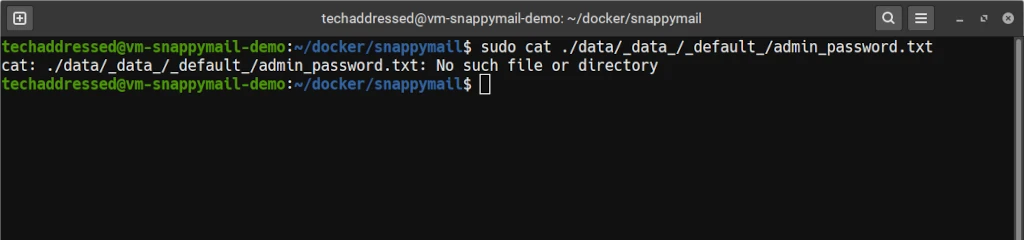
If you go back now, after having changed the admin credentials, and try to echo the admin_password.txt file, you’ll find that the file no longer exists.
Configuring Domains
The next thing we need to configure inn the admin panel are the domains that SnappyMail will allow to login to accounts. Click on Domains on the left to get started.
You’ll notice in the screenshot, below, that there are a few entries already listed under domains. The first is the local container itself. The second is a wildcard that allows you to attempt to login to any valid email account, though this only works if SnappyMail is able to discern the valid mail server settings for the domain on its own. We DO NOT want to let just anyone in the world use our system.
Notice to the right of the domain listings are trash can icons. Click the icon for both of the domain listings and verify that you wish to delete them.

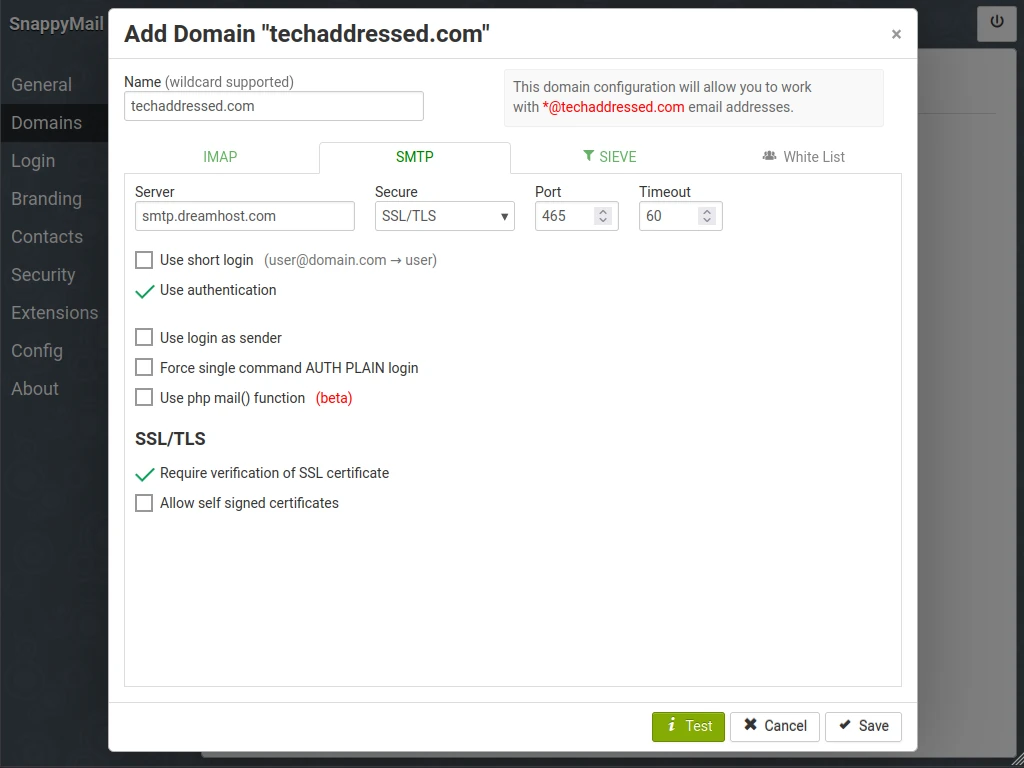
Once this is complete, click on the Add Domain button which will bring up an interface like this one. You’ll notice that there are a number of tabs on this interface – particularly we’re going to worry about the IMAP and SMTP tabs.
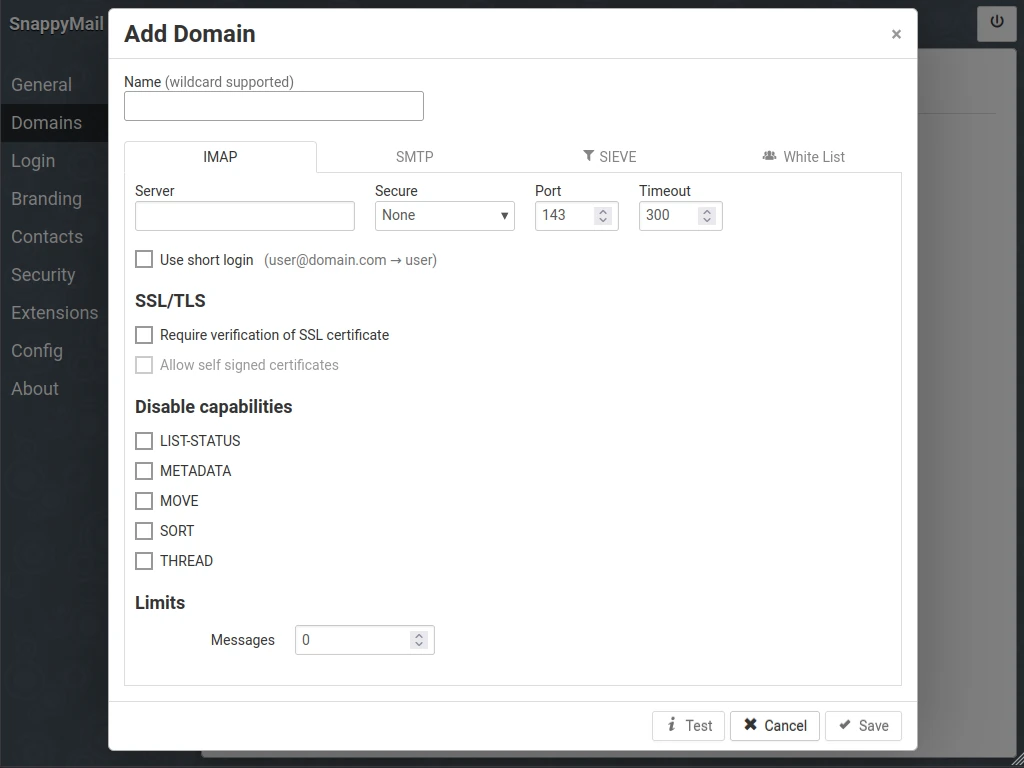
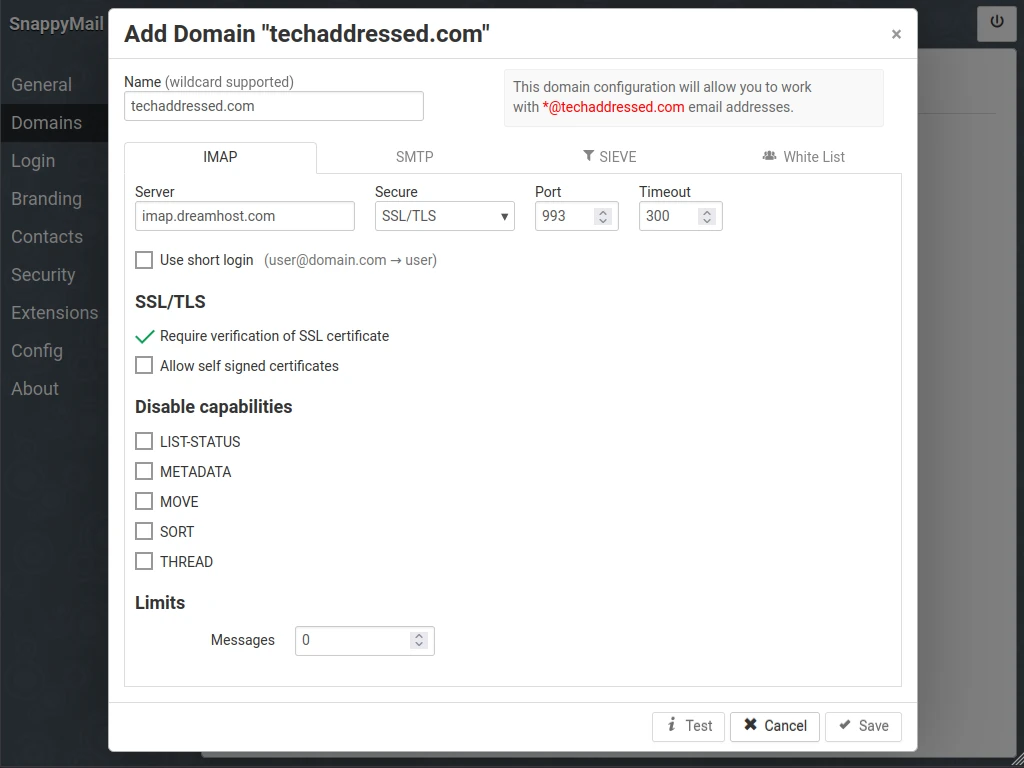
I’ve created example screenshots for both tabs to help you. Starting on the IMAP tab, enter the domain domain associated with the email account(s) you want to allow access to into the Name field. Next, enter your mail host’s IMAP server information into the provided fields – Server, Secure, Port – and then check the “Require verification of SSL certificate” box. Once those are done, click over to the SMTP tab.
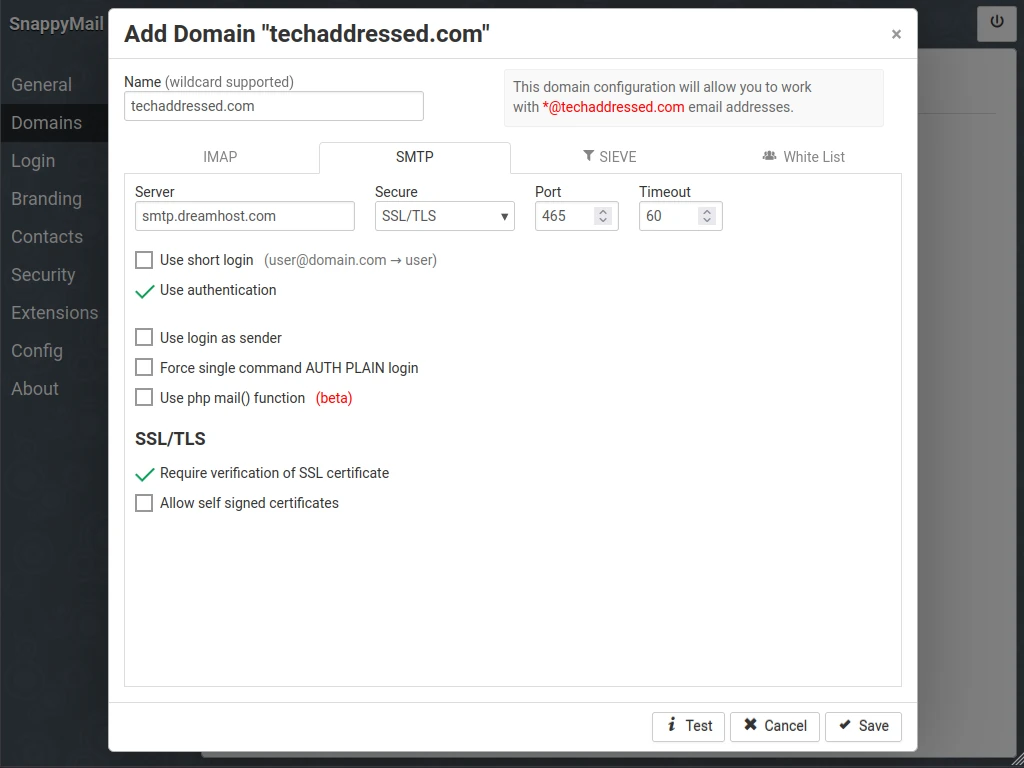
We’re going to repeat the same as we did on the previous tab and enter the SMTP information into the fields – Server, Secure, Port – and check the “Require verification of SSL certificate” box.
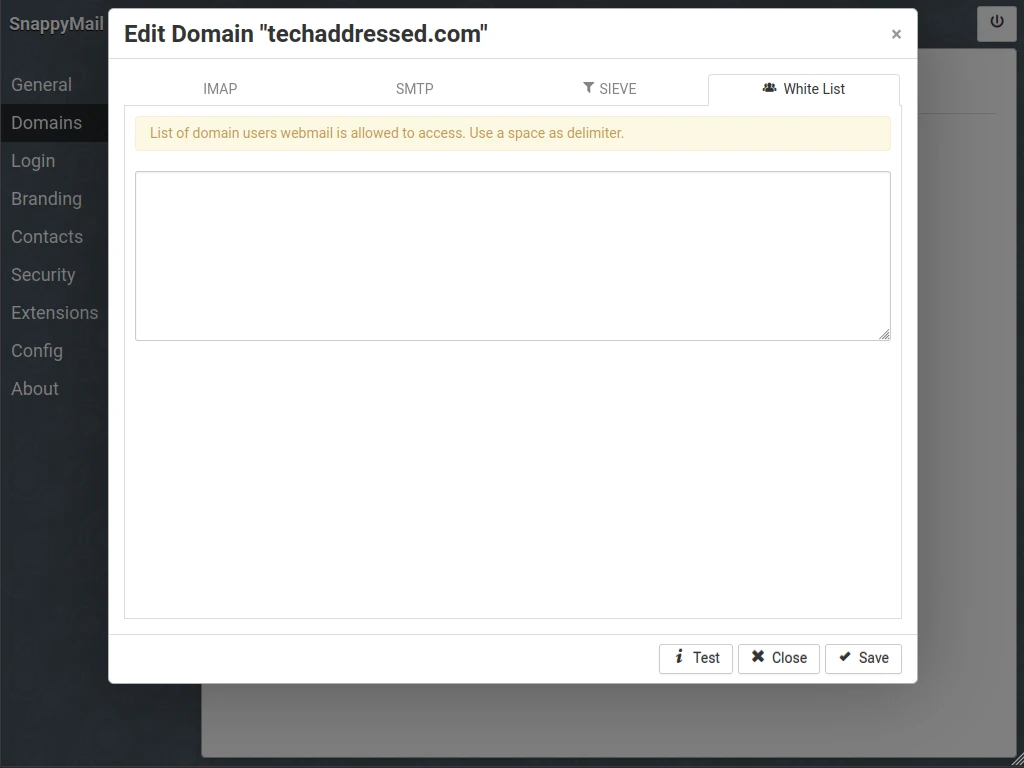
This step is optional. If you only want specific email addresses from your domain to be able to use SnappyMail, you can add those addresses on the White List tab, as seen below. By default, if this list is empty, any email address for your configured domain will be allowed to login through SnappyMail.
Before we save the settings, we want to check that everything is configured properly. Click on the Test button in the bottom right. You’ll be asked to enter the login credentials of a valid email account on your domain. Enter the username and password then click the Test button.
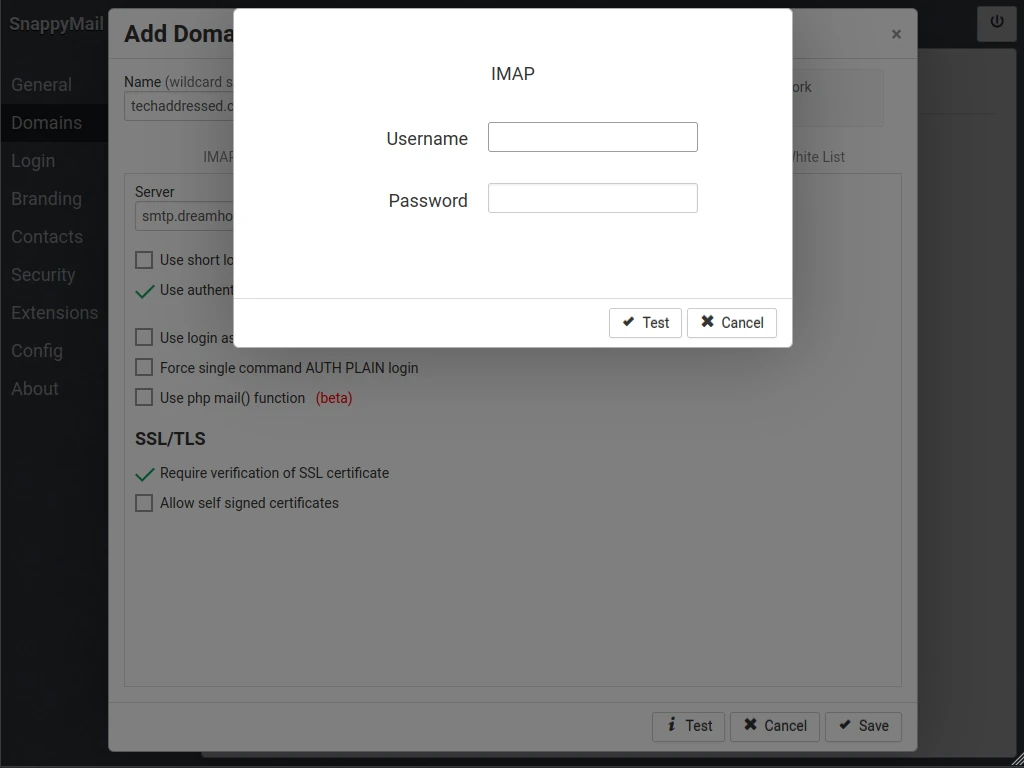
If your server settings were entered correctly, you’ll notice that the tab labels and Test button have turned green. If any of these are red instead of green, you’ll need to go back and adjust the settings then test them again until everything is correct.
Once you’ve passed the tests, click the Save button to save your domain settings.
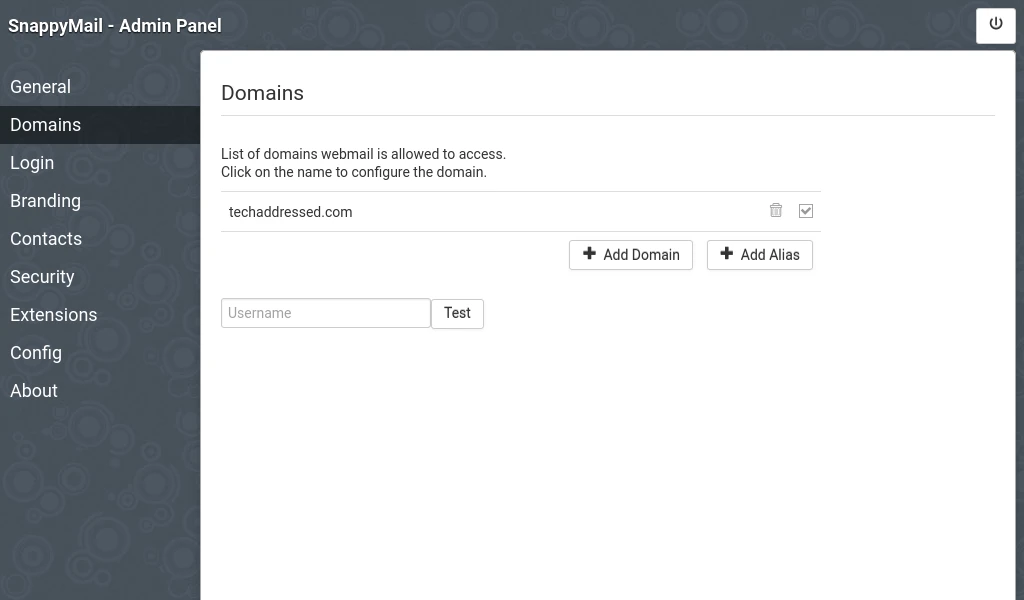
You’ll be taken back to the main domain screen where you’ll see your domain listed. At this point, you’re able to exit out of the admin panel and login to your email account(s) on the main login screen. With that said, however, I do recommend you setup one additional feature in the admin panel – two factor authentication.
Recommended: Two Factor Authentication
More security is typically a good idea. While there’s an argument that can be made that someone who figures out your email address and password can just login to a mail server directly, I’m of the opinion that it’s better to have two factor authentication, anyway, to prevent someone from using your SnappyMail deployment to attempt to brute force any account credentials.
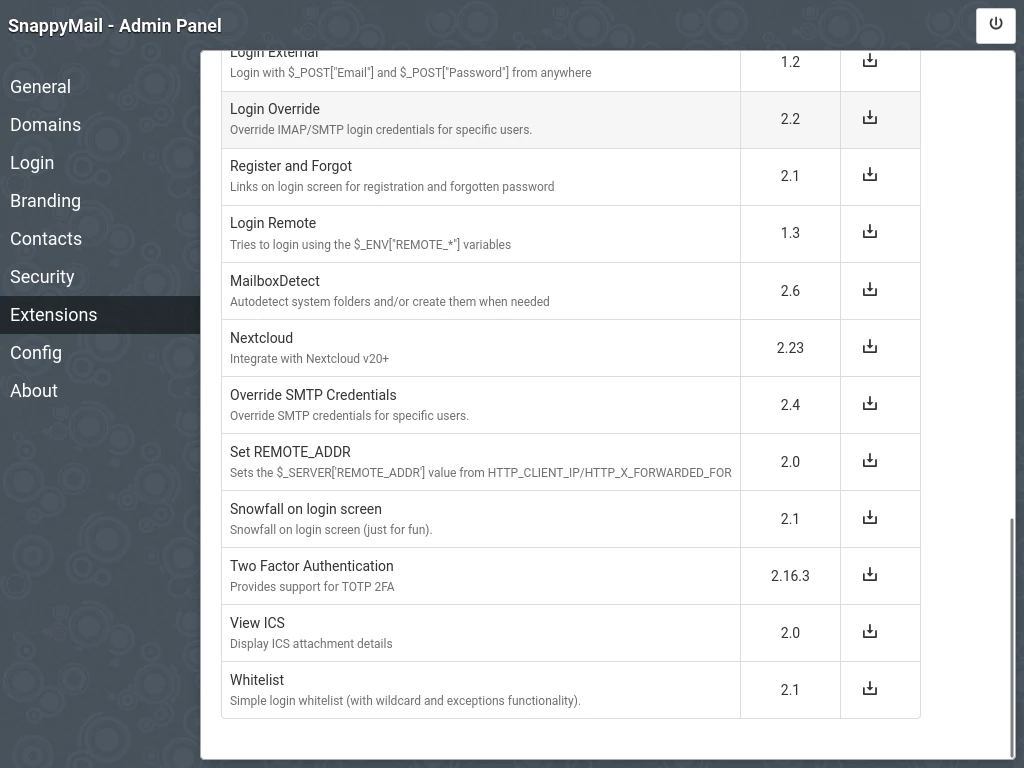
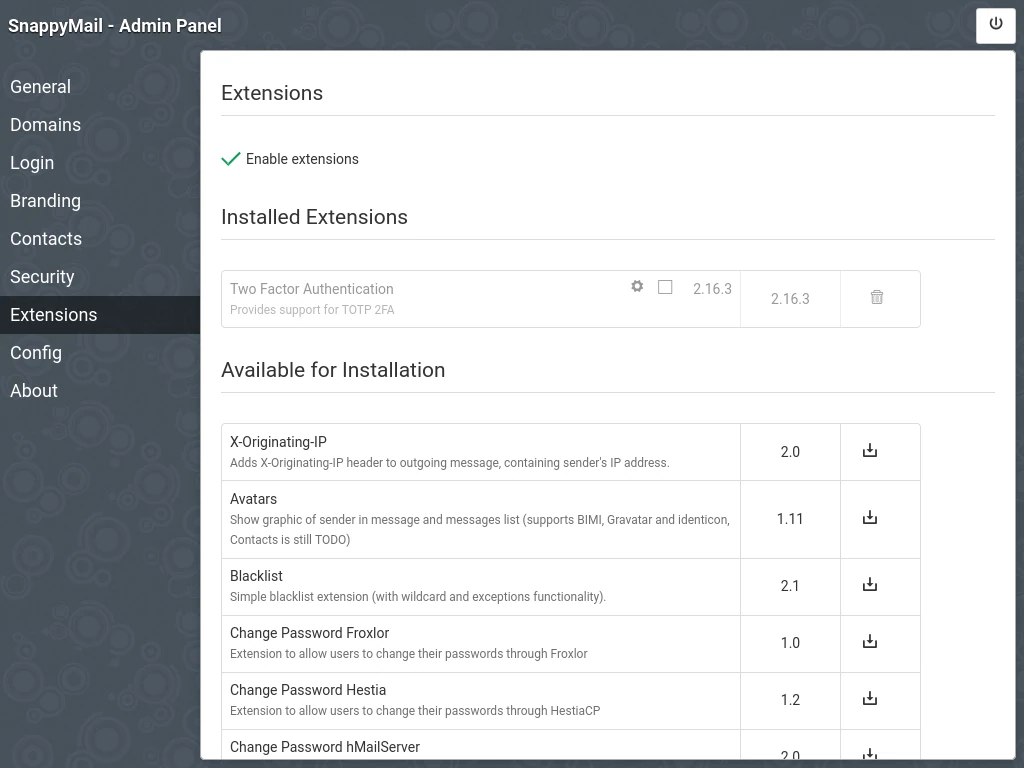
To configure two factor authentication, we’ll need to make use of an extension. Click on Extensions on the left. When the extensions interface loads, you’ll notice a check box at the top labeled “Enable extensions“. Check this box.

Scroll down to the bottom of the extension list. Close to the end you’ll see where it says Two Factor Authentication. Click the download button in the right column to install this extension.
If you scroll back to the top of the page, you’ll see the Two Factor Authentication extension is indeed installed, but by default it’s disabled. Click the small check box to enable the extension.
If you wish to force users to use two factor authentication, click the small gear icon next to the check box. The box that appears will allow you to check to Enforce 2-Step Verification
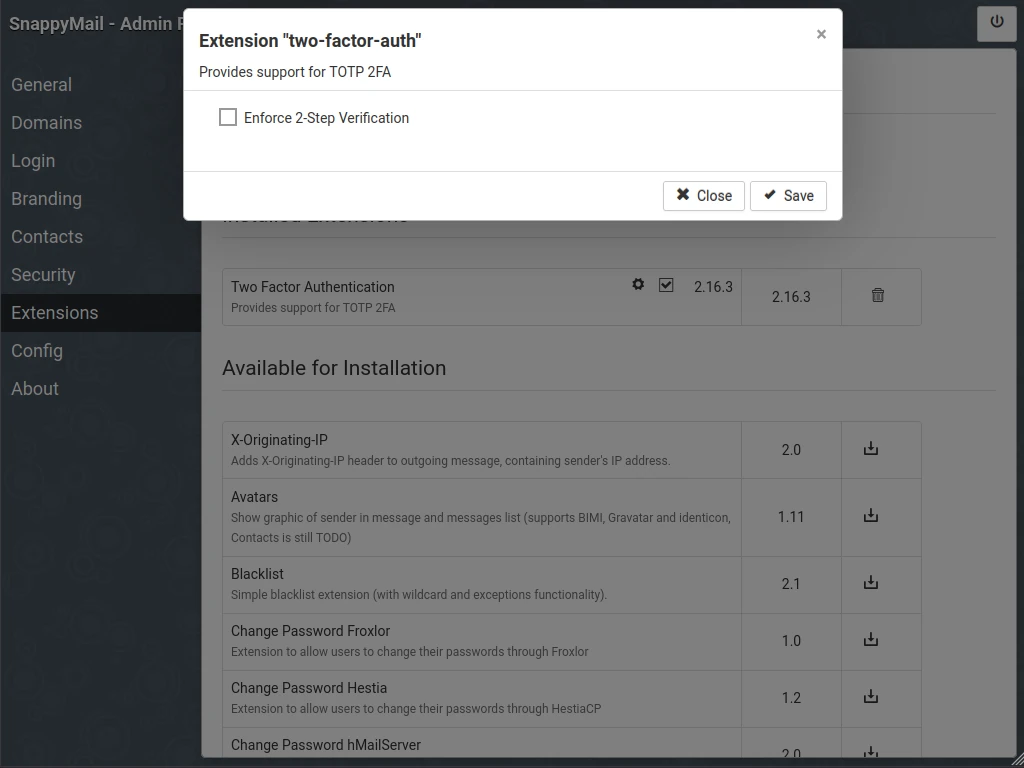
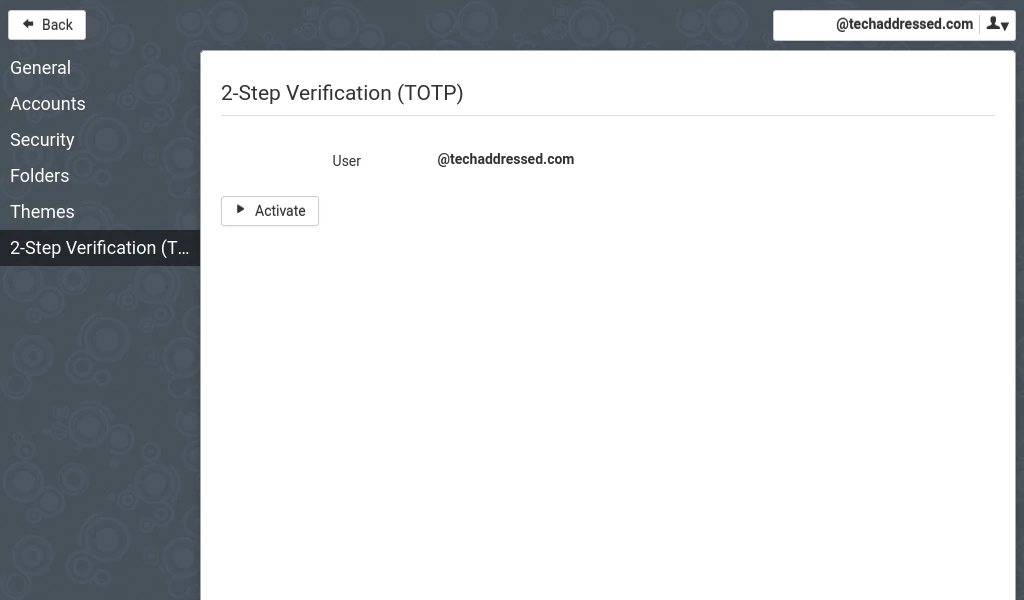
When two factor authentication is enforced, users will see be prompted to activate it if they haven’t already when they next login.
Additional Settings
In this tutorial, we’ve covered the most important settings that you’ll need to get SnappyMail deployed, configured, and secured. There are a number of additional settings and extensions inside the admin panel that you can explore on your own to customize the system to your liking.
A few of the settings and extensions I’d encourage you to check out include:
- Contacts
- Avatars
- Branding
- Themes
To include all of these topics would make this tutorial close to twice the length it already is. If you want to experiment with any of these, you could consider creating a second container for testing and then apply the changes that you find you actually want to your main instance.
Closing
Congratulations on successfully deploying Snappymail using Docker Compose! You now have a functional self-hosted webmail solution at your fingertips, whether it’s in the cloud or your homelab. Throughout this tutorial, you’ve not only gained the knowledge to deploy your own webmail client but also learned how to manage it effectively.
If you found this tutorial helpful and would like to support our efforts in creating additional resources like this, please consider making a donation. Your support is greatly appreciated!
If you can’t make a donation, kindly consider sharing this tutorial with others who may benefit from it. If you have any questions or require further clarification on any aspect of this tutorial, please feel free to leave your inquiries in the comments below. Thank you for visiting, and we look forward to you returning again soon!