Have you ever wished you could search Google and get results without ads, cookies, and IP address tracking? Today is your lucky day! This tutorial teaches you how to setup your own Whoogle search using Docker. If you’ve never setup anything with Docker before or self hosted anything, this is a great first project for you to try.
Before We Begin
This tutorial is written to be on the friendly side for the benefit of those who might be new to Linux and/or Docker. Admittedly, the general public doesn’t worry much about how private their web searches are – nor do they generally consider self hosting anything – but I would like to keep things accessible for those who might.
This tutorial was created using a Debian 11 cloud server at Linode. These instructions should, however, work regardless of server or operating system choice so long as it is setup to run Docker containers.
I should be clear that you do not need to deploy this in the cloud – though if you’d like to try this out on a cloud server you can get $50 free credit for 60 days at Linode (affiliate) or $100 free credit for 60 days at DigitalOcean (affiliate) using my referral links. Using a cloud server is a great solution for learning / trying things out. With that said, though, any system – be it a virtual machine, your personal desktop, a raspberry pi, or whatever – can be used to run Whoogle.
Keep in mind, without using something like a VPN – if you host Whoogle on your home network Google will still be able to track searches back to your IP address.
We’ll need to be sure the necessary packages are installed on the server. First make sure it’s fully updated:
sudo apt update && sudo apt upgrade -yNext let’s make sure the software we need is installed.
sudo apt install docker.io ufwYou’ll also likely want to add your user account to the docker group or you’ll need to use sudo to run of your docker commands. Replace username with whatever your account is.
sudo usermod -aG docker usernameLast, you want to make sure we’ve setup a firewall – ufw -on your server. If you’re connected to the server via SSH, the default port is 22. Unless you’ve changed it (and if you did you probably already know what you’re doing) you’ll want to make sure you allow this port so you’ll be able to connect back to the server in the future.
sudo ufw allow 22/tcpThen you want to enable the firewall.
sudo ufw enableContinue with the tutorial once you have a suitable system ready.
Default Setup
You can setup a default Whoogle container with the following command:
docker run --restart=always --publish 5000:5000 --detach --name whoogle-search \
   benbusby/whoogle-search:latest
This will start your new container with it listening on port 5000. Make a note of your system’s IP address as you’ll need it later to access Whoogle. You can obtain the system’s IP addresses with:
ip aAdditionally, if this is your first time using Docker, you can check that your new docker container is running with this command.
docker psIf you want or need to delete your container, get the container ID using the previous command and run:
docker rm ############ --forcewhere ############ is the docker container id.
As software updates are released, simply delete your existing container and re-run the command you use for creating your container. The new container will have the latest updates.
The last thing to do before you can access Whoogle is to open port 5000 in your firewall.
sudo ufw allow 5000/tcpBrowsing To Your Whoogle Instance
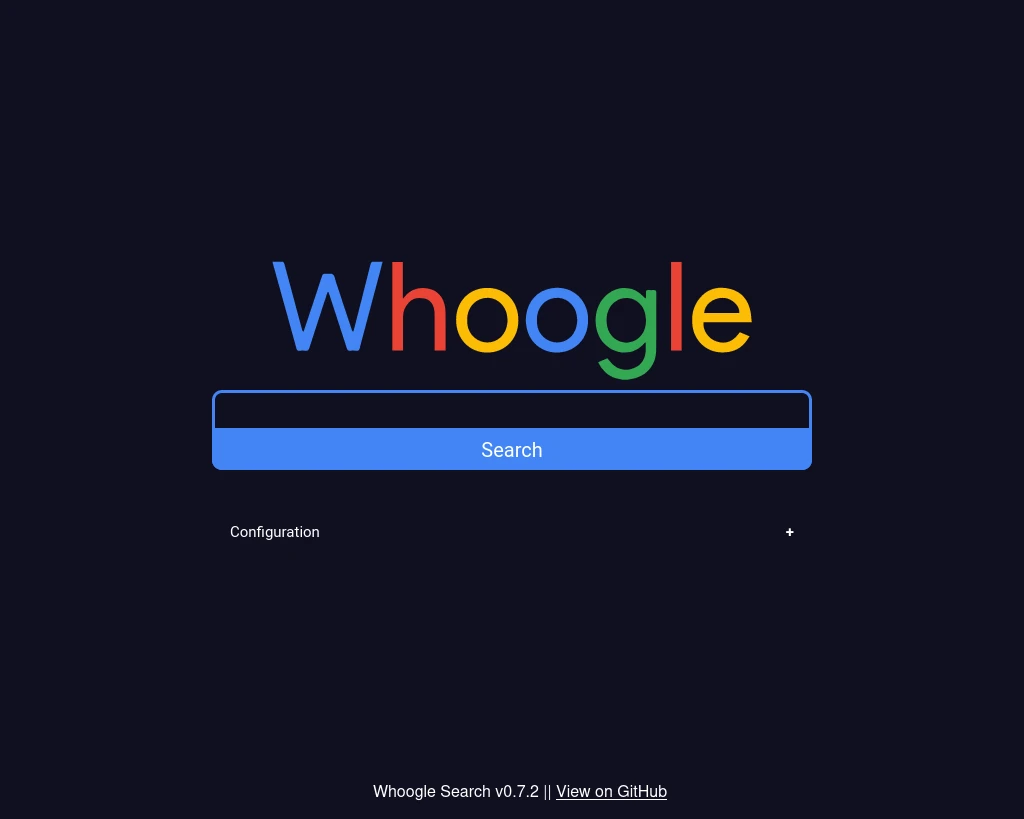
With your new container running and the firewall port open, you should be able to view it in a browser using the server ip.
http://###.###.###.###:5000/Replace the ### with your server IP. The command we used to create our container setup a bare default instance. It should look like this:
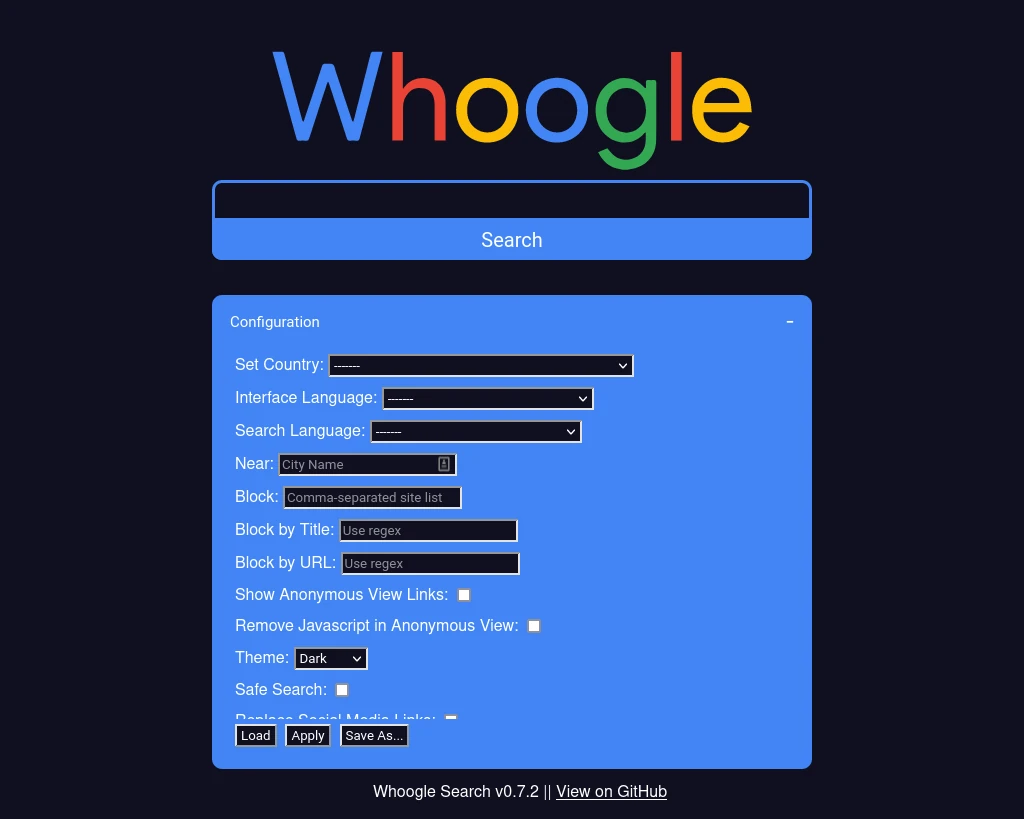
Configuration Settings
Notice that your default Whoogle container has a Configuration drop-down. From here you can change things like your country, language, theme, and more. This gives you a chance to easily change settings.
Another way to make configuration changes is by setting environment variables when you create the container. For example:
docker run --restart=always --publish 5000:5000 --detach --name whoogle-search \
   -e WHOOGLE_CONFIG_THEME=light \
   -e WHOOGLE_CONFIG_DISABLE=1 \
   -e WHOOGLE_CONFIG_SAFE=1 \
   benbusby/whoogle-search:latest
In this example, I’ve set the theme to light instead of the default of dark, I’ve disabled the configuration drop-down, and I’ve enabled safe search. You can get the full list of environment variables from the project’s GitHub page.
If You’re Deploying In The Cloud
If you’re planning to use Whoogle in the cloud or exposed to the open internet there are a few configuration changes that I highly recommend you make.
docker run --restart=always --publish 5000:5000 --detach --name whoogle-search \
   -e WHOOGLE_USER=whoogle \
   -e WHOOGLE_PASS=cl3vERp@ssw0rd \
   -e WHOOGLE_CONFIG_THEME=dark \
   -e WHOOGLE_CONFIG_DISABLE=1 \
   benbusby/whoogle-search:latest
Here I’ve specified a username and password for basic http authentication for basic protection against the general public using your Whoogle container – unless you intend on making your instance available to the general public.
Advanced: Using SSL + Domain Name Via A Proxy
If you’re ready to step up to something more advance – if you’re going to use Whoogle in the cloud, I suggest using a SSL certificate and domain with Whoogle. Here’s another setting:
docker run --restart=always --publish 5000:5000 --detach --name whoogle-search \
   -e WHOOGLE_USER=whoogle \
   -e WHOOGLE_PASS=cl3vERp@ssw0rd \
   -e WHOOGLE_CONFIG_THEME=dark \
   -e WHOOGLE_CONFIG_DISABLE=1 \
   -e WHOOGLE_CONFIG_URL=https://your.domain-goes-here.com/ \
   benbusby/whoogle-search:latest
Here I’ve told Whoogle what domain to respond to. If you’re going to go as far as to use a domain for your instance, I would highly recommend you configure a proxy server to enable a SSL certificate.
If you’ve never setup a reverse proxy server before, I’ve created a tutorial – How To Setup A Basic Nginx Reverse Proxy – that shows you everything you need to get one up and running.
Conclusion
If this was your first experience with self hosting apps or working with Docker and you’ve managed to get Whoogle working allow me to congratulate you! You’ve taken your first steps into a field that can be not only a great hobby but that can also help steer you toward a potential career.
If you found this tutorial helpful or have any questions, I encourage you to please share it with others and/or leave a comment below. If you would like to support our efforts to create additional resources like this, please consider making a donation. Your support is greatly appreciated! Thanks for reading and I hope you visit again soon!

How do you update Whoogle on docker?
If you’re just using docker run the easiest way is to delete the existing container and create a new container. Because the container image is whoogle-search:latest you’ll always get the latest version.